

How to build LEGO space terrain: part II
Discover how story can help shape a LEGO alien world for the 2024 LEGO City and LEGO Friends space sets with this LEGO Space-inspired build guide.
The LEGO City and LEGO Friends Space sets released in 2024 offer a plethora of interstellar ships, vehicles and stations perfect for exploring extra-terrestrial worlds and in any number of ways. The only problem is that beyond a small side build here and there none of the sets have really offered much in the way of an alien planet to explore.
That’s where the LEGO Group’s invitation to take part in a Pick a Brick-inspired build project got us inspired to try our hand at building exactly that – out-of-this-world terrain for our astronauts and their mechs, rovers and ships to roam across.
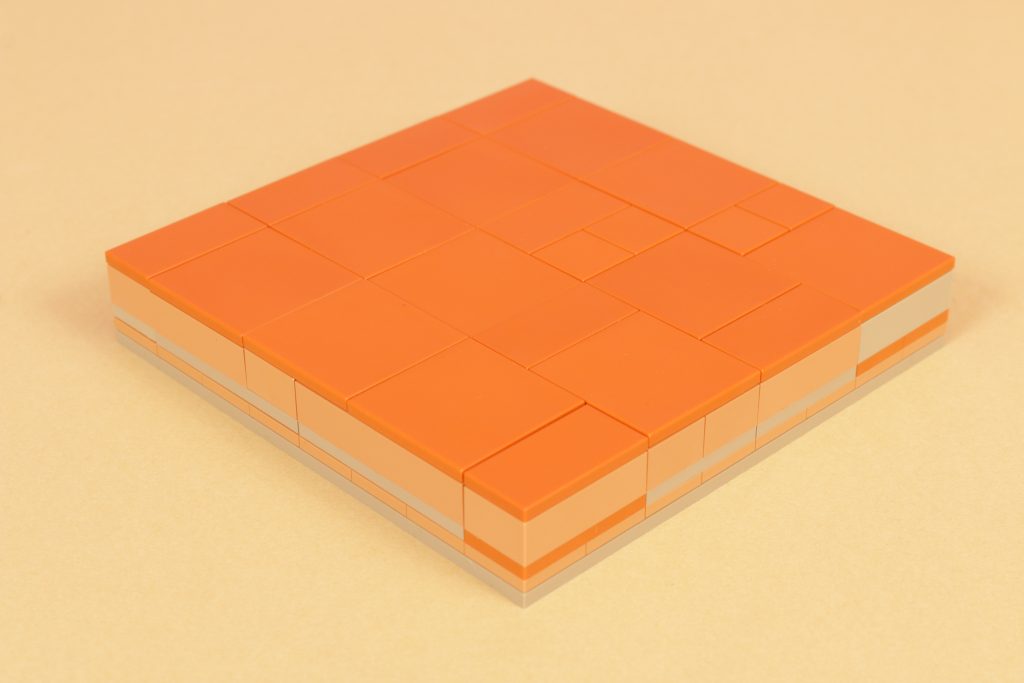
The particular approach we have decided to take involves the understanding and application of a modular base design, consisting of a baseplate covered in 2×2 jumper plates with ‘blocks’ on top. Each block is made up of single layers of plates, bricks and tiles respectively and serves as the default ground level by which we can build up and down from by simply swapping out select blocks with whatever we choose to build.
Part I of this build guide explains the concept in more detail and runs through a first example of how you can build with it, taking its lead from the idea of a couple of astronauts walking diagonally across a well-worn section of land punctuated with rockwork.


This part II of the guide explores the impact that story can have on what you can build and how. What next on this alien planet for our explorers, then?
Part II – Story

Whatever build concepts and techniques you choose to use when building whatever it is that you want to build, understanding story is perhaps the most important stage of an effective creative process. You can have an idea of how to build, but deciding what to build and why you are building it can make all the difference.
Our inspiration for this build project is the 2024 range of LEGO City and LEGO Friends sets, which all follow an overarching simple and fairly open-ended story based around exploration and adventure into the unknown. There are hints towards more specific ideas within individual sets, but across the collection this is the broader picture being painted.
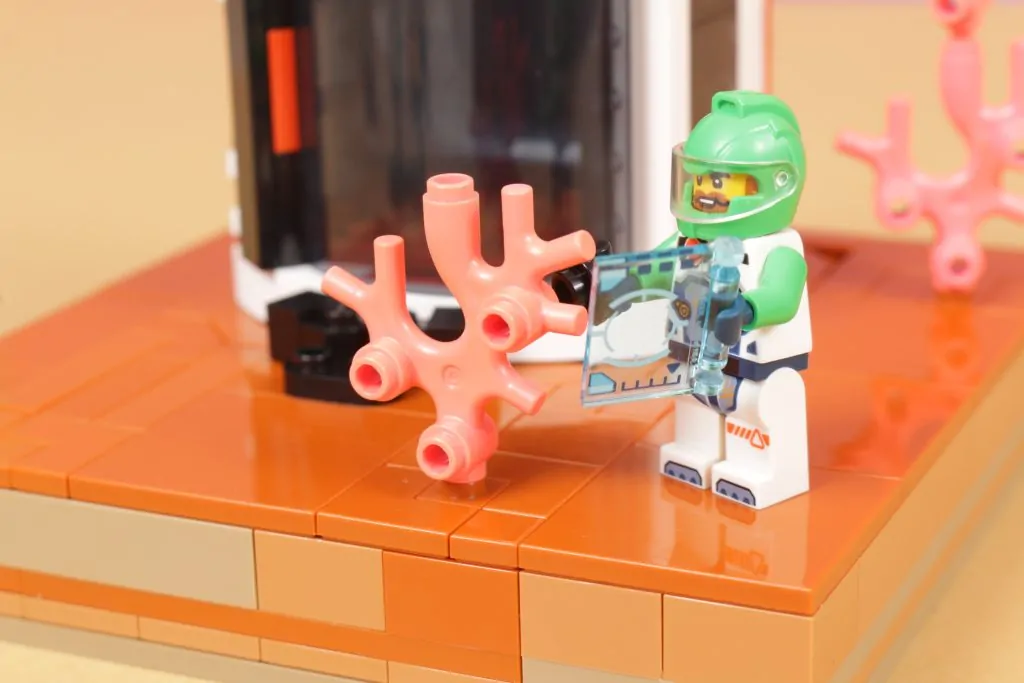
The planet that is depicted in box art and across the handful of small side-builds to the various sets features dark orange, sandy landscape punctuated with dark tan rockwork and exotic-looking, brightly-coloured plant life. Everything is alien, untouched by humans, fascinating and fun.
It’s this read of the world that the Space sets are based in that will direct what we want to build and in what way.


Plant life
While the LEGO City and LEGO Friends Space sets explore any number of different vehicle types and hints towards different story scenarios, one fairly common feature from the alien world they are on is the plant life.
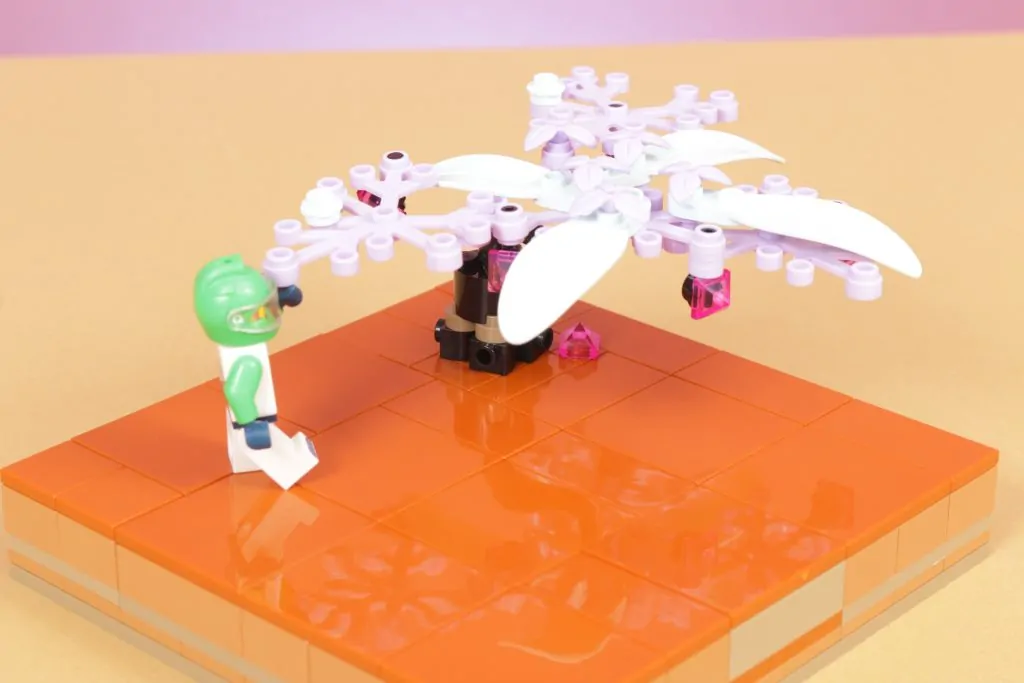
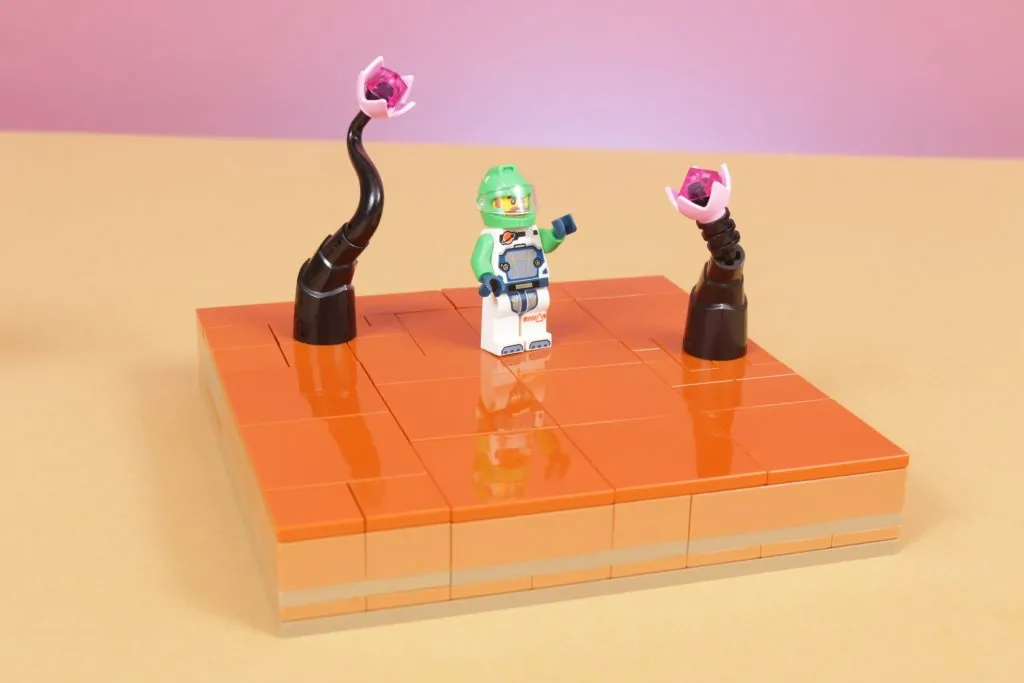
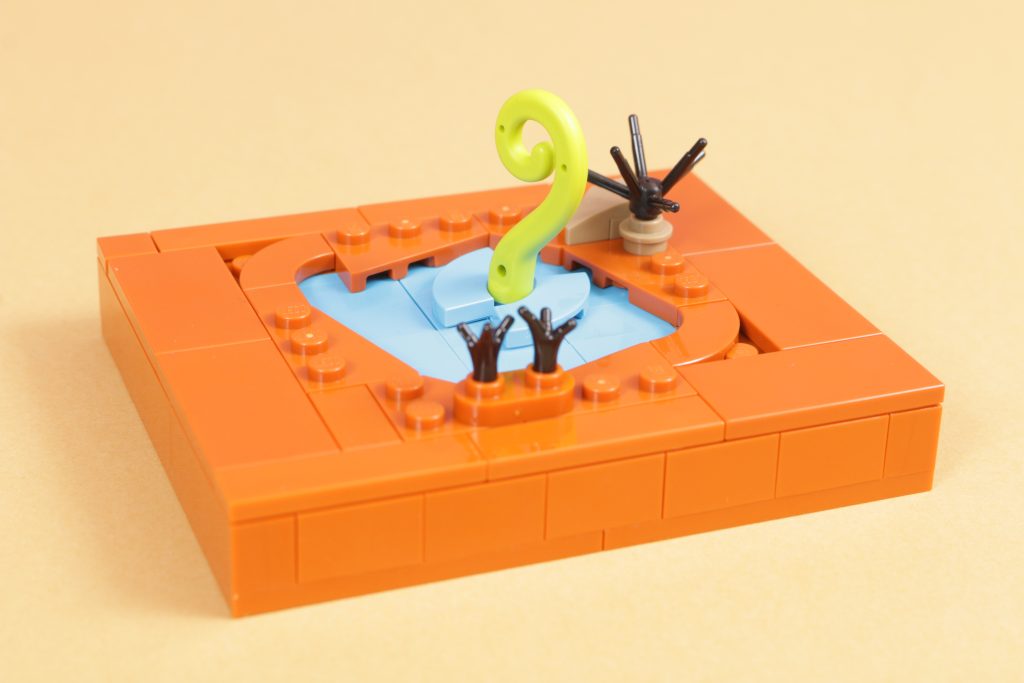
Between the dark orange sand and dark tan rockwork are leaves and bushes of bright pinks, purples and lavenders all stemming from deeply contrasting black roots and trees. As a colour combination it’s as far from what we see on Earth as can be imagined, and creatively is quite fun to play around with a bit more, particularly with the parts selection available on Pick a Brick (PAB), from which all parts featured in this build guide have come, minus models from the LEGO City and LEGO Friends sets themselves.

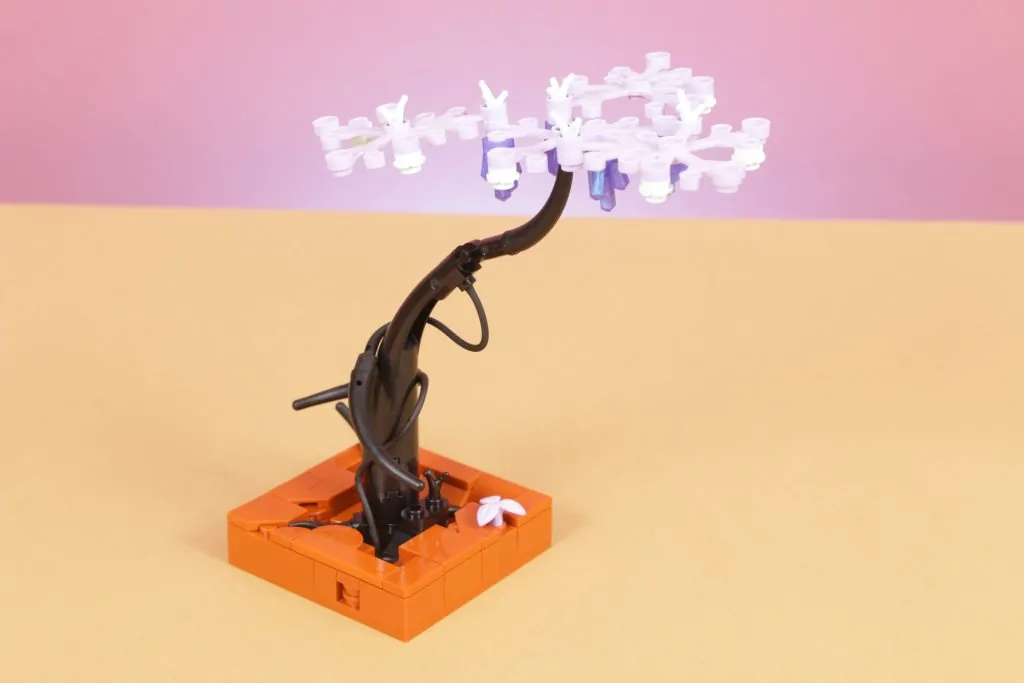

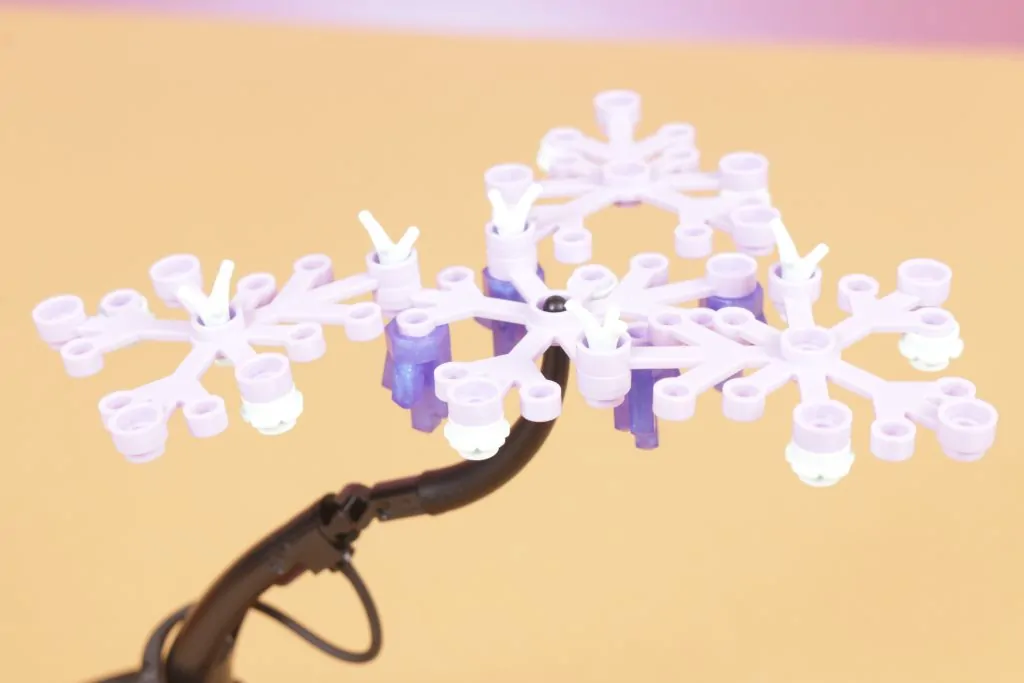
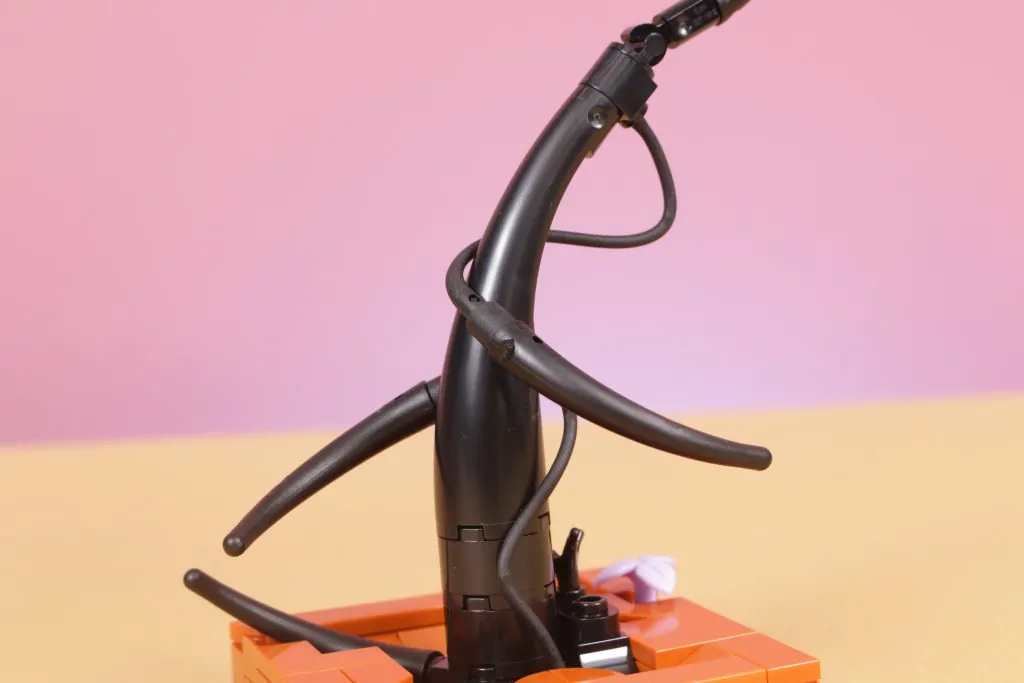

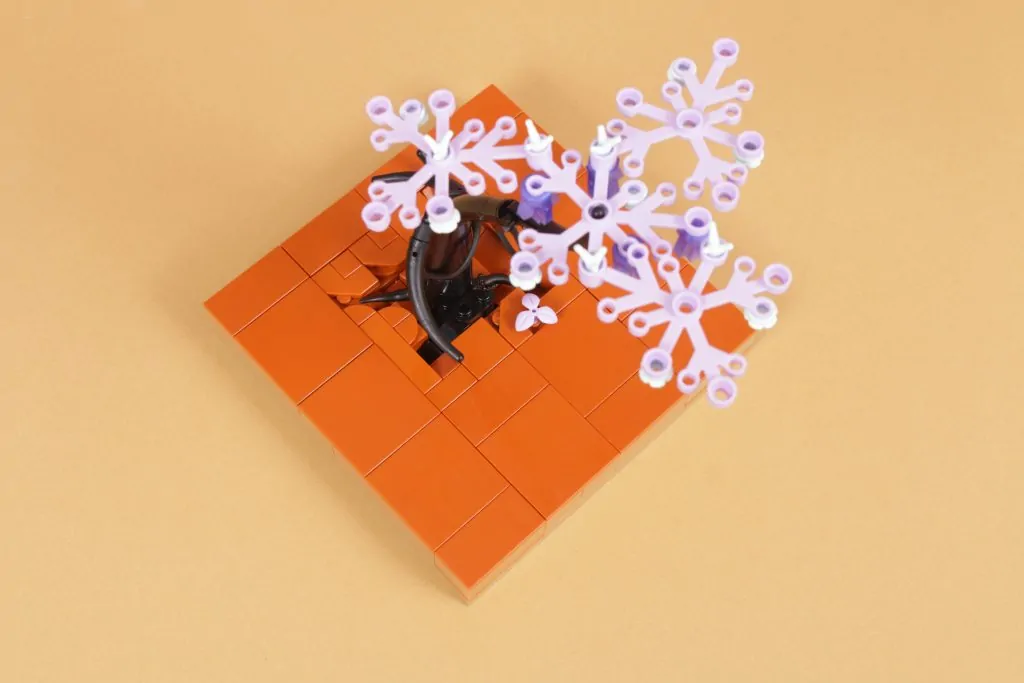
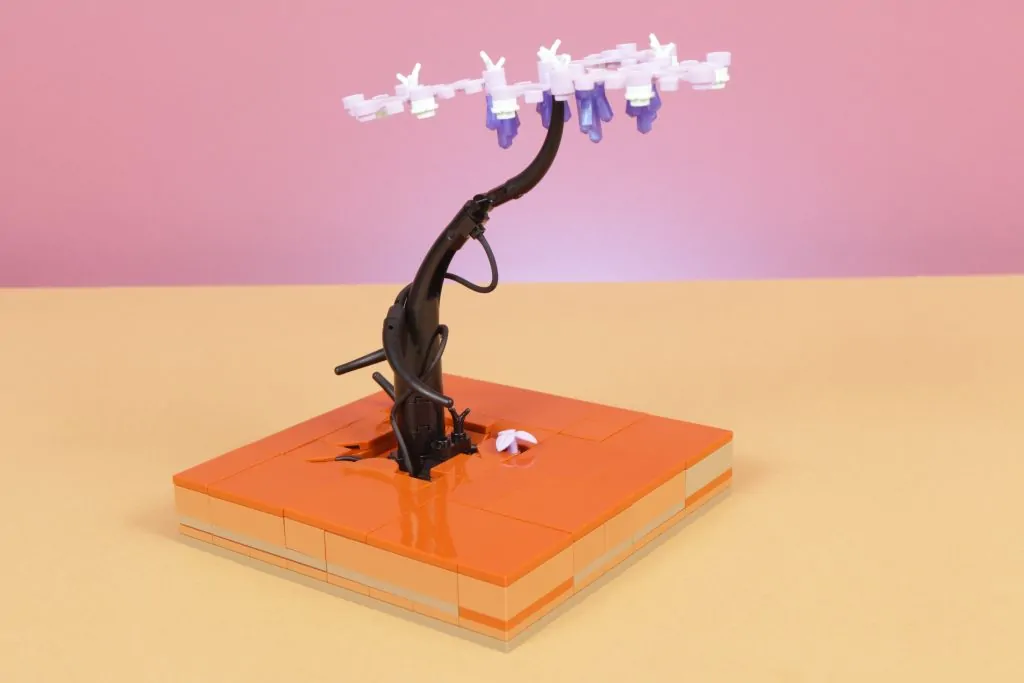
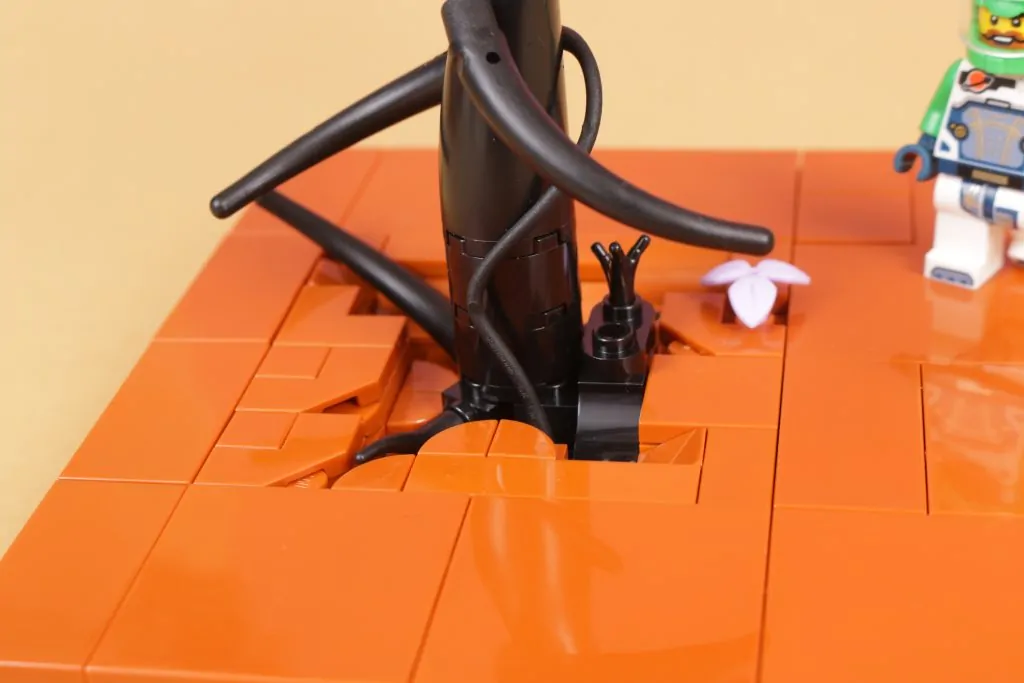
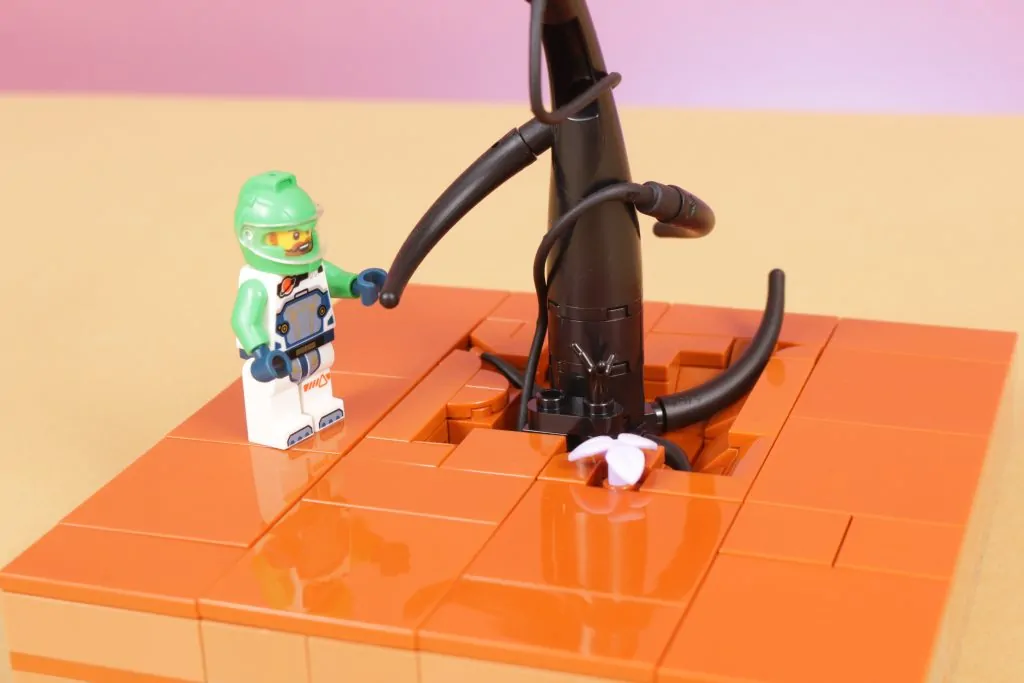
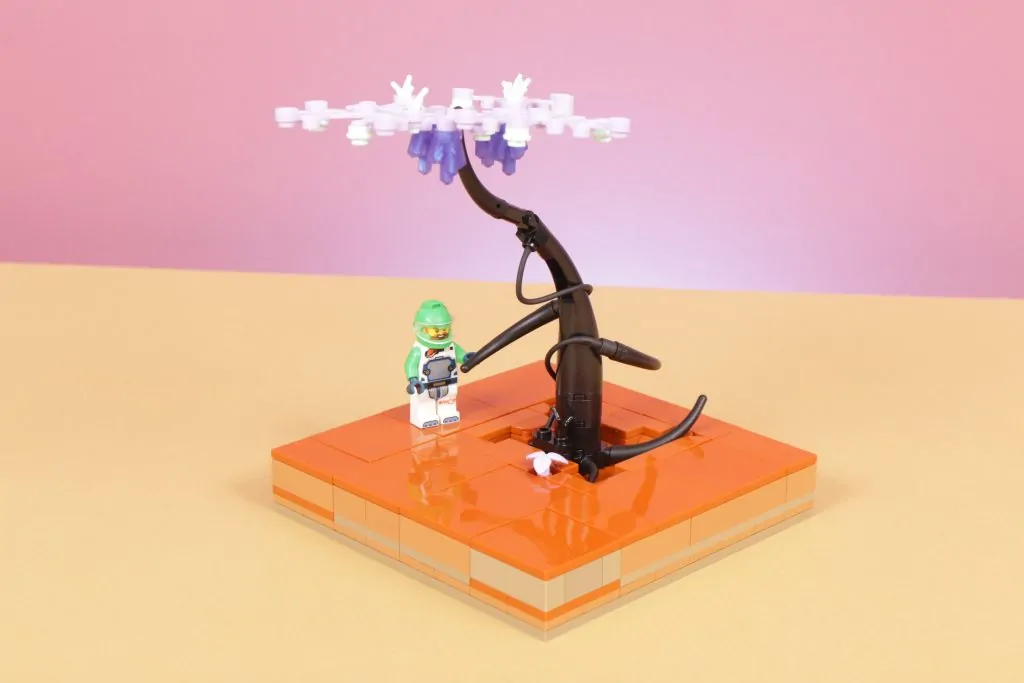
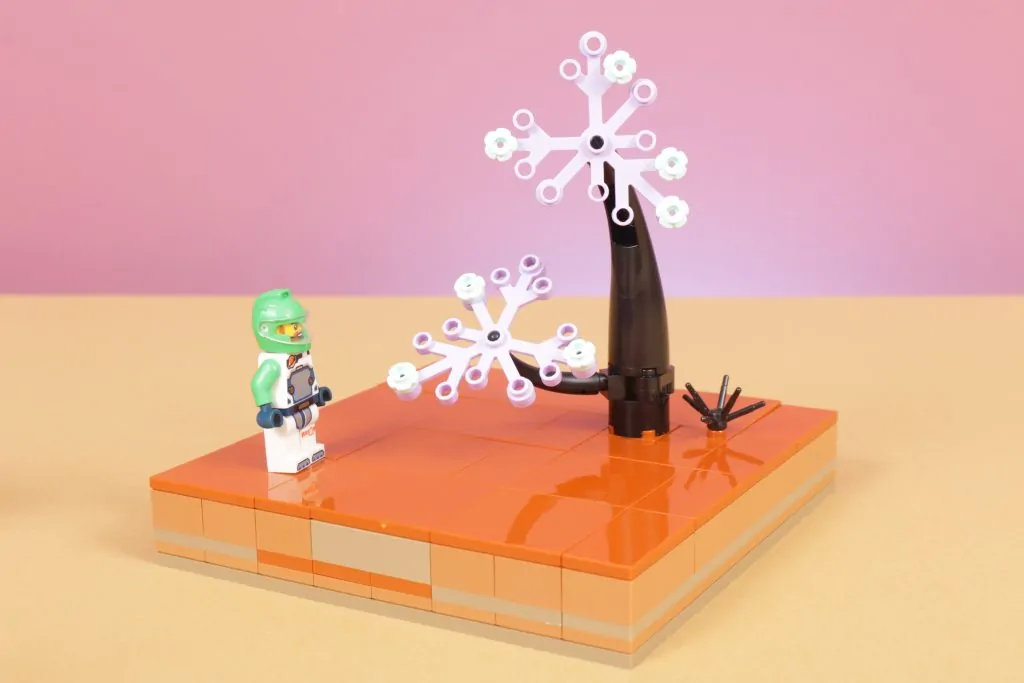
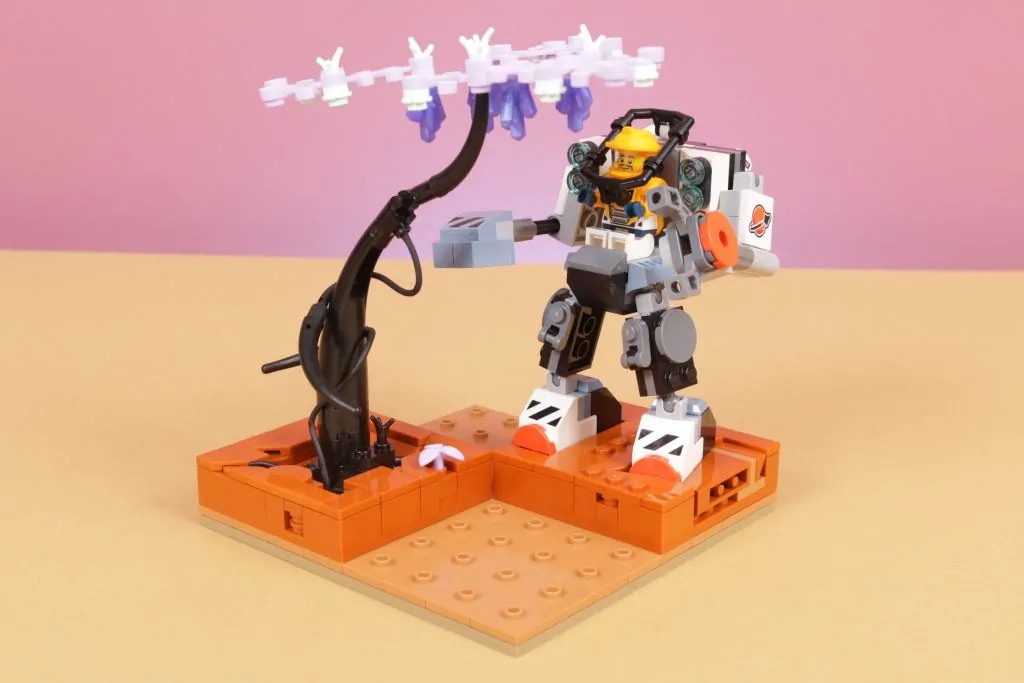
A quick scan across what’s available on PAB can give you all sorts of ideas for which way to take things. For this approach, we selected the most organic-looking black pieces to serve as roots and trunks, so as to contrast not only in colour with the desert landscape, but also offer a different stylistic approach to the flat, angular lines of the sand and rocks.
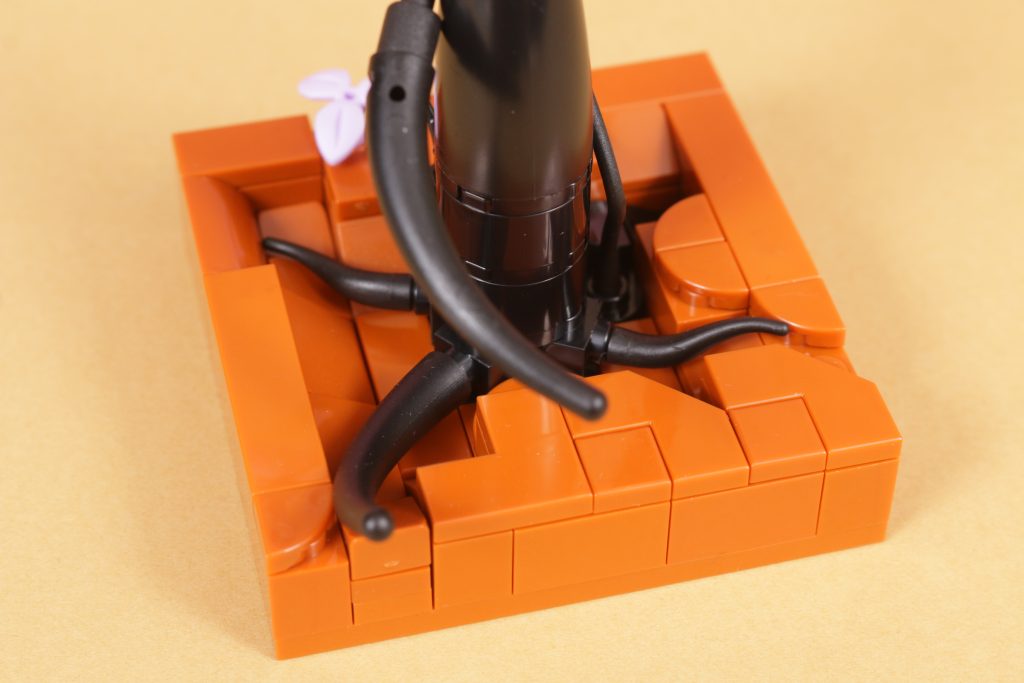
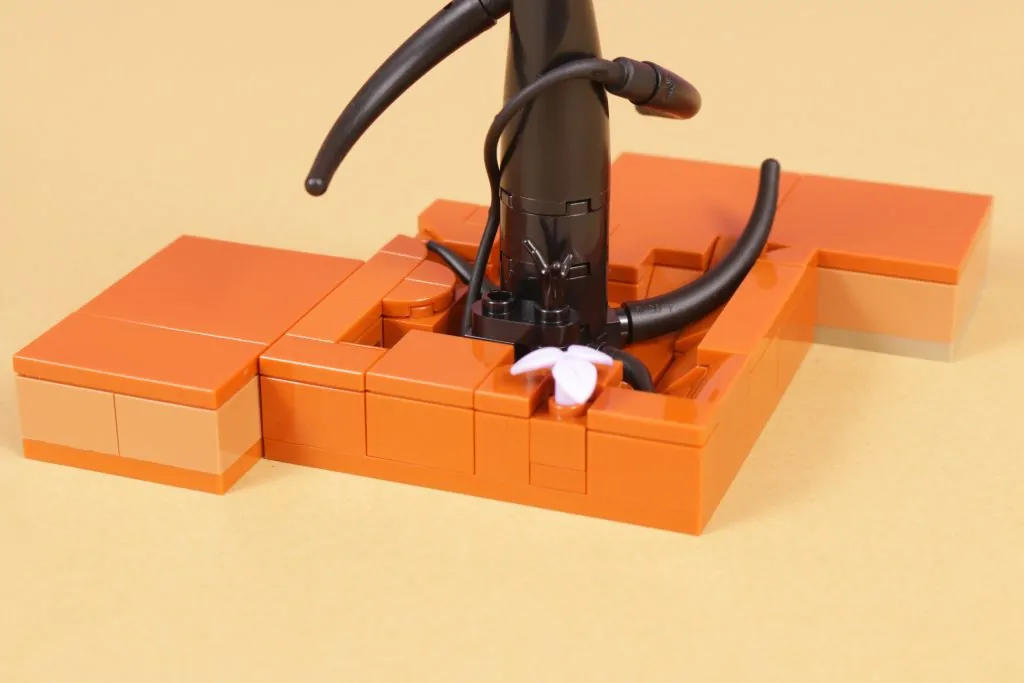
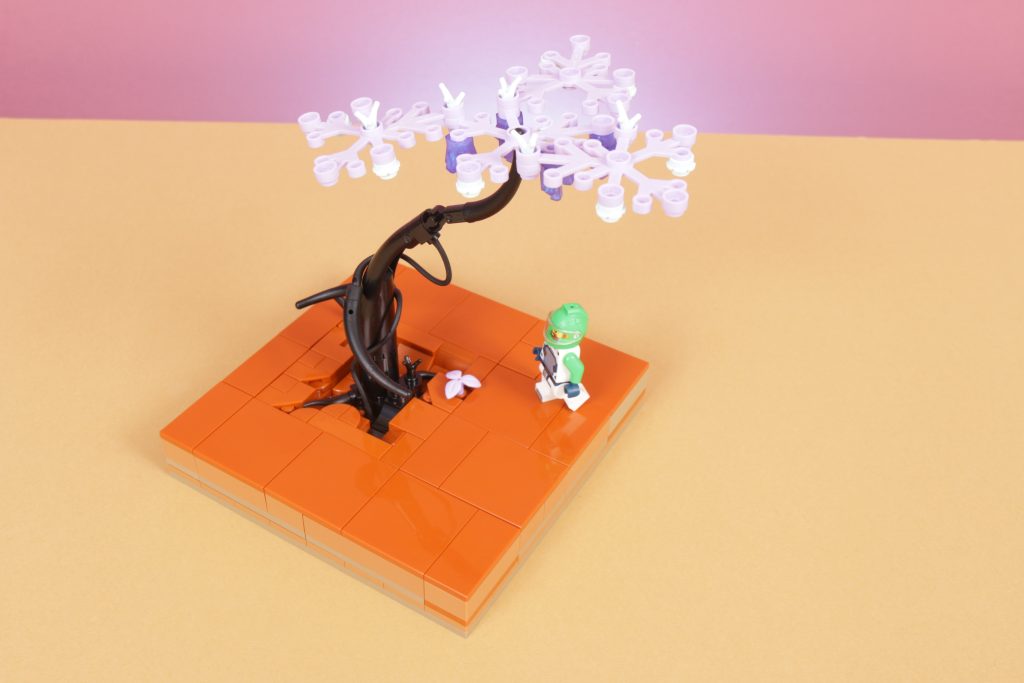
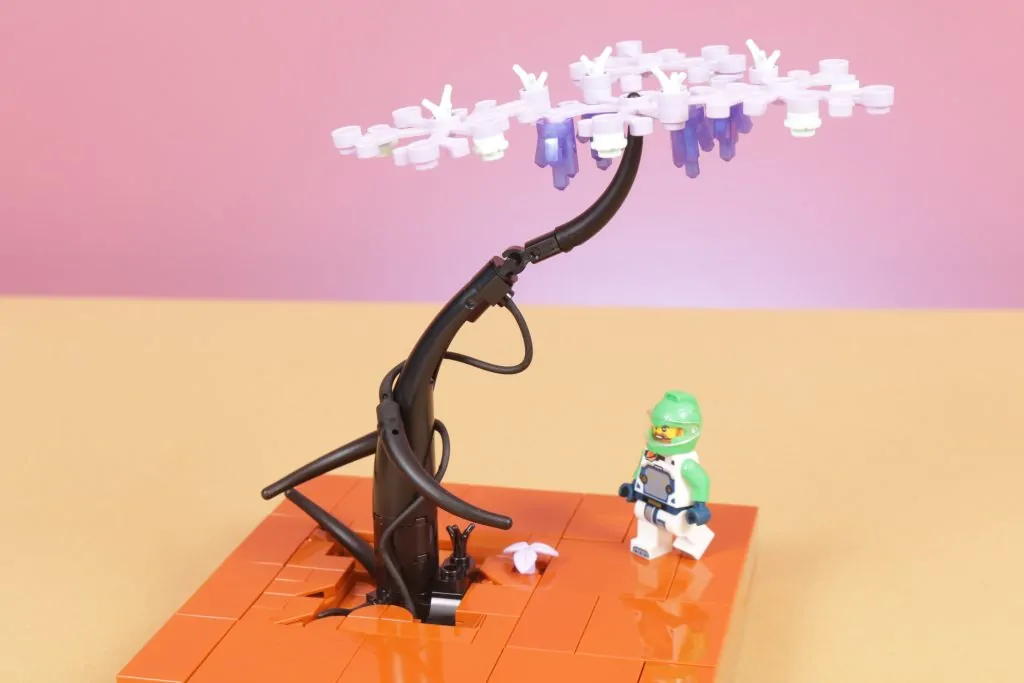
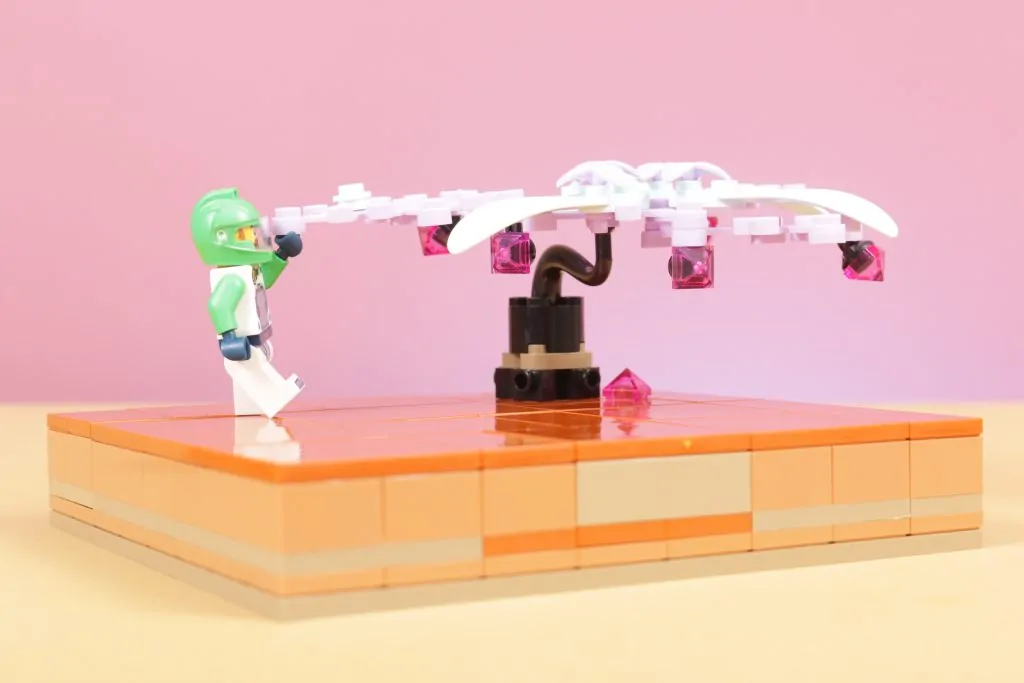
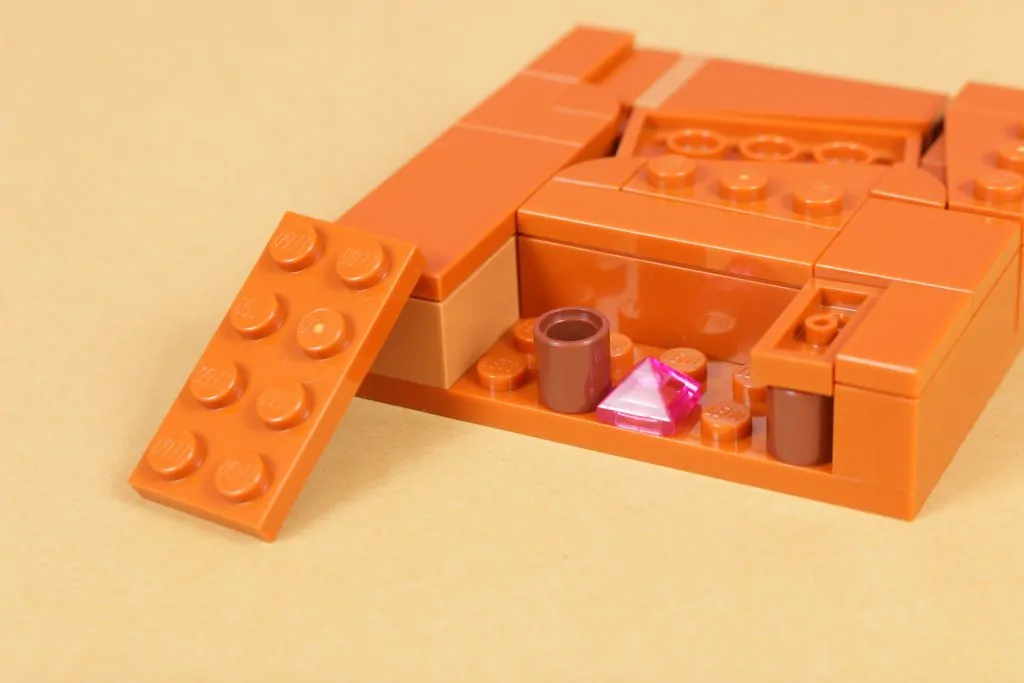
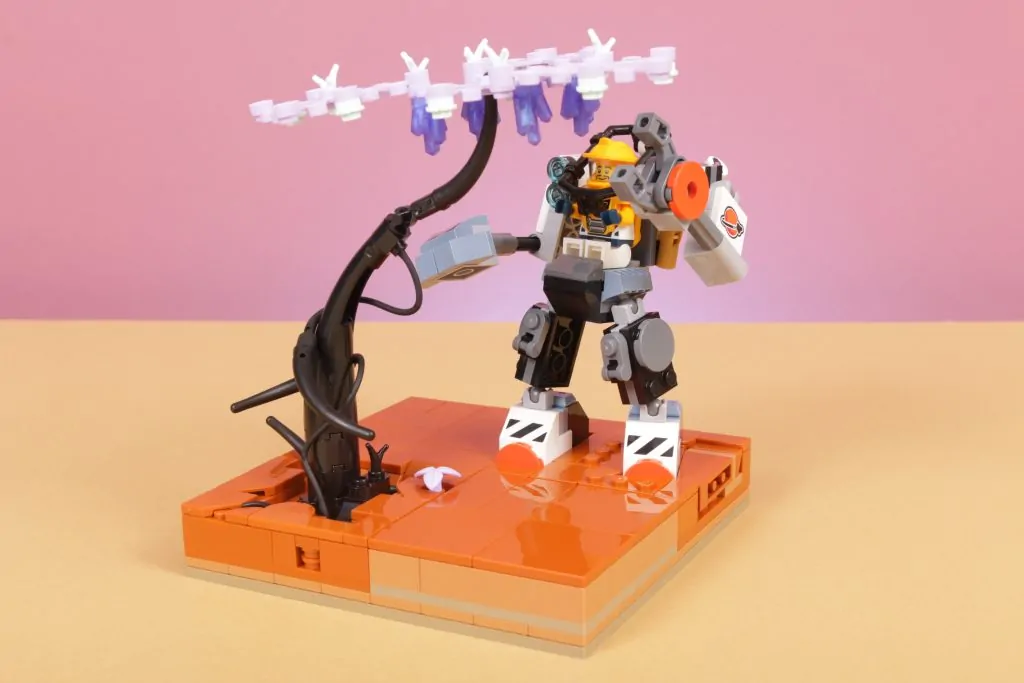
The flexibility of the modular base system again comes into its own with consideration to some of the larger examples of plant life, as we can build downwards into the ground to show roots cutting through the ground for a far more natural appearance than a tree otherwise sprouting out of a perfectly flat surface.
We’ve also chosen to use the plants as the origin of the gemstone pieces that the astronauts are seemingly in search of as an energy source, as hinted at across the official LEGO sets, with the option of being able to go bigger with the plants adding to the challenge that such a situation could represent. Out of reach, or perhaps in the mouth of a plant with a hidden bite, this is alien plant life with a hint of the unknown to it.


Key parts
| Image | Element name | Element number | Link |
|---|---|---|---|
 | LIMB ELEMENT | 6097450/2417 | Add to cart |
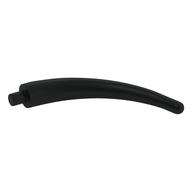
 | ELEPHANT TRUNK | 6382249/80497 | Add to cart |
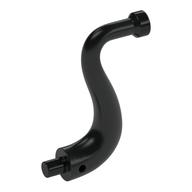
 | NECK – TAIL, DIA. 15,83 – DIA. 7,84 | 6448746/67361 | Add to cart |
 | TIP OF THE TAIL Ø6,47 | 6055070/40379 | Add to cart |
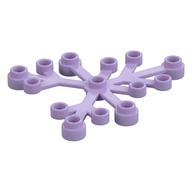
 | PLANT, W/ 3.2 SHAFT, NO. 5 | 6388510/1578 | Add to cart |
 | PLANT, W/ 3.2 SHAFT, NO. 2 | 6262134/49577 | Add to cart |
Mech prints
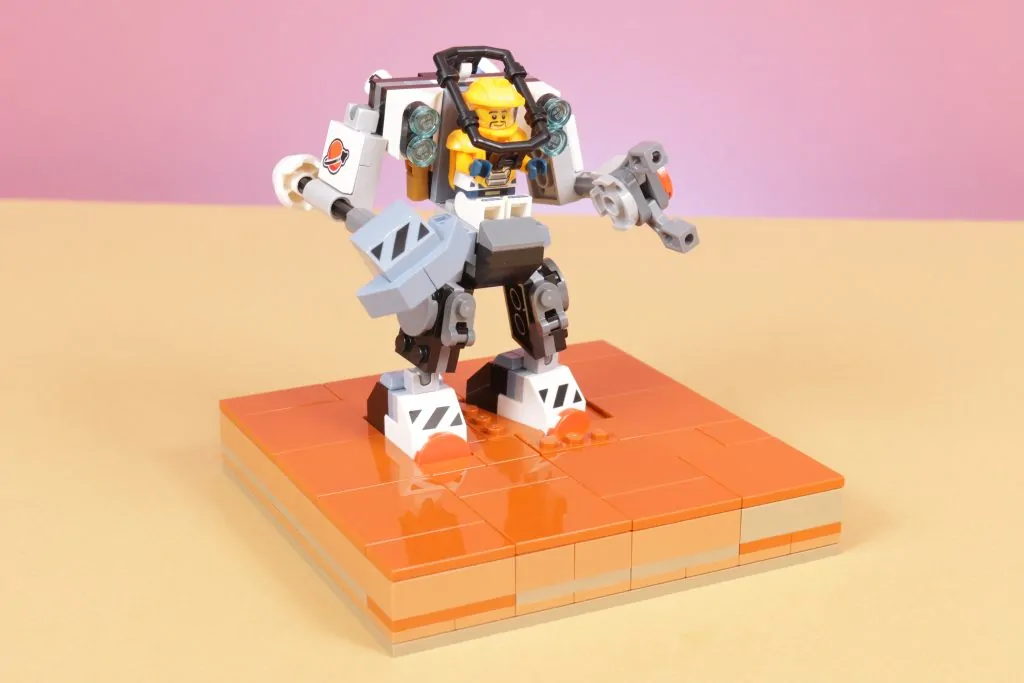
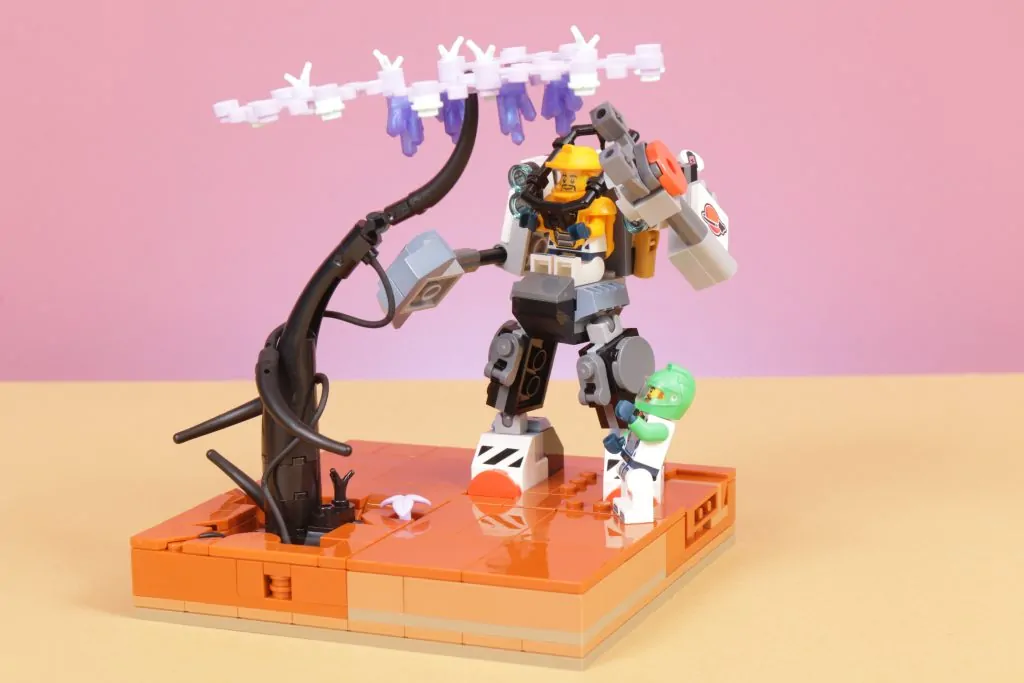
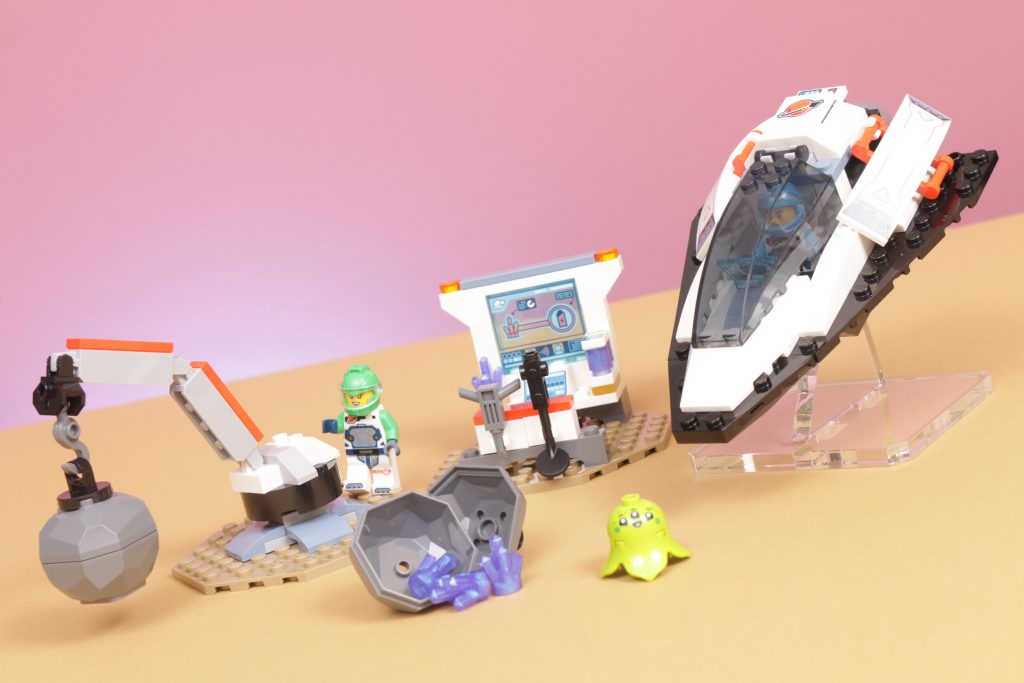
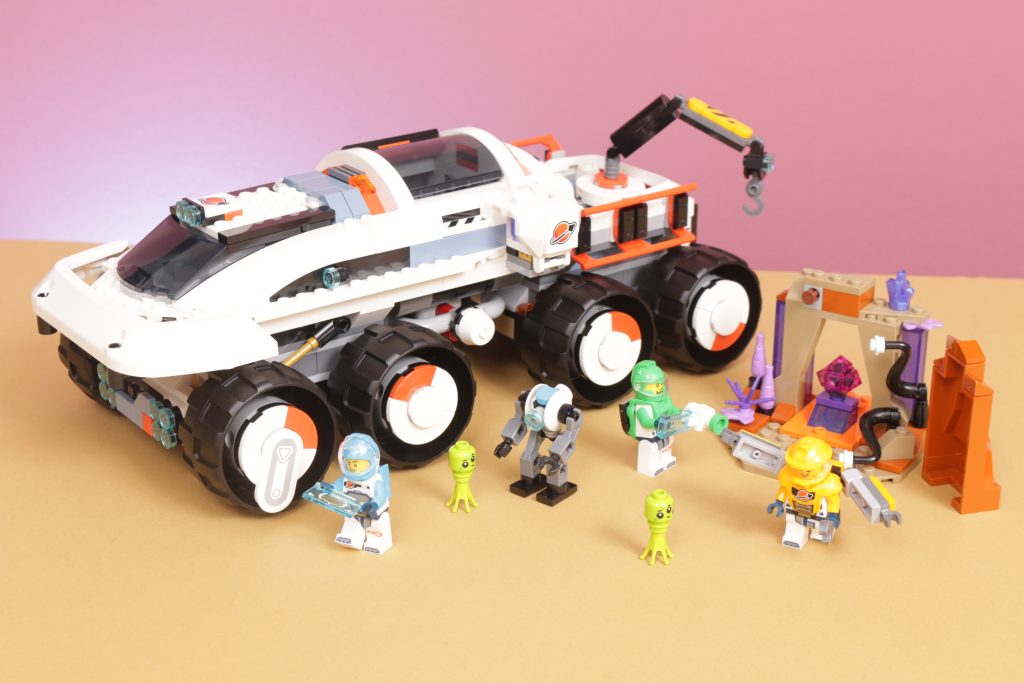
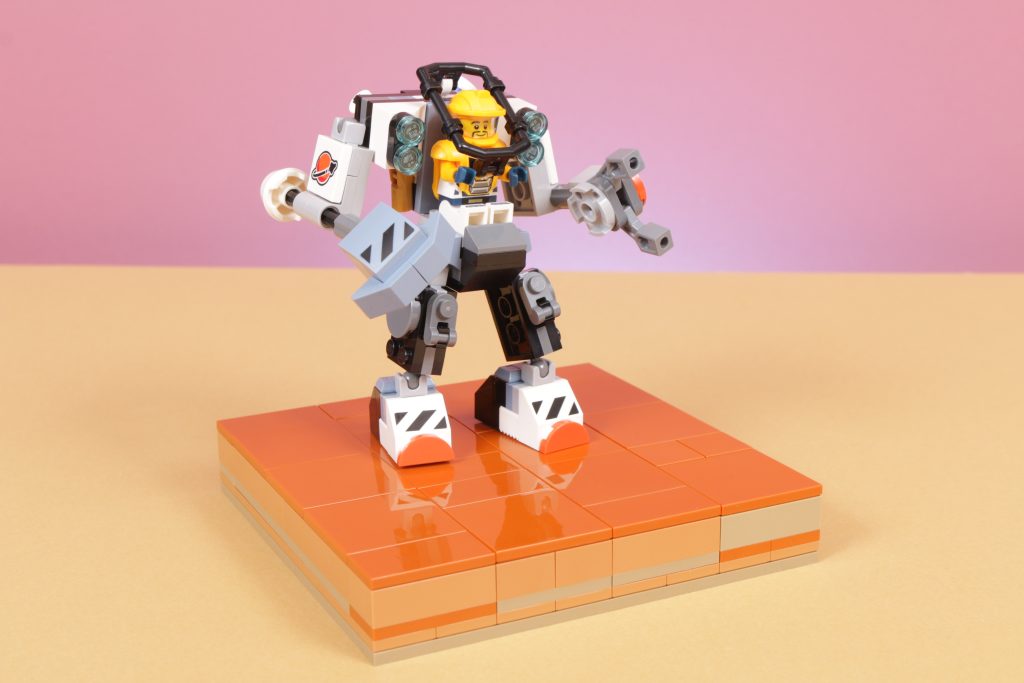
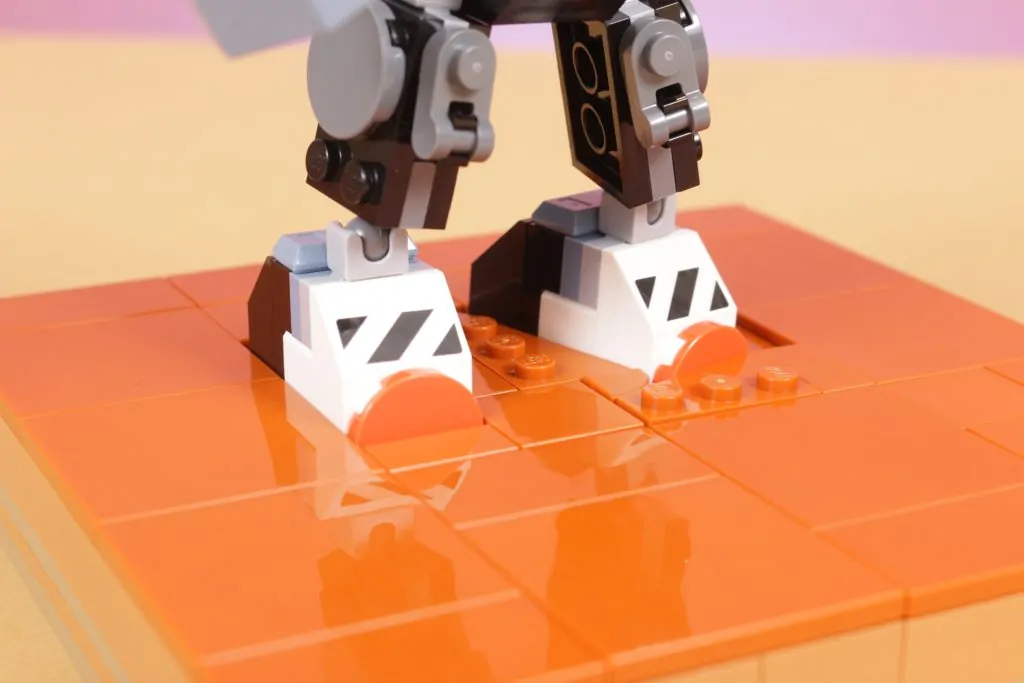
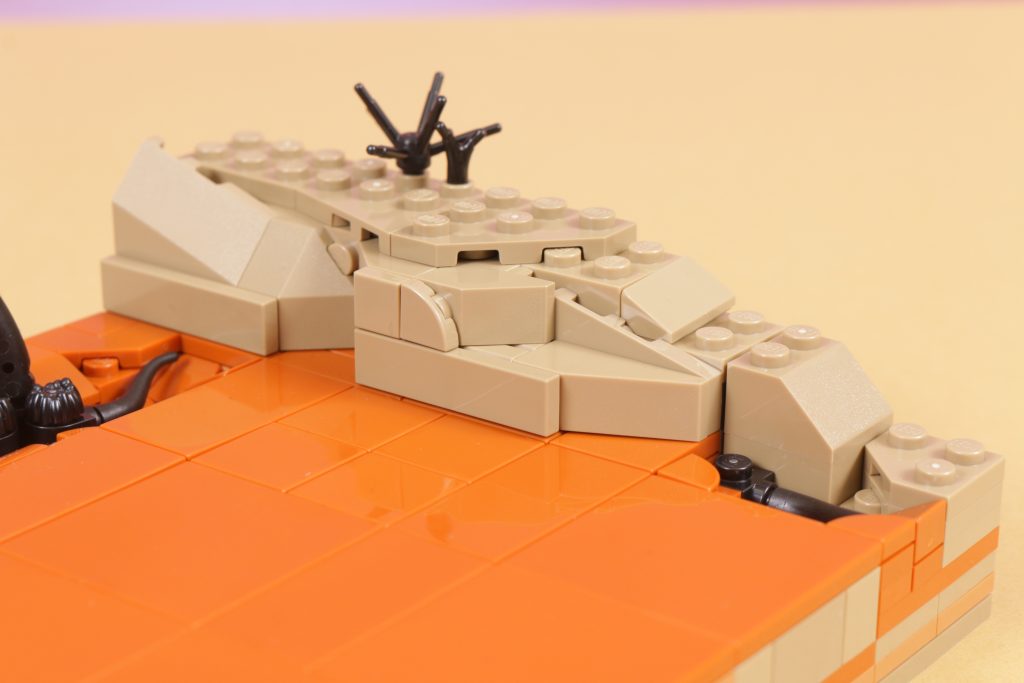
Part I of this build guide showcased the impact on sand that a minifigure’s footsteps could have, but let’s scale that up for the impressive walker from 60428 Space Construction Mech. This mech looks heavy so should absolutely sink into the sand as it stands still.
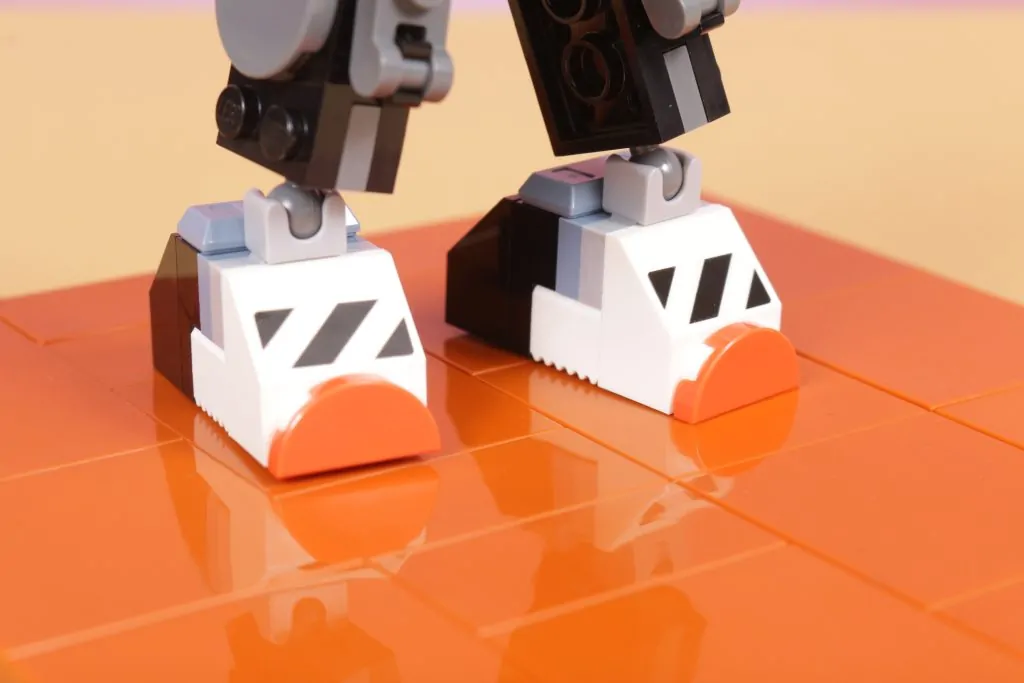
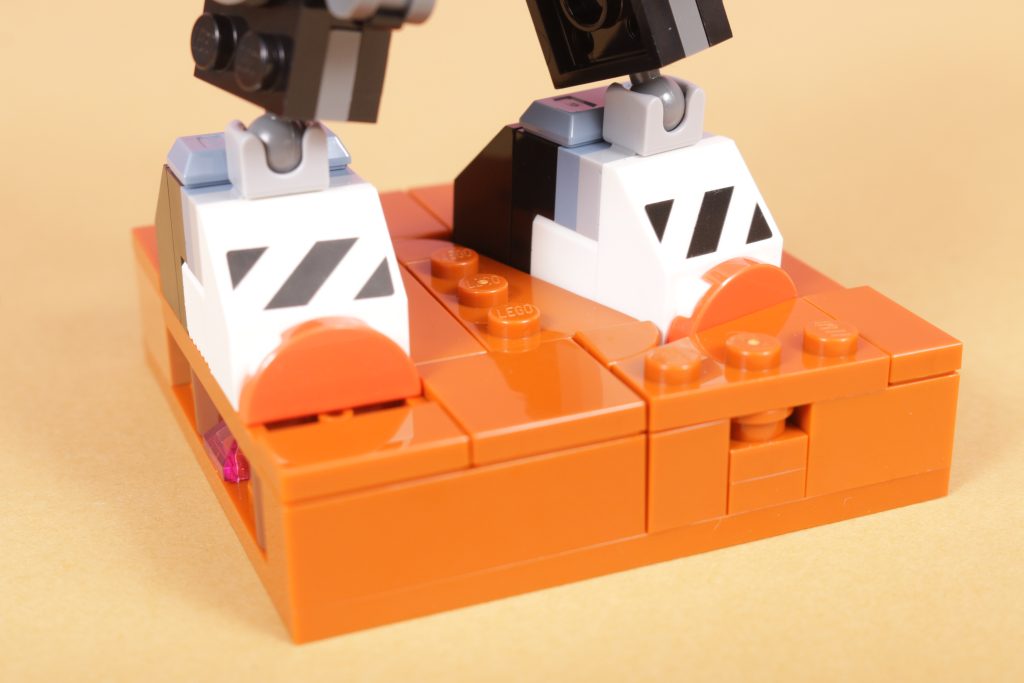
A similar technique to minifigure footprints can be utilised here, while playing around with angled plates and tiles as well as a bit of creative work with some Studs Not On Top (SNOT) technique and an inverted wedge piece can create the outline of a footprint at a slight angle.
This serves as a steady stand to hold the mech in to better reflect the presumed weight of it in the sand, while continuing the technique across a larger version of this modular base can turn a pair of prints into a trodden pathway.

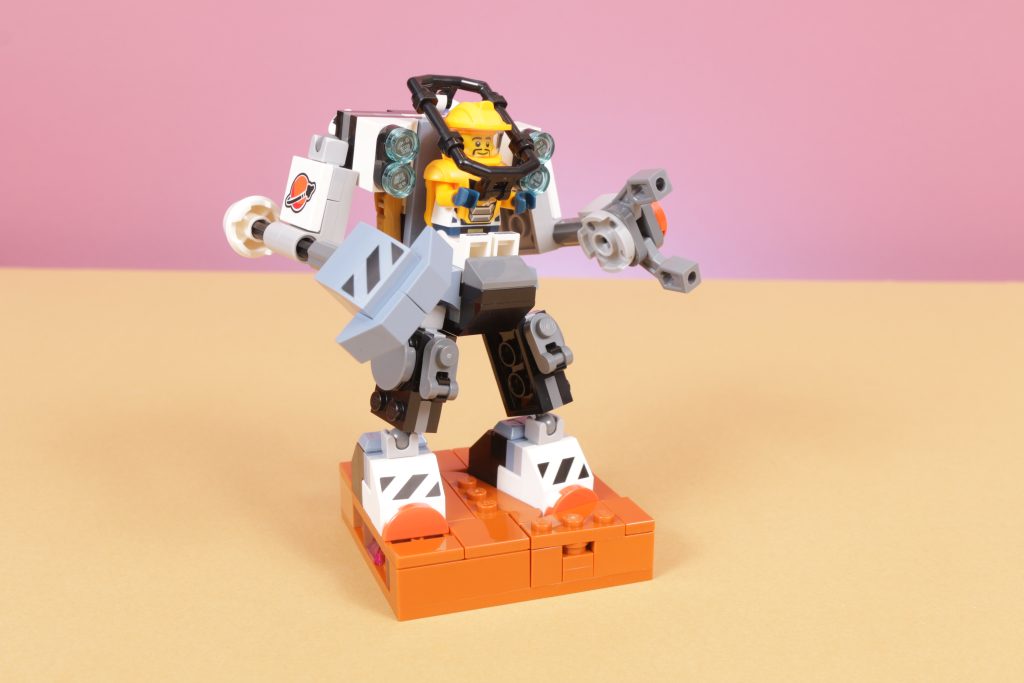
We have a technique that reflects the reality of such a mech a lot better now, but what else can we do for the story at play? Well, pairing these footprints with one of the larger examples of plant life and placing them into the one modular base build transforms two halves of a scene into the start of a story, where conveniently the grabber on the mech is just able to reach the gemstones held within the branches of the tree.


Key parts
| Image | Element name | Element number | Link |
|---|---|---|---|
| BEAM 1X1 | 6170813/18654 | Add to cart | |
 | ROOF TILE 1X2X3/74° INV. | 6385969/2449 | Add to cart |
 | PLATE 1X2 W/ VERT. TUBE | 6328183/41682 | Add to cart |
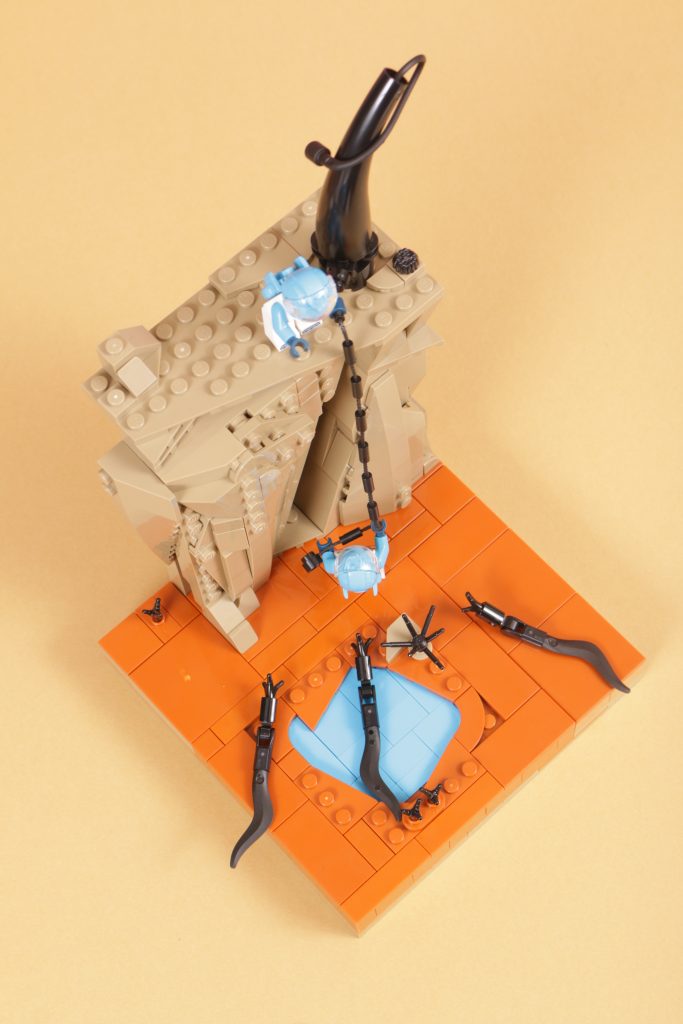
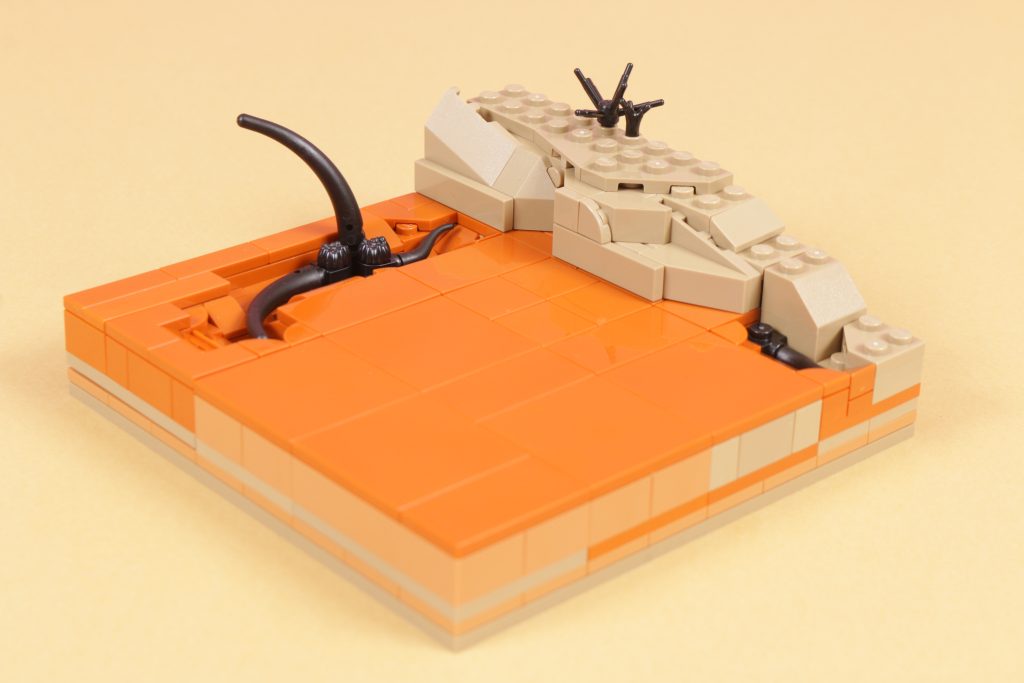
Time for a dip
With any voyage across a new world, the search for water is most important. Indeed, if there is to be plant life and aliens on this planet for our LEGO City Space team to interact with then there must be water too.
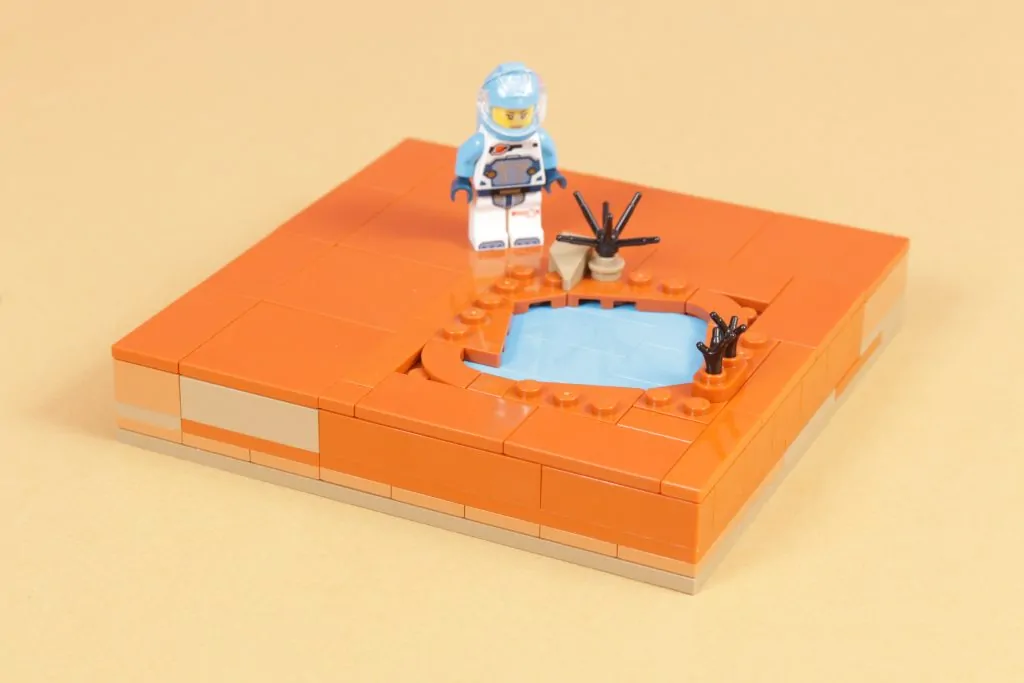
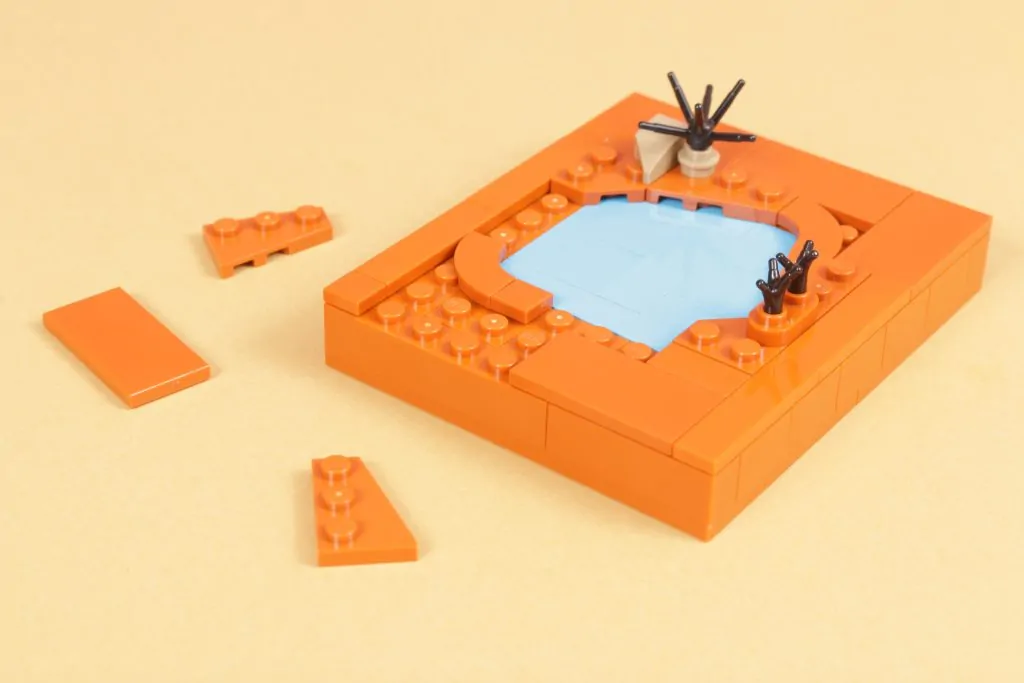
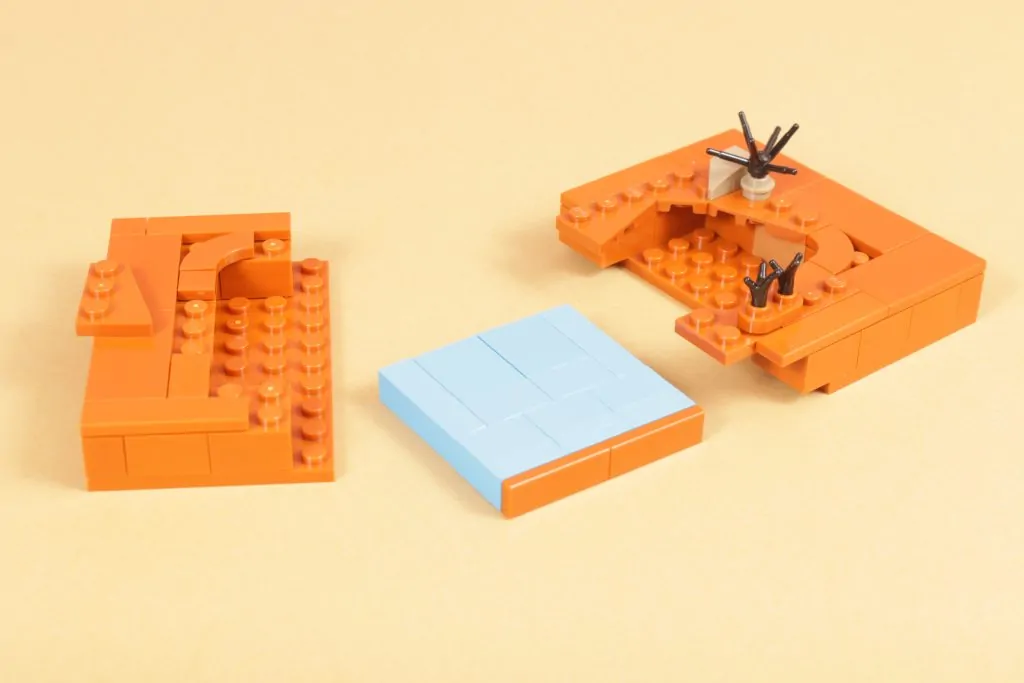
This simple water hole is created by sandwiching a line of bricks acting as the water between the modular base plate’s lowest and highest levels of plates/tiles – it’s not connected, per se, but it is locked in place so as to offer a smooth, untouched surface of something water-like. Importantly, the top layer of plates and tiles comes in at the same height as our modular base design.
And in this instance as we are on an alien planet we’ve coloured the water a thicker, brighter blue to reflect that maybe it’s not quite the same as the H2O we are used to on earth. Meanwhile, using angled and rounded tiles and plates of the same colour as the sand-based surface to the base helps shape the edges of the water hole into a more interesting and natural appearance.
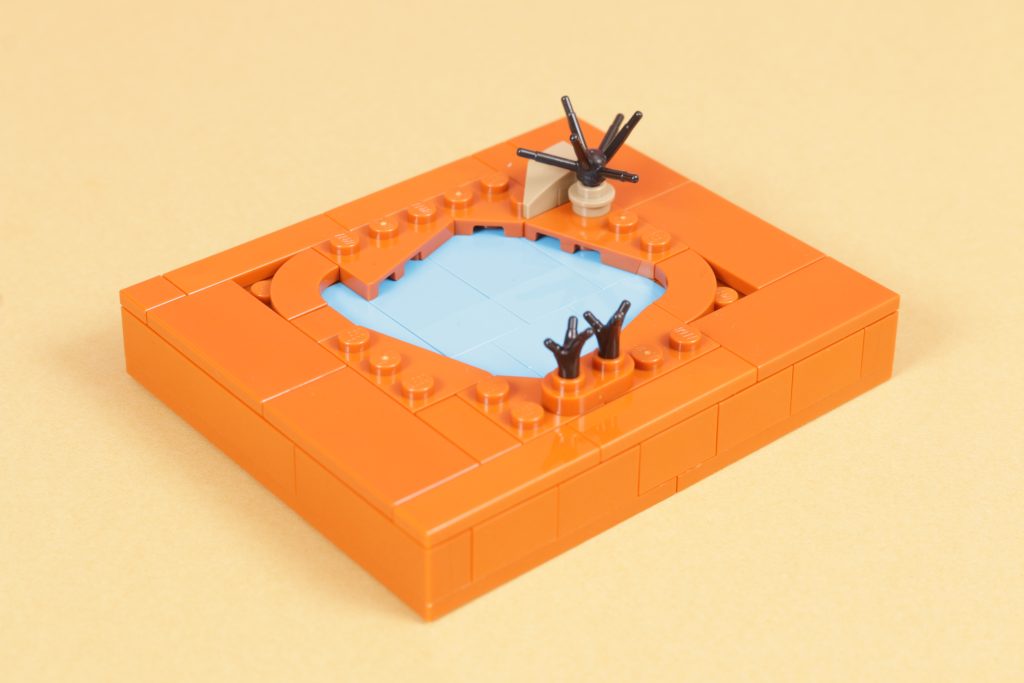

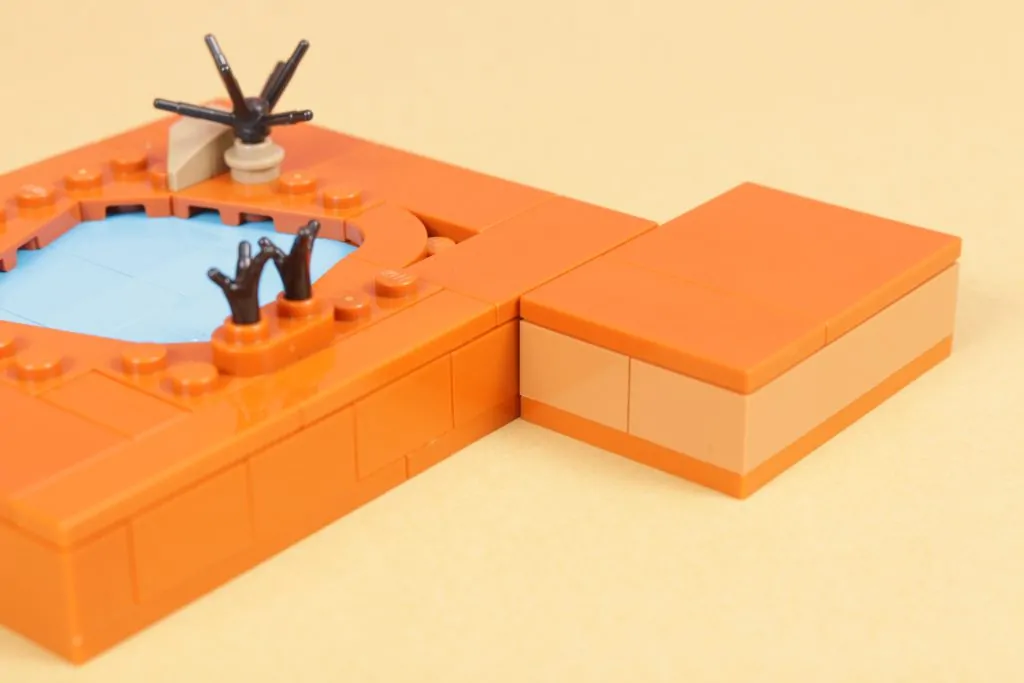
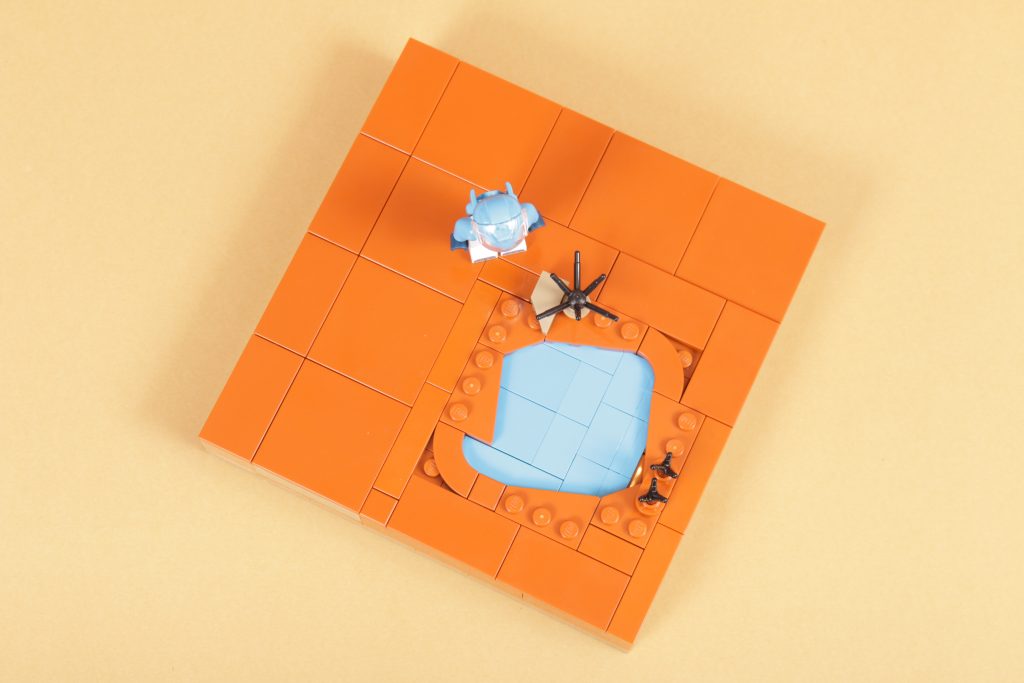
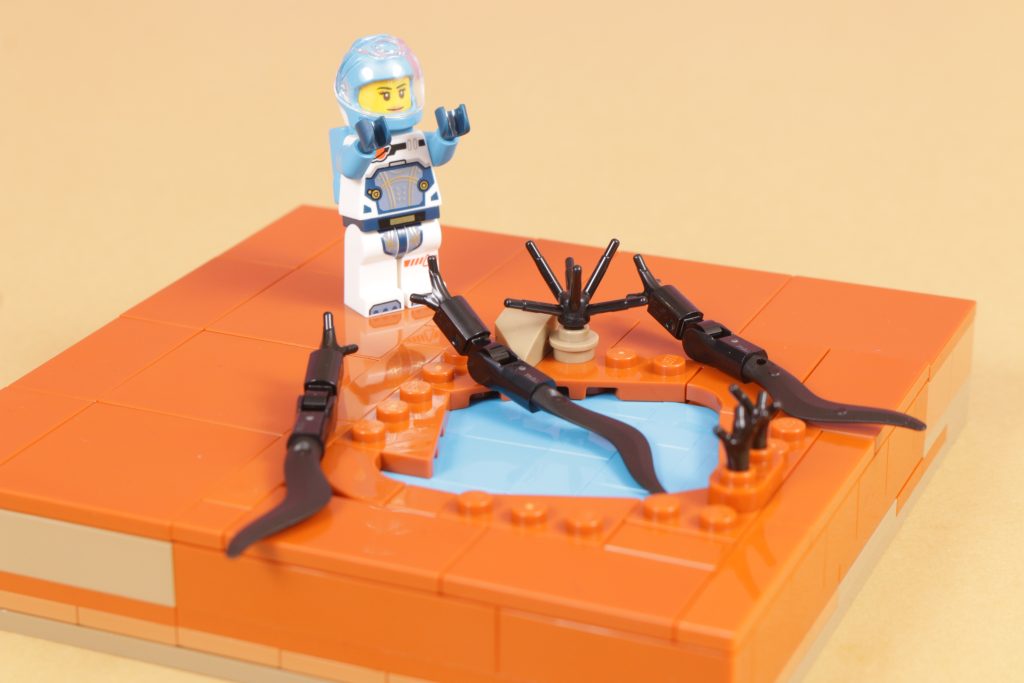
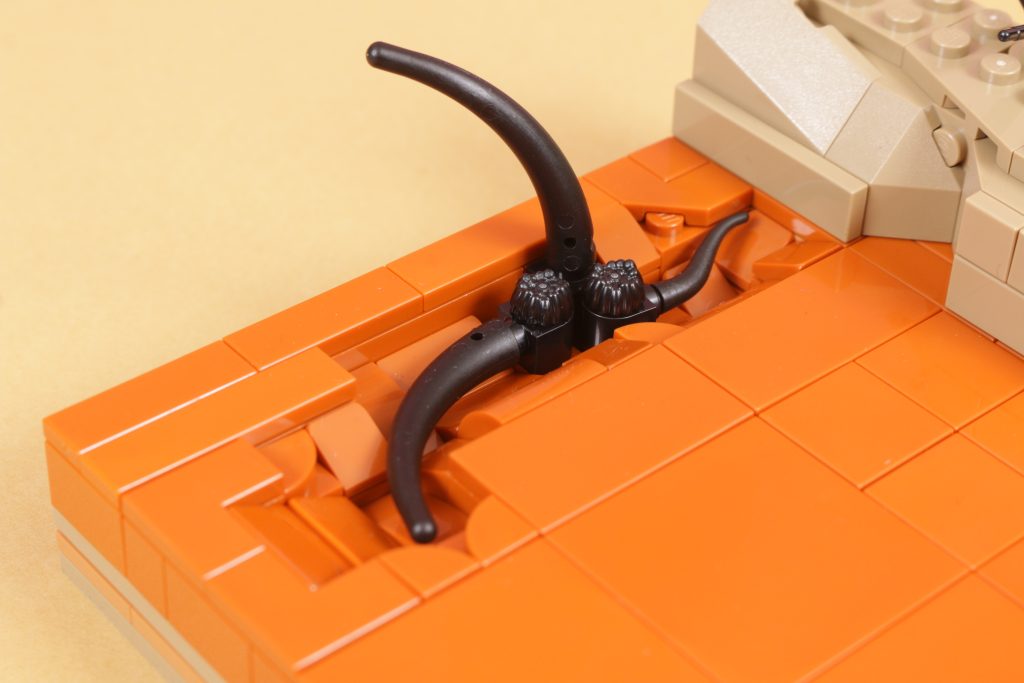
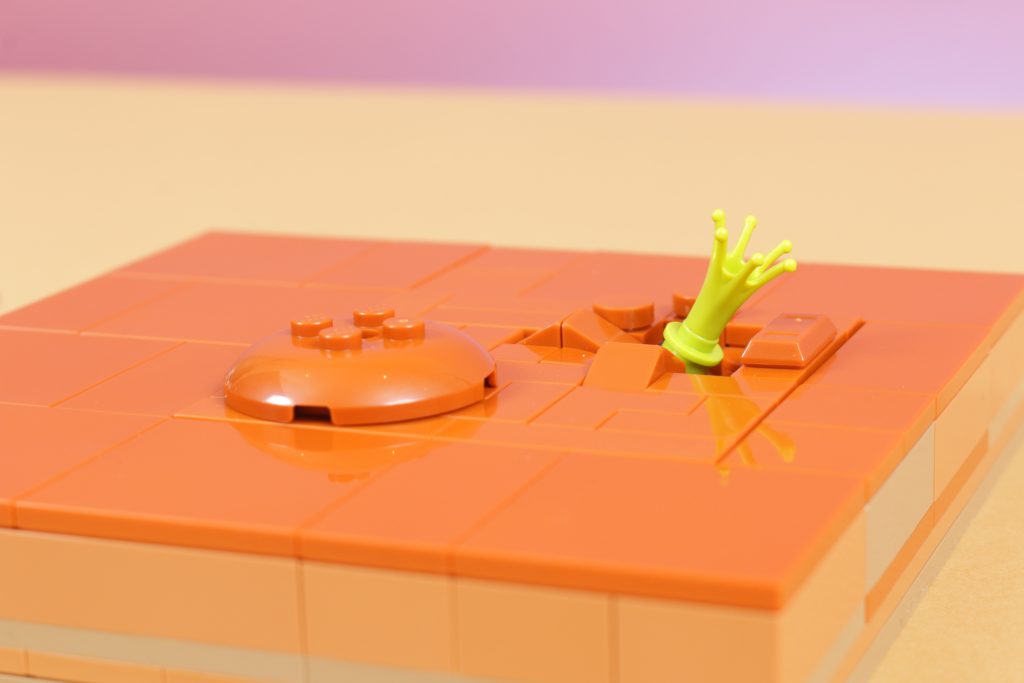
Whilst we’re going with untouched water, there’s nothing stopping you inserting a few bricks with studs on one side into the water build so as to add an alien creature reaching out from underneath, and a few ripples to signify its movement.
In our case, though, we’ve created a little black alien creature to emerge from this water hole, based on the assumption that like nature on earth, nature on this alien planet would see some creatures able to more effectively blend in with their surroundings. We’ve dotted a few black sprouts of shrubs and bushes here and there in our various builds, and using one of the smaller parts as the head of this eel-like alien creates a more nefarious creature able to hide and spring out at the unsuspecting astronauts.

Key parts
| Image | Element name | Element number | Link |
|---|---|---|---|
 | PLANT, W/ 3.2 SHAFT, NO. 3 | 6302576/68211 | Add to cart |
 | HORN W/ 3.2 SHAFT, NO. 2 | 6453008/1997 | Add to cart |
 | TILE 2X2, W/ BOW | 6258069/27925 | Add to cart |
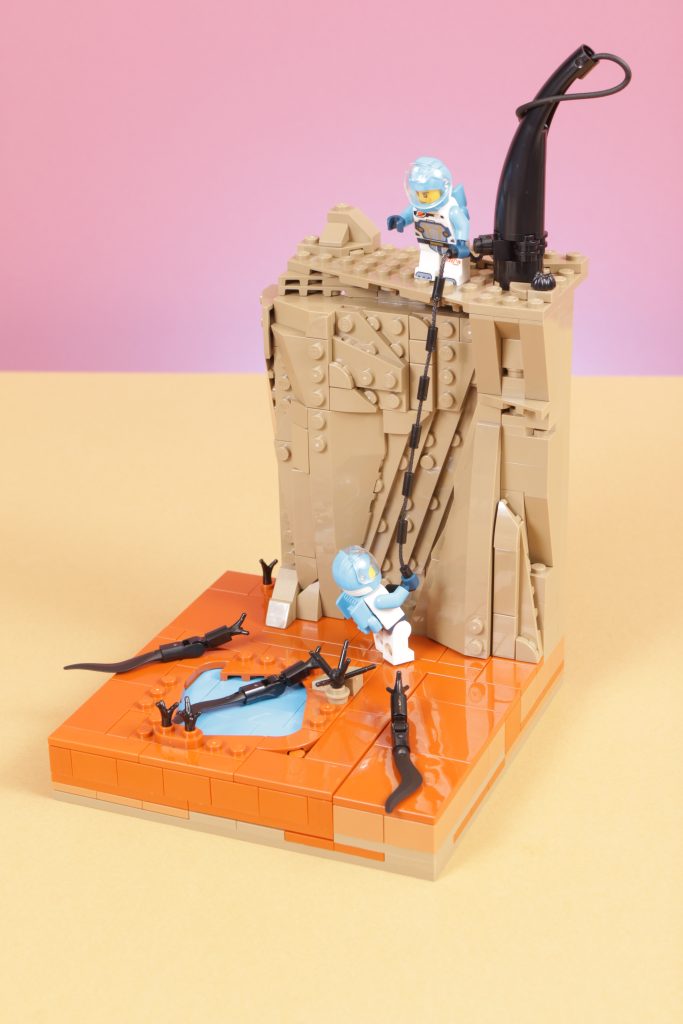
Up and out
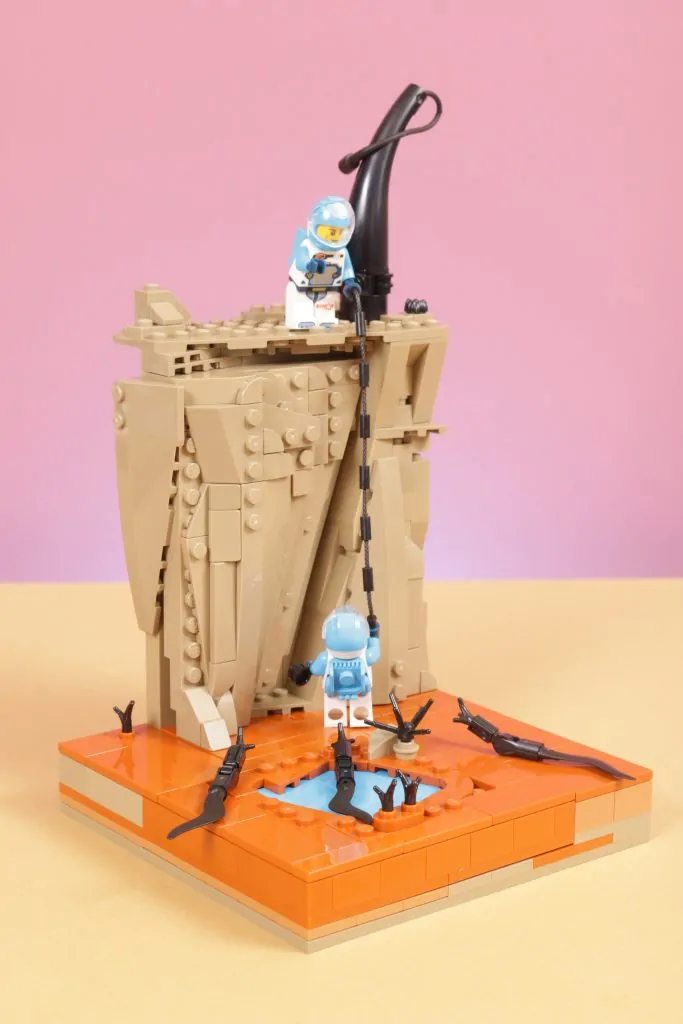
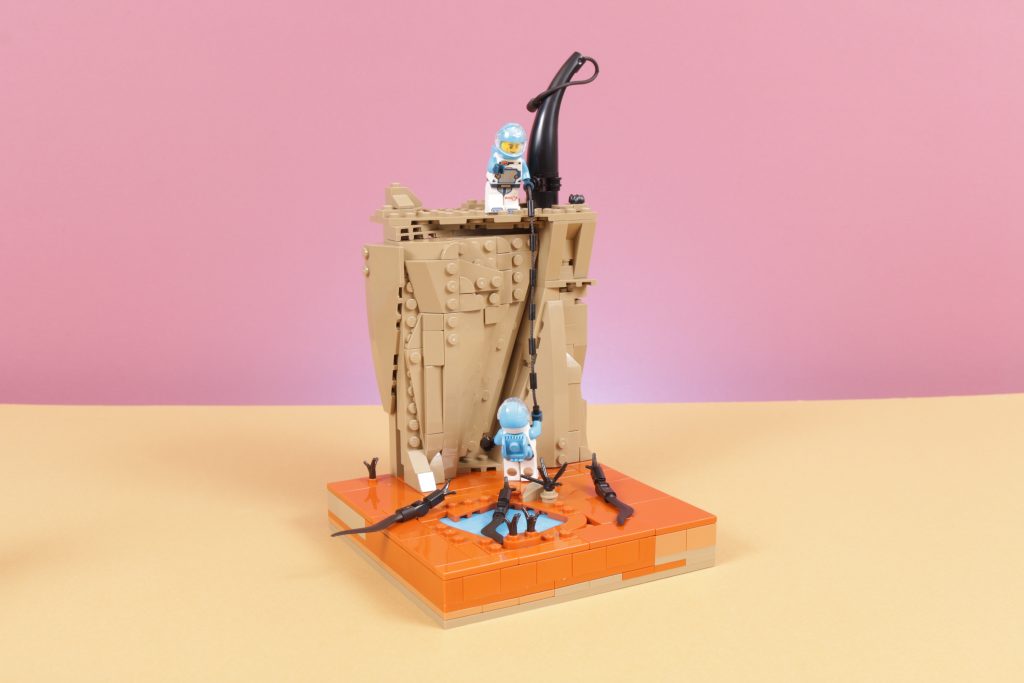
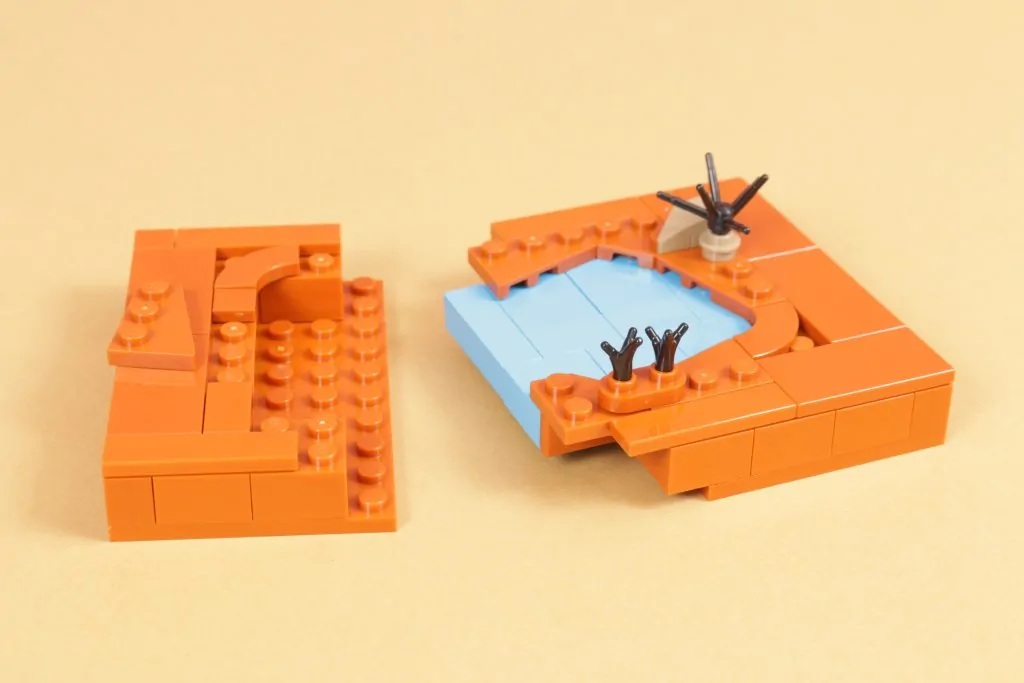
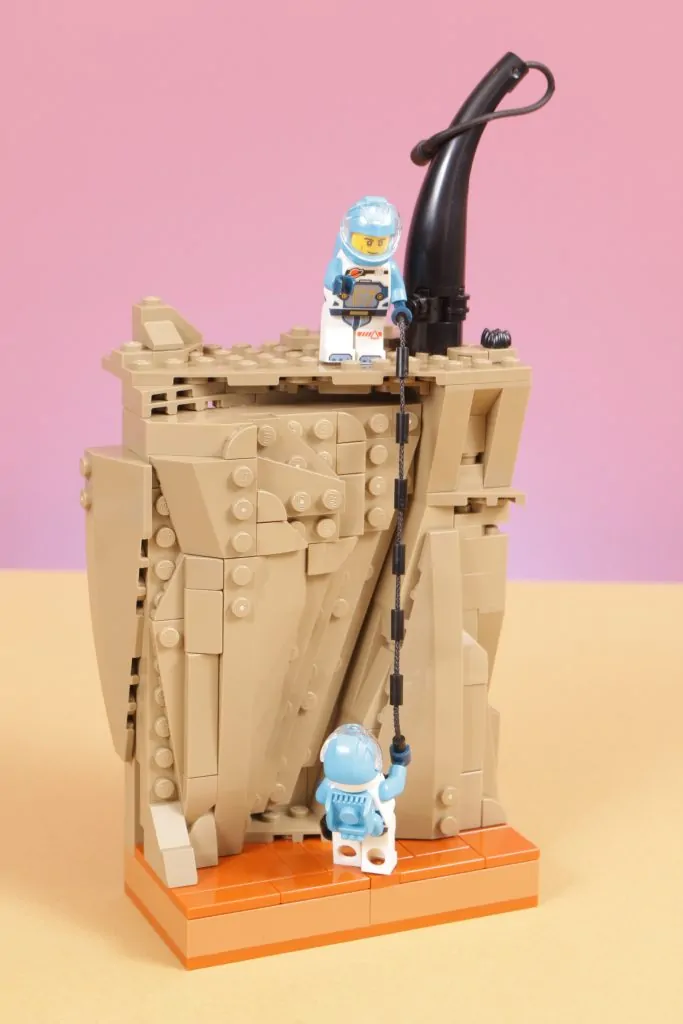
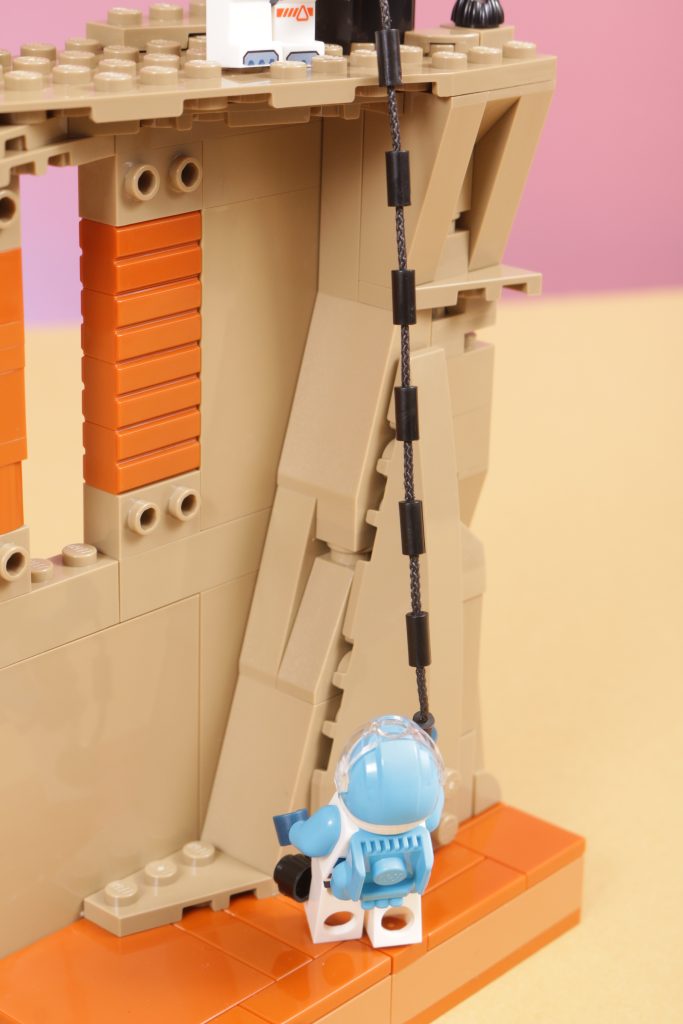
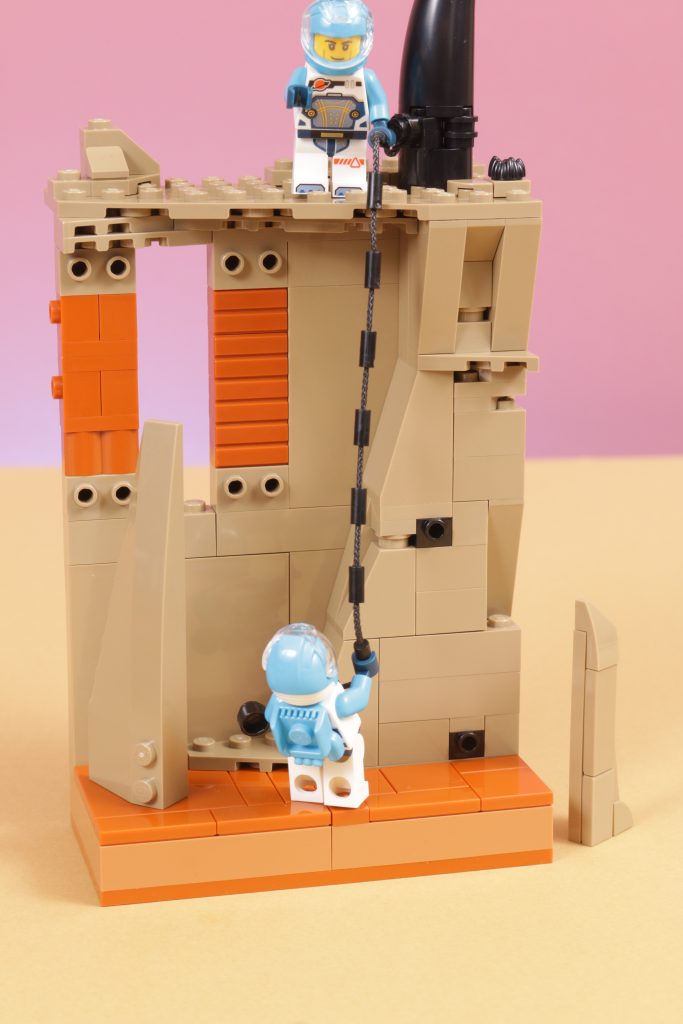
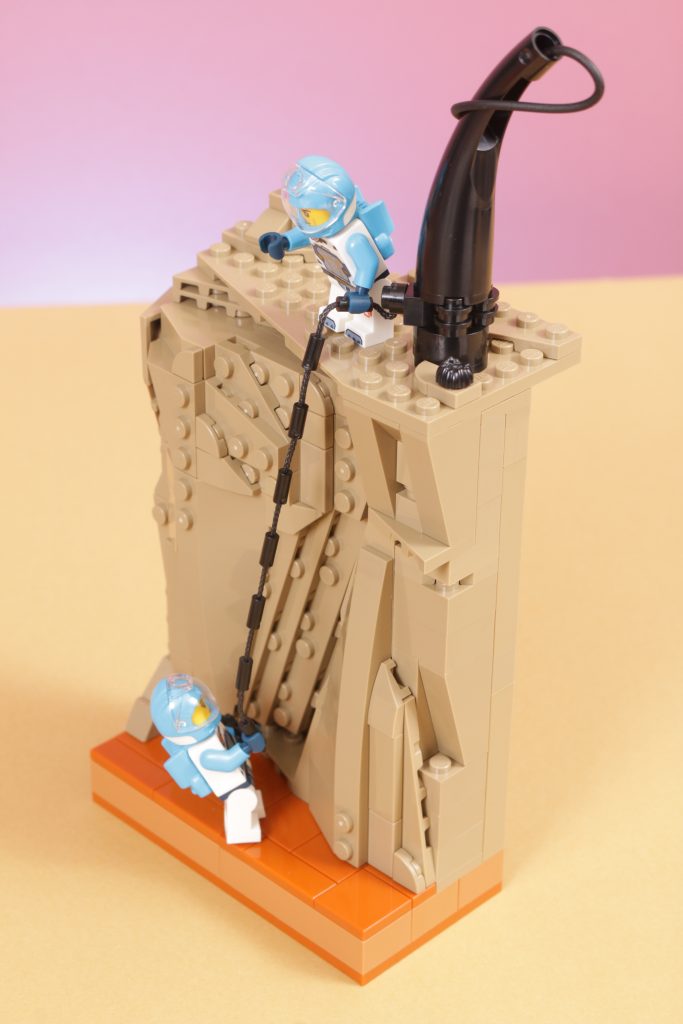
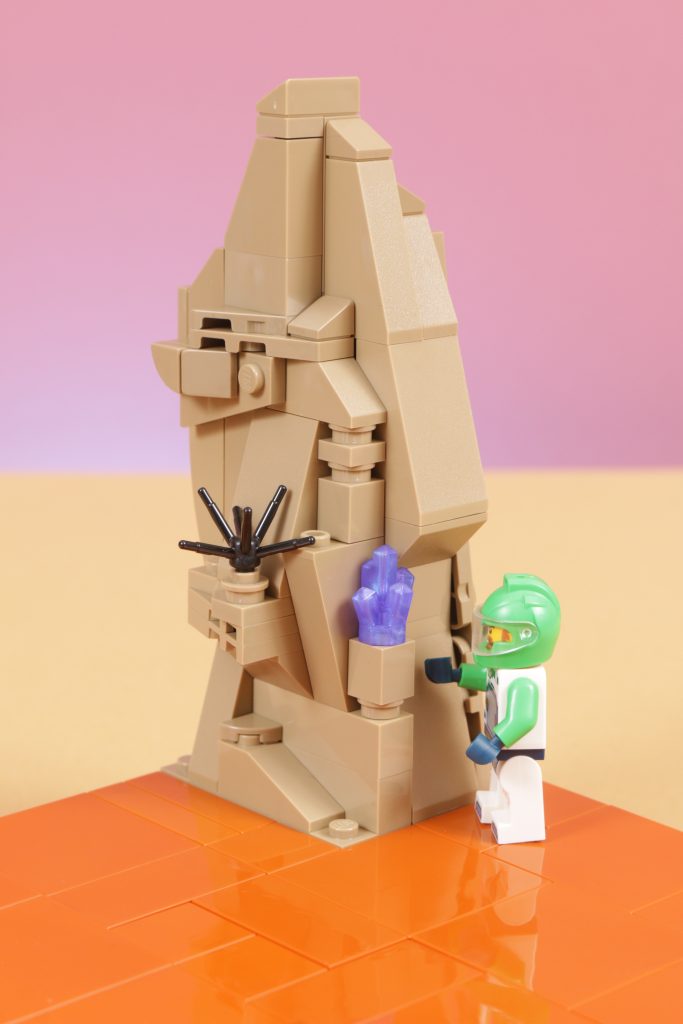
In which case, this astronaut needs an escape plan, so let’s add some further story and more specifically some height to this scene by building a rock face for the astronaut to scale up with the help of an ally.
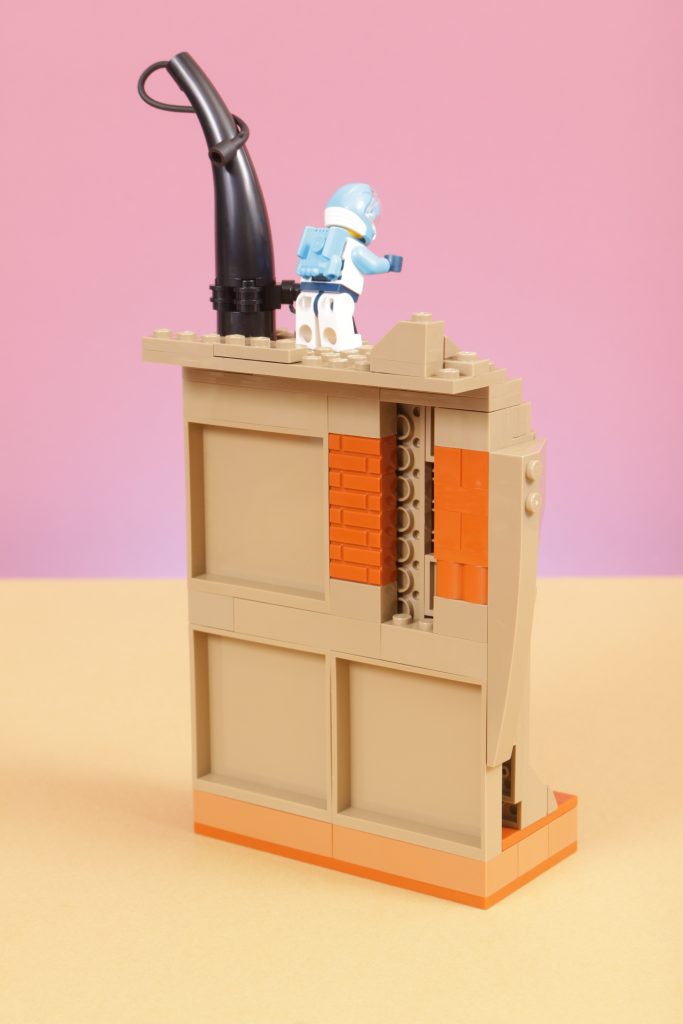
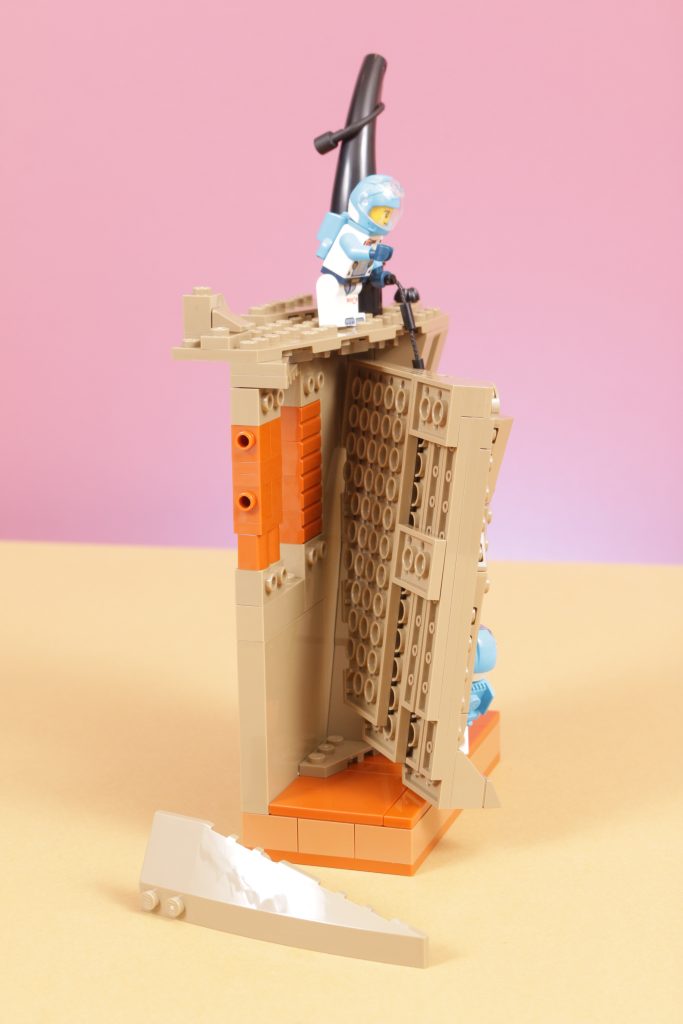
Again this is a build that is constructed in a simple way, in fact using two different techniques. On the left side the rock face is created by attaching layers of angled plates and wedges to the side using bricks with studs on their side, and on the right we’ve used angled bricks to build up the interior side of the rockwork, before again finishing off the front side with some large wedges and plates attached on their side. Using both techniques side by side helps add variety and texture to the model in a way that using just one technique would struggle to.
Both techniques are also pretty fun and in their own right very effective for building bigger rock faces (be that on an alien planet, in the wild west, along the base of a pirate fort, and so on), in no small part because they encourage bigger building. An odd statement, but a reference to how if you are planning on building large surfaces of rockwork like this then larger bricks are your friend where smaller bricks will often create too busy and disjointed of a landscape for the eye to accept. Long, flowing rock face is – in our opinion – best shaped from larger bricks and plates where such lines and cuts in landscape can be best recreated. Smaller bricks break up flow and direction a little too much. Try it out – build bigger using bigger.
To help set this particular scene we’ve added a tree stump with rope tied around it for the astronaut in peril to grab on to and pull her way out of the alien eel attack.
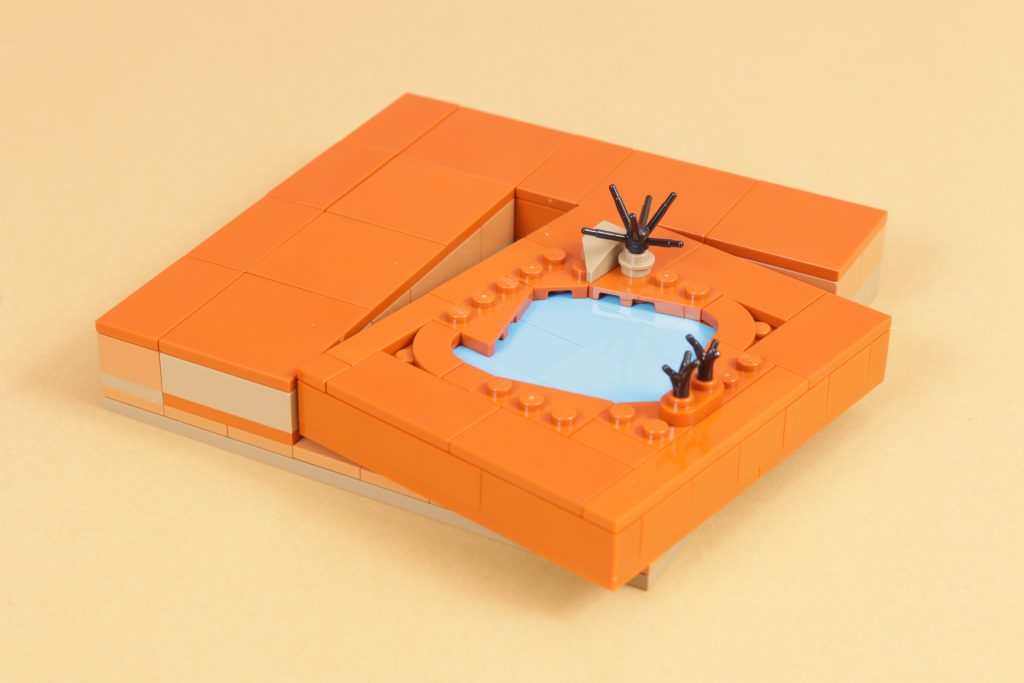
Again, here we are building the rockwork to come in at the same height as the default surface we have set in our modular base, and in building up we have added size and weight to the scene across a small amount of land, allowing for it to pair nicely with something like the water hole which takes up more space as a wide and shallow build.
Key parts
| Image | Element name | Element number | Link |
|---|---|---|---|
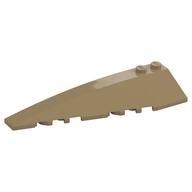 | LEFT SHELL 3X10 | 6266296/50955 | Add to cart |
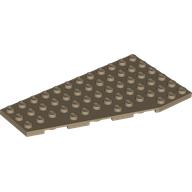 | LEFT WING 6X12 | 6425446/30355 | Add to cart |
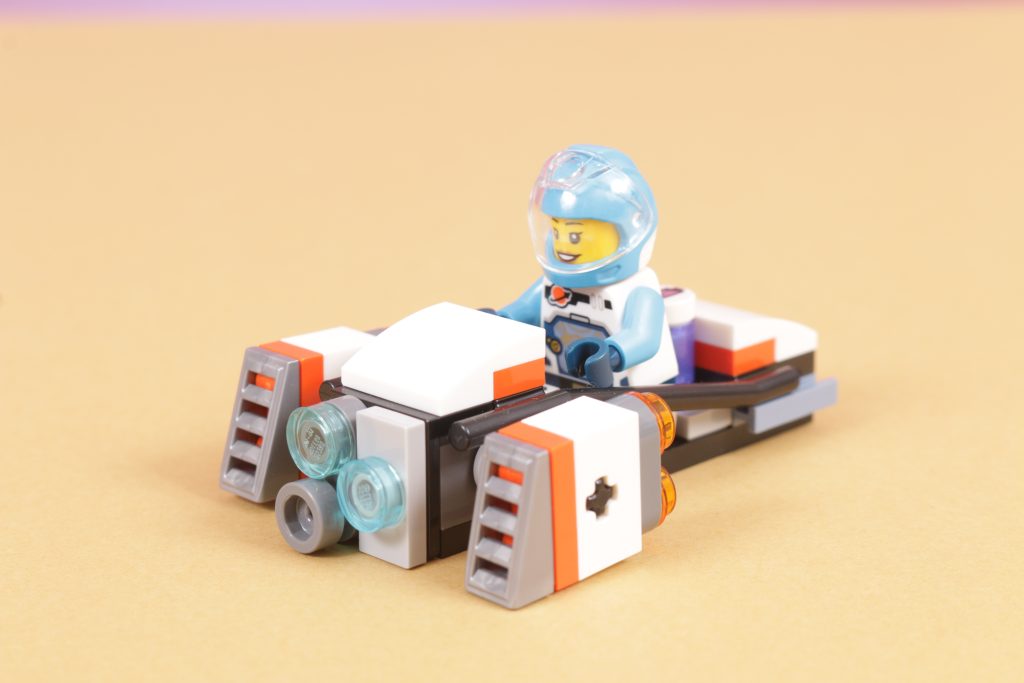
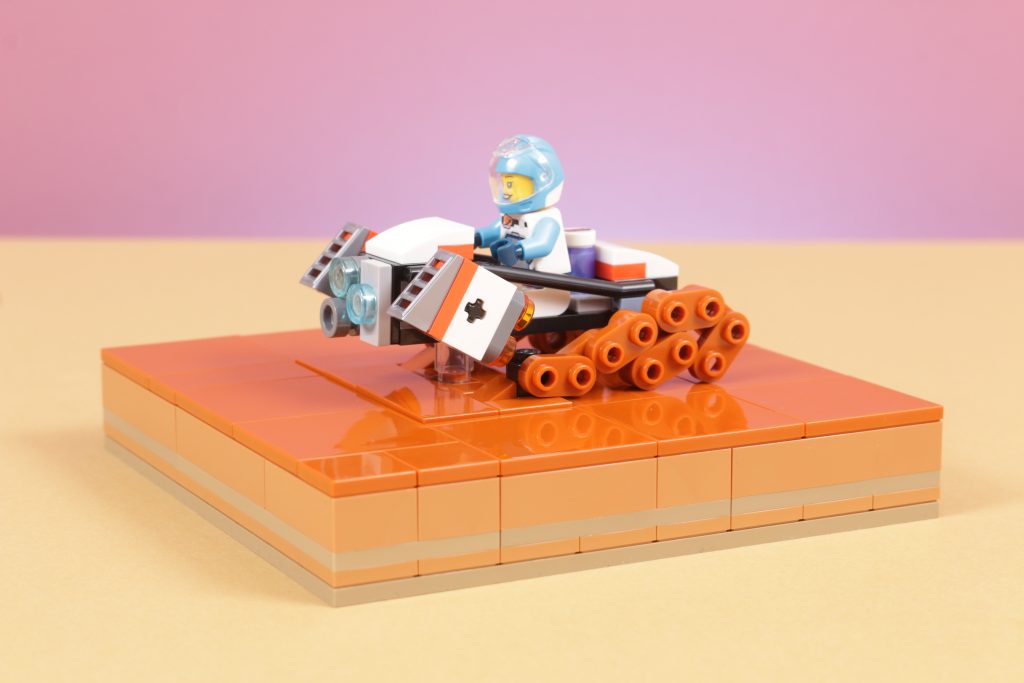
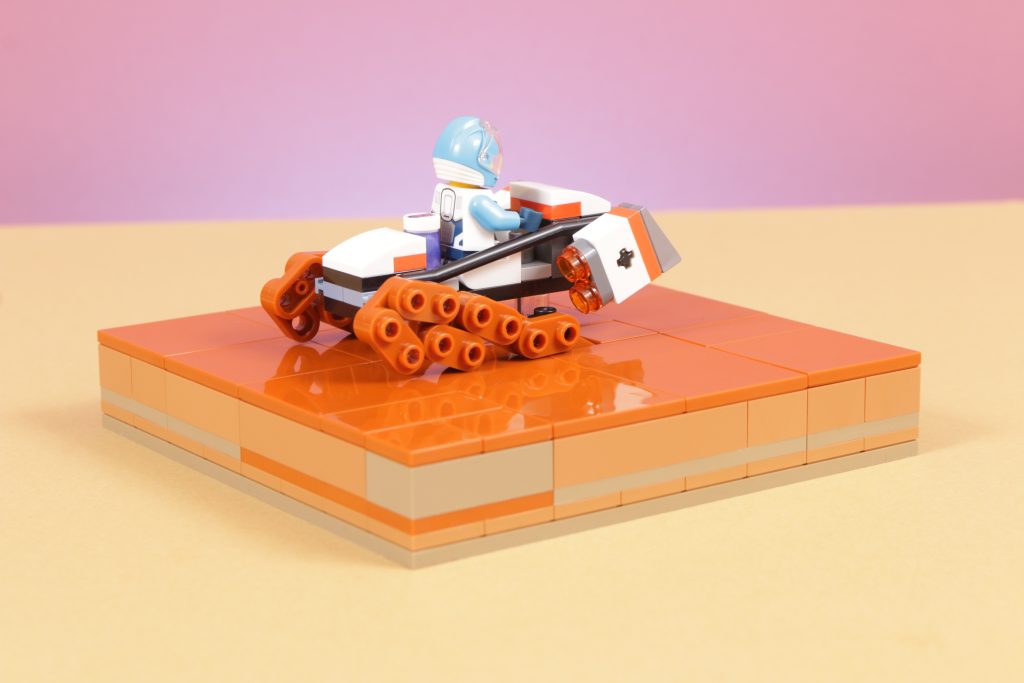
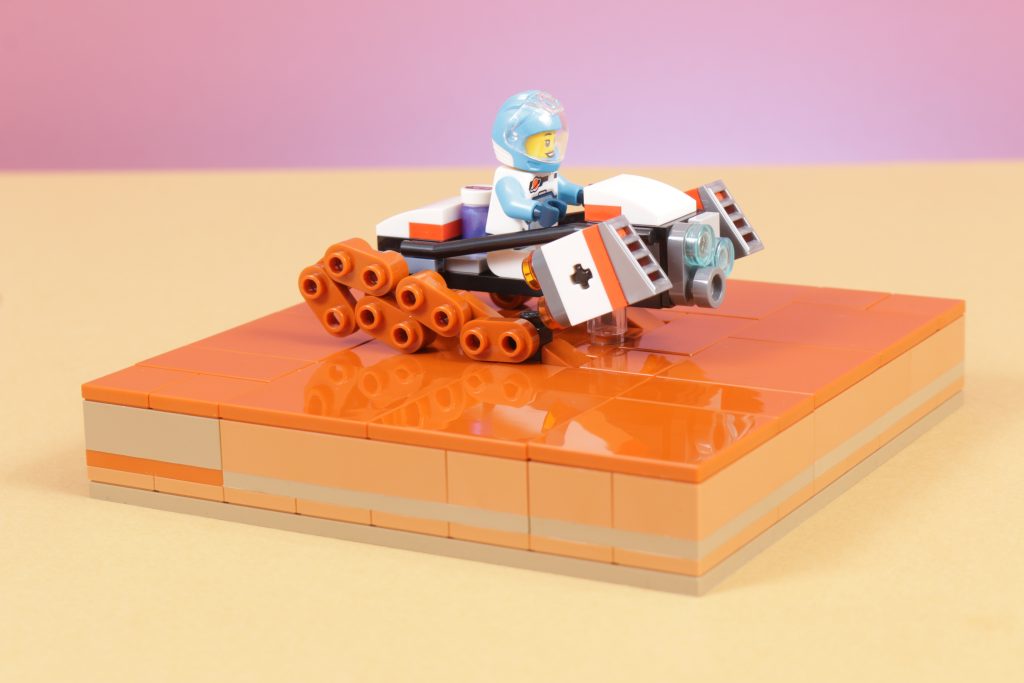
Speed demon
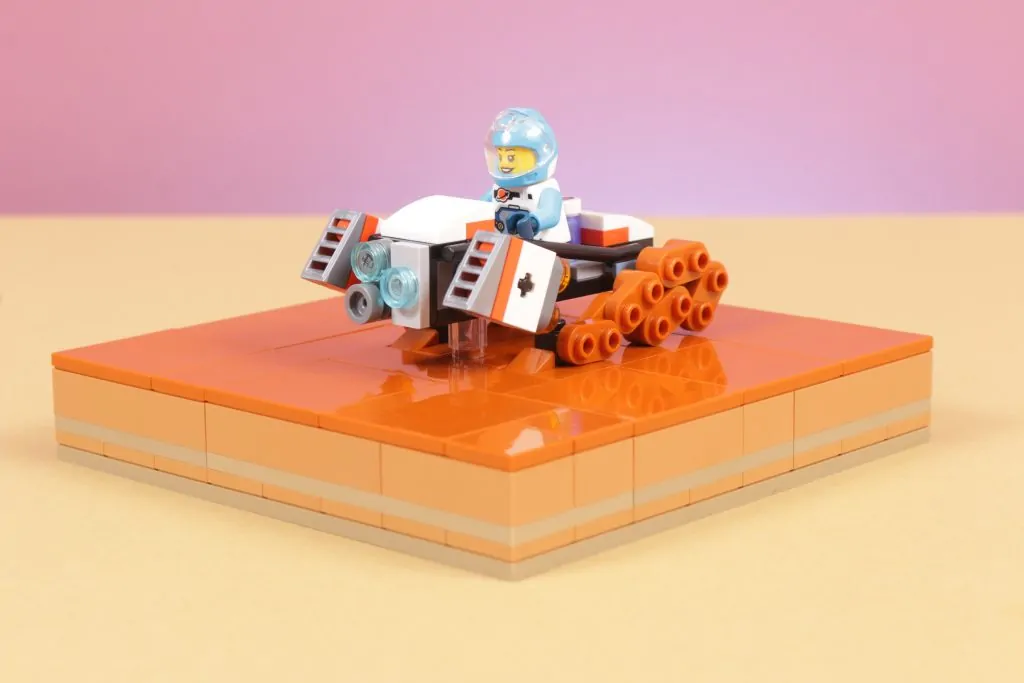
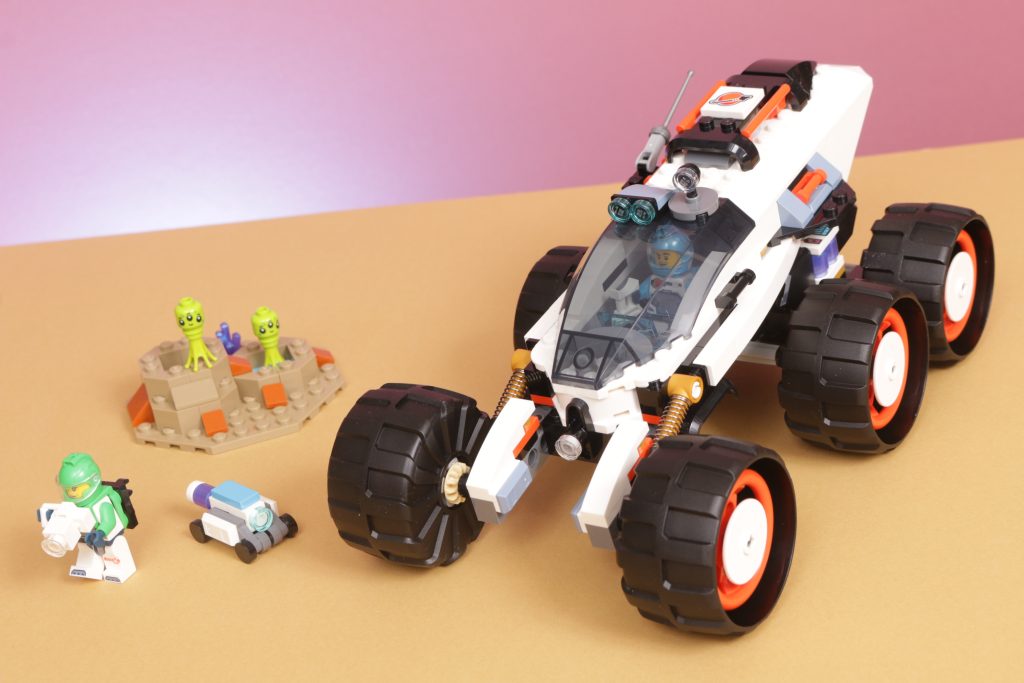
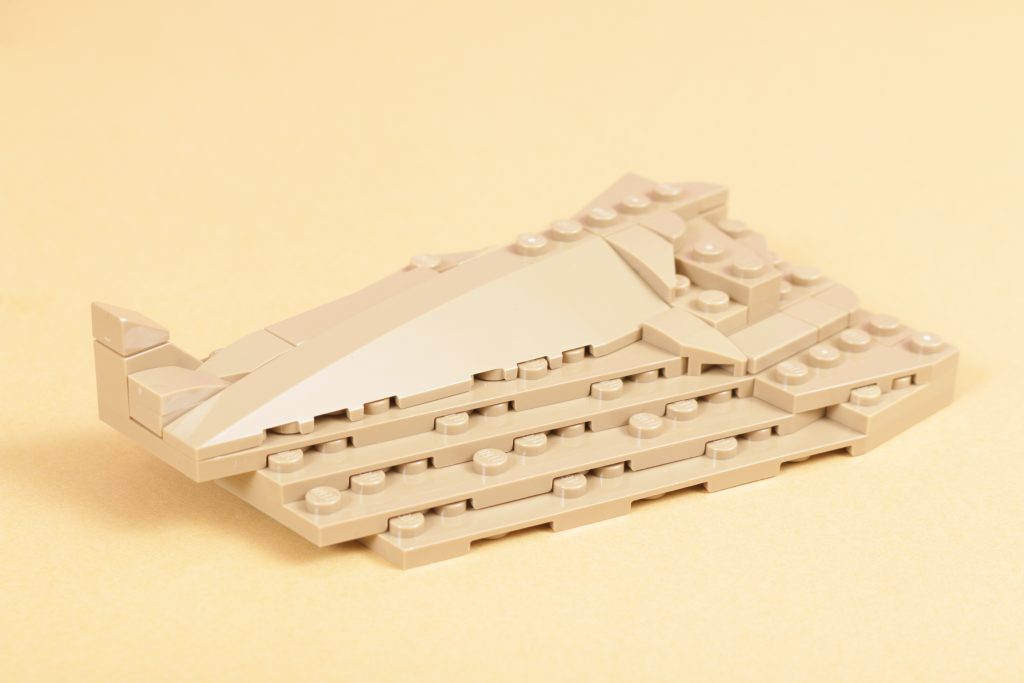
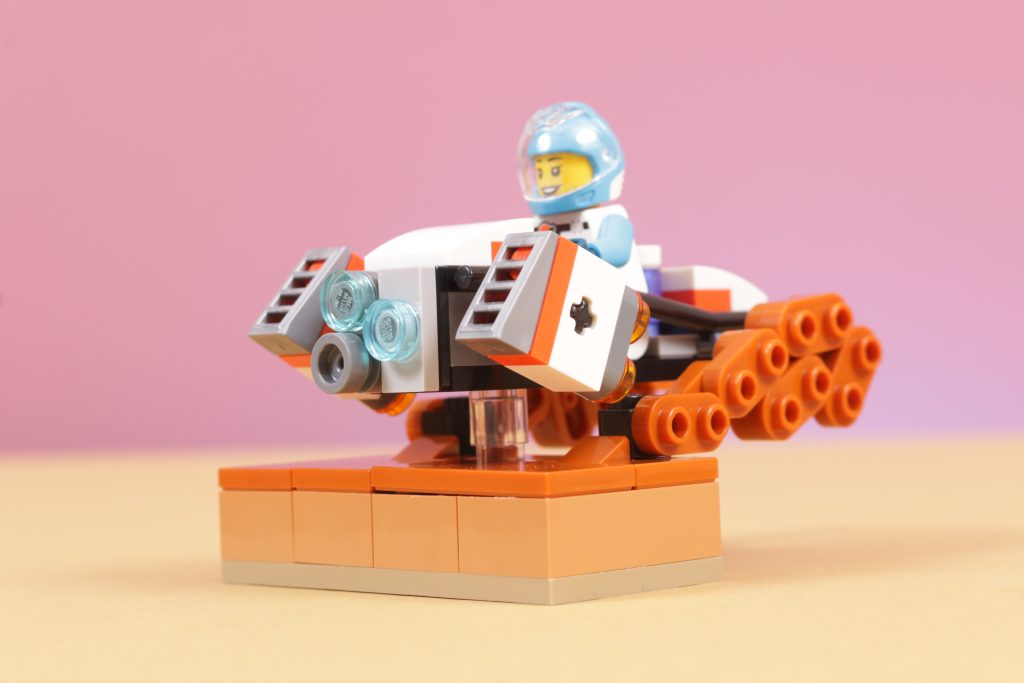
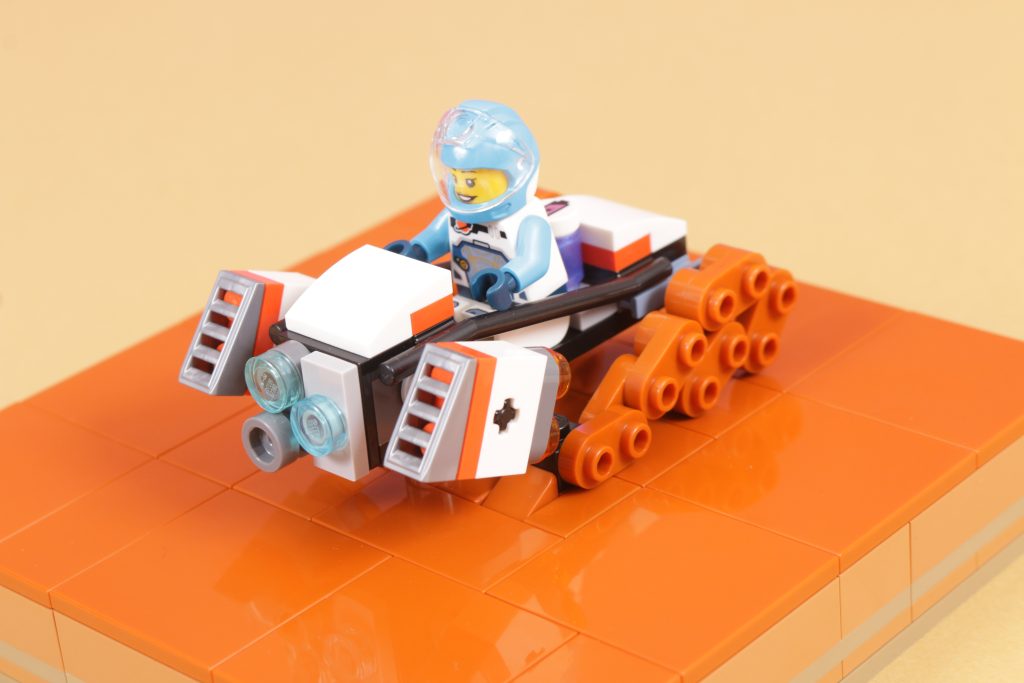
Story, and the opportunity to build from it, also comes from the official LEGO sets themselves too, beginning with the somewhat elusive 30663 Space Hoverbike. If it’s the fastest way to get around then you’d expect it to kick up a lot of dust as it speeds along the surface.
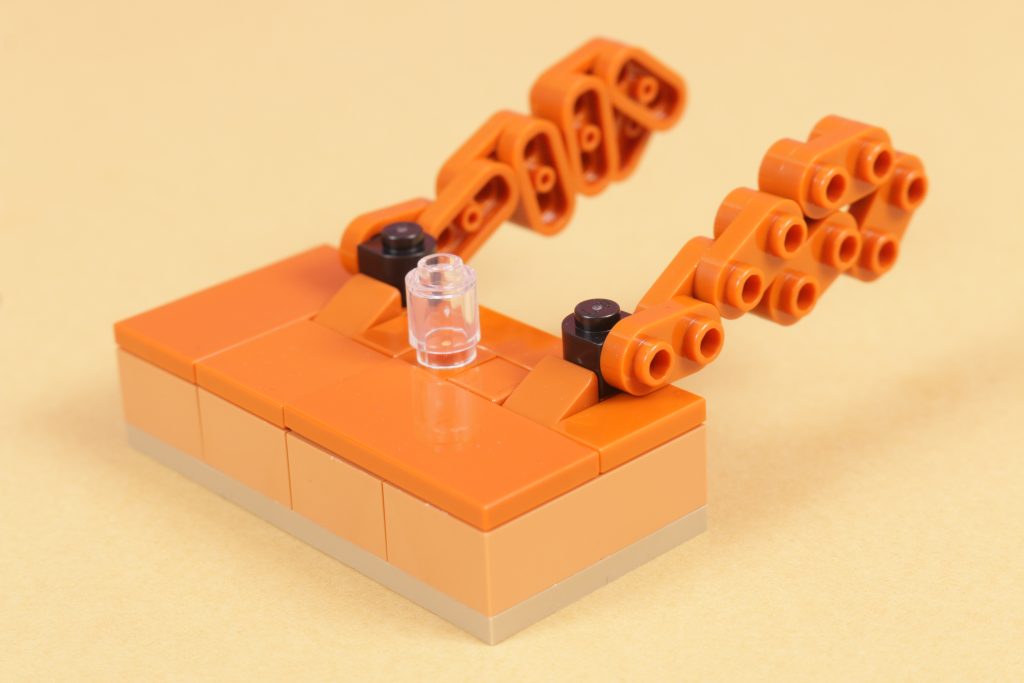
There are any number of ways to catch that in brick form, but we’ve chosen a simple construction using just 1×2 rounded plates, which thanks to the exposed studs and rounded shape begin to look like clouds of dust and sand being kicked up as the engines of the hoverbike rush by. Connecting these to a small base using bricks with studs on their side and then making sure that base again comes to the default height of the larger modular base gives you flexibility to place such a speeder wherever you want. Maybe they are speeding across a deserted landscape, or they are weaving between rocks, or they are charging away from something.
Key parts
| Image | Element name | Element number | Link |
|---|---|---|---|
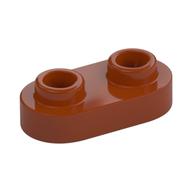 | PLATE 1X2, ROUNDED, NO. 1 | 6369194/35480 | Add to cart |
| PLATE 1X1X2/3, W/ 1 KNOB, ROUNDED | 6424674/3386 | Add to cart |
A home from home I
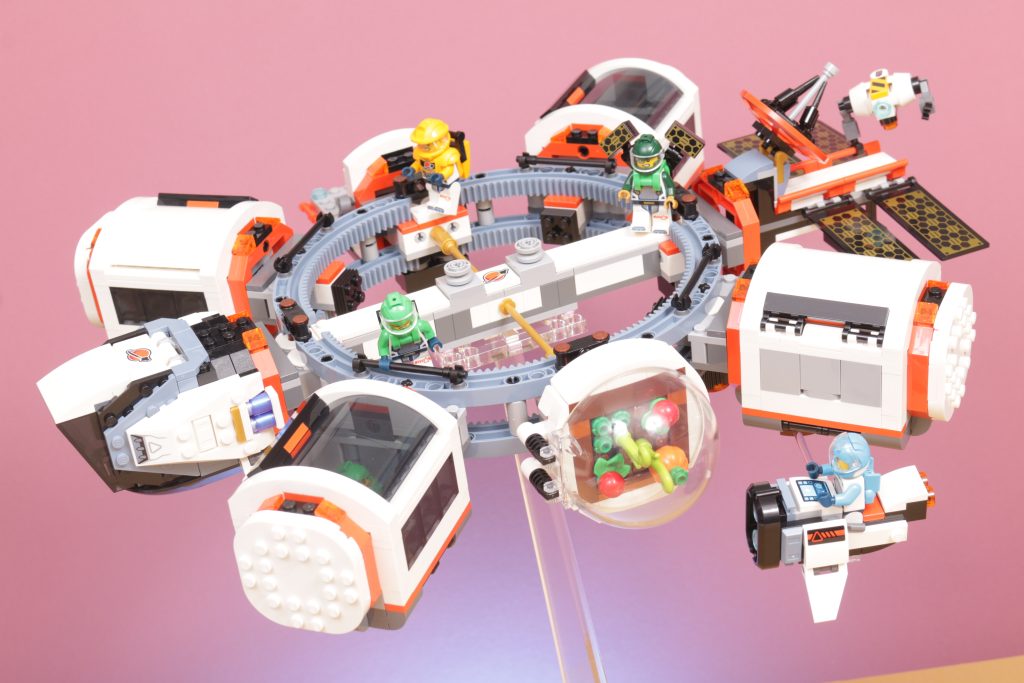
Looking more broadly across the Space City and Friends sets also offers up another potential story point, based around the modular pods that appear in more than one of the sets and have been designed to be compatible with almost all of them.
These pods appear in 60434 Space Base and Rocket Launchpad as part of the rocket and as an extension to the central base, and can be added to 60439 Space Science Lab just the same. You get one that slots into the middle of 60432 Command Rover and Crane Loader to serve as a portable research lab, while the one included in 42605 Mars Space Base and Rocket also serves either as part of the rocket or as an extension to the space base. 42602 Space Research Rover also has capacity to transport one of these pods on its back, while even the trio of Technic sets carry a hint of compatibility with these pods. Finally, 60433 Modular Space Station’s entire identity is based around the modularity of these pods and their multi-use purpose, as its circular design holds four of them in place.
In short, the pods are very clearly established as playing an important part in our astronauts’ lives across most of the Space-themed sets. They offer up a mix of research, recreation and living quarters for them, and if that’s the case across different vehicles and bases, then by extension their everyday use would continue on the planet’s surface as the astronauts establish themselves. The large space bases we have in more than one of the official sets are brilliant central hubs for the characters, but for smaller, faster operations that can establish presence on the surface faster and more efficiently, there’s no looking beyond these very versatile pods.
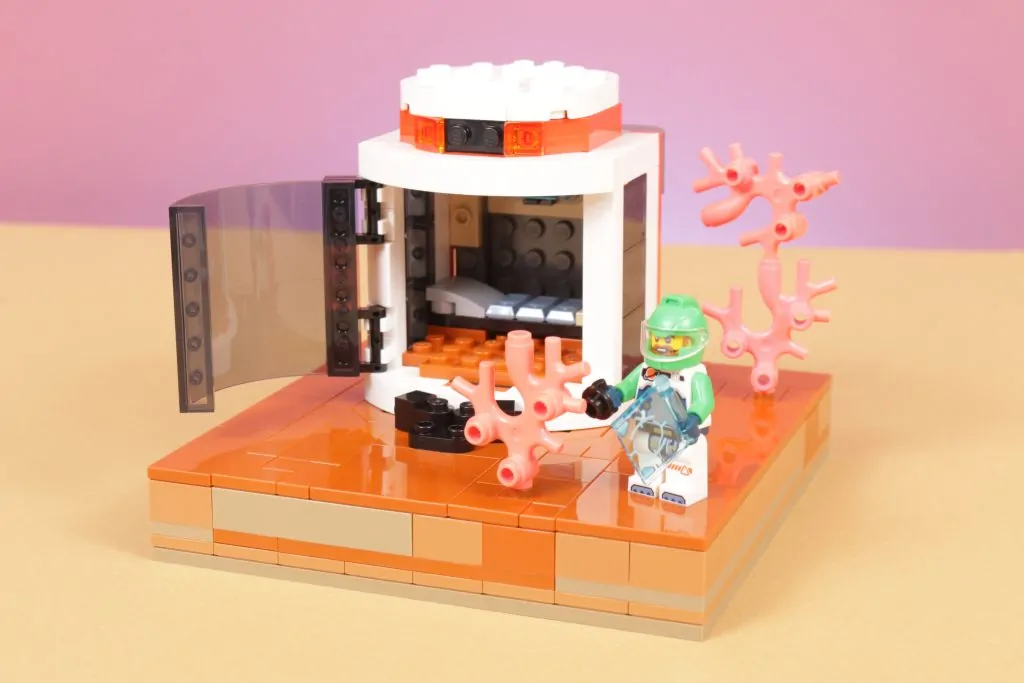
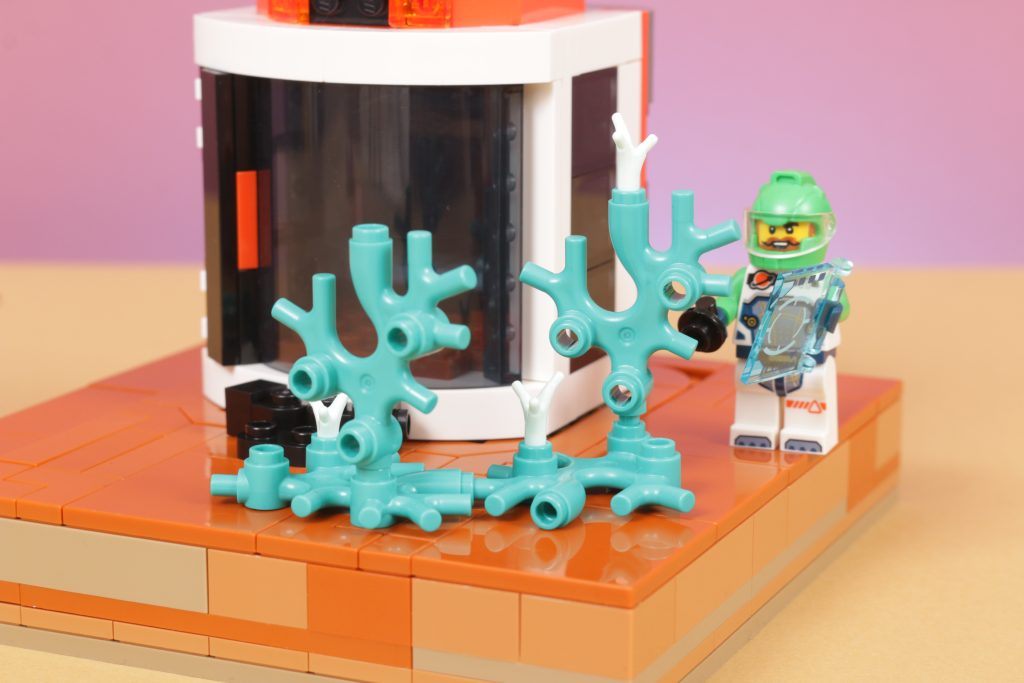
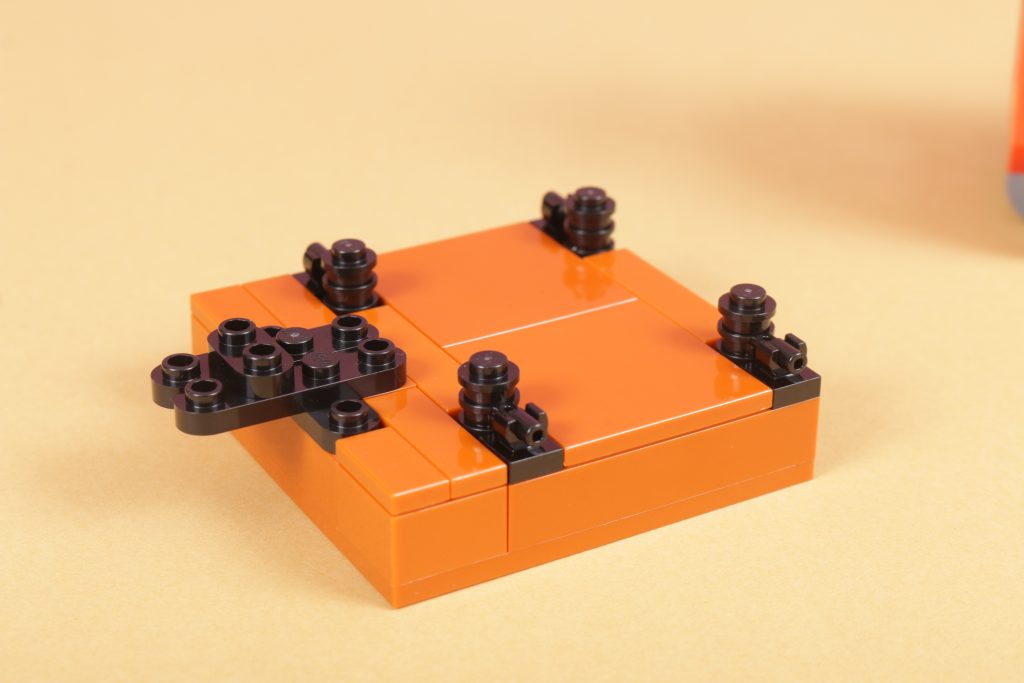
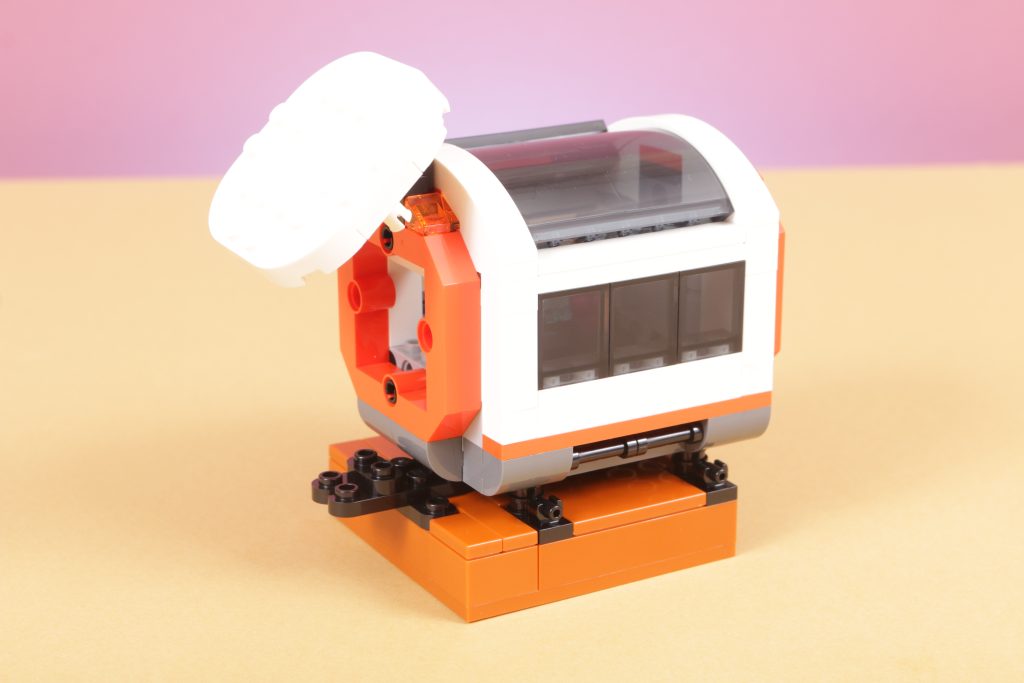
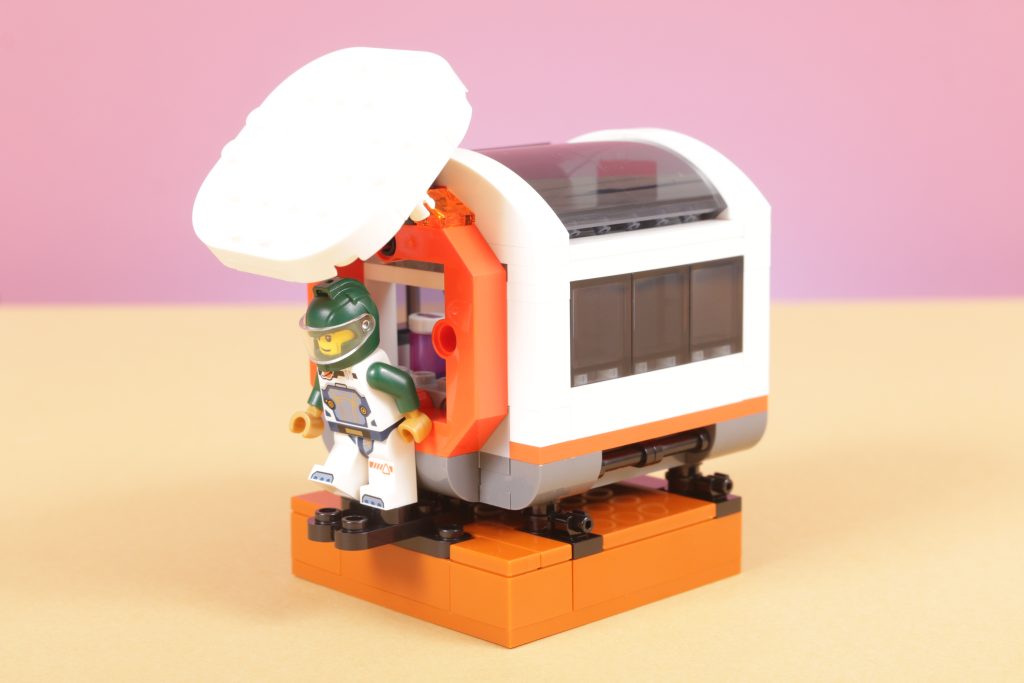
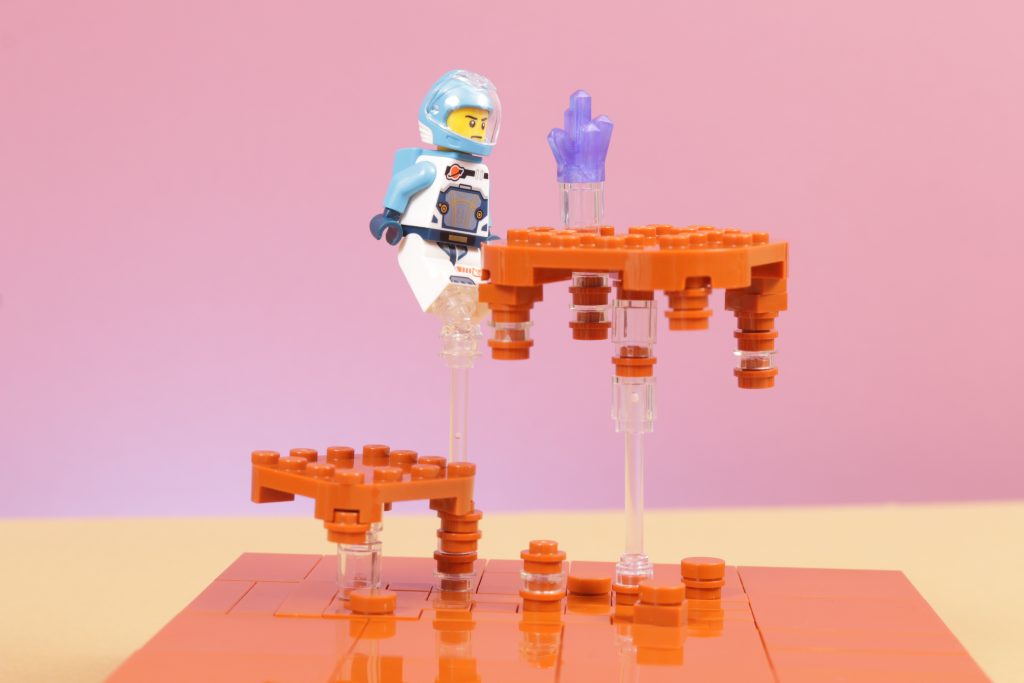
One very quick and simple build involves a handful of black parts to serve as a basic support frame for a pod to sit slightly suspended above the ground. Add some steps at the front and a little construct to hold the end door of the pod open and you have an accessible version of a pod that can sit on the planet’s surface and be used for whatever appropriate purpose in work or recreation when on an alien world.
Key parts
| Image | Element name | Element number | Link |
|---|---|---|---|
| PLATE 1X1 ROUND W/ HORIZONTAL 3.2 SHAFT | 6196548/32828 | Add to cart | |
 | PLATE 1X4, ROUNDED, NO. 1 | 6428167/77845 | Add to cart |
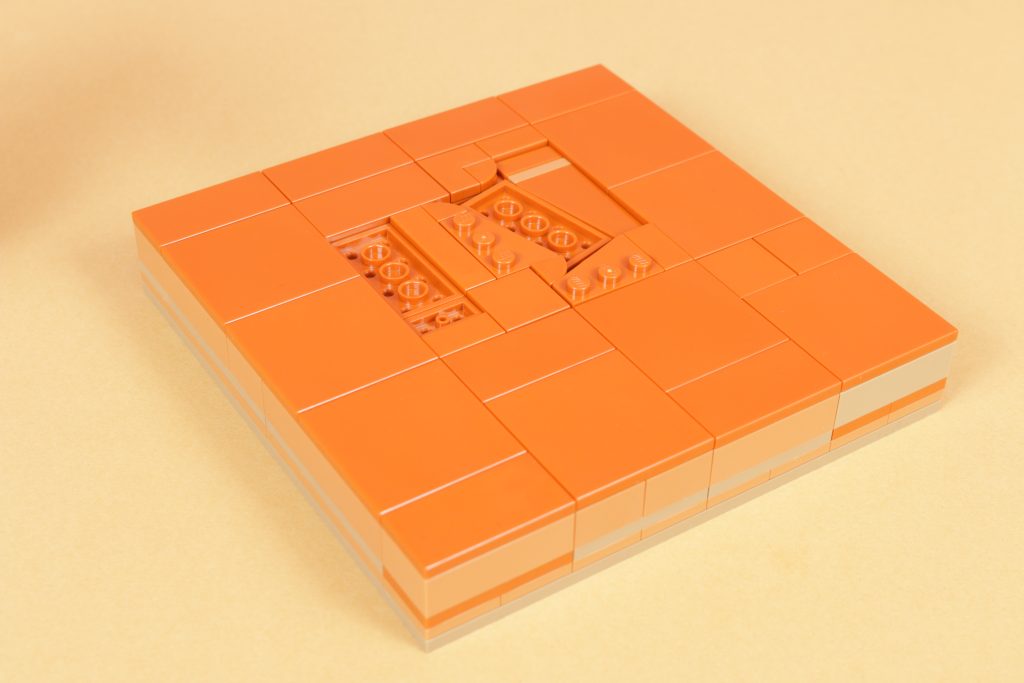
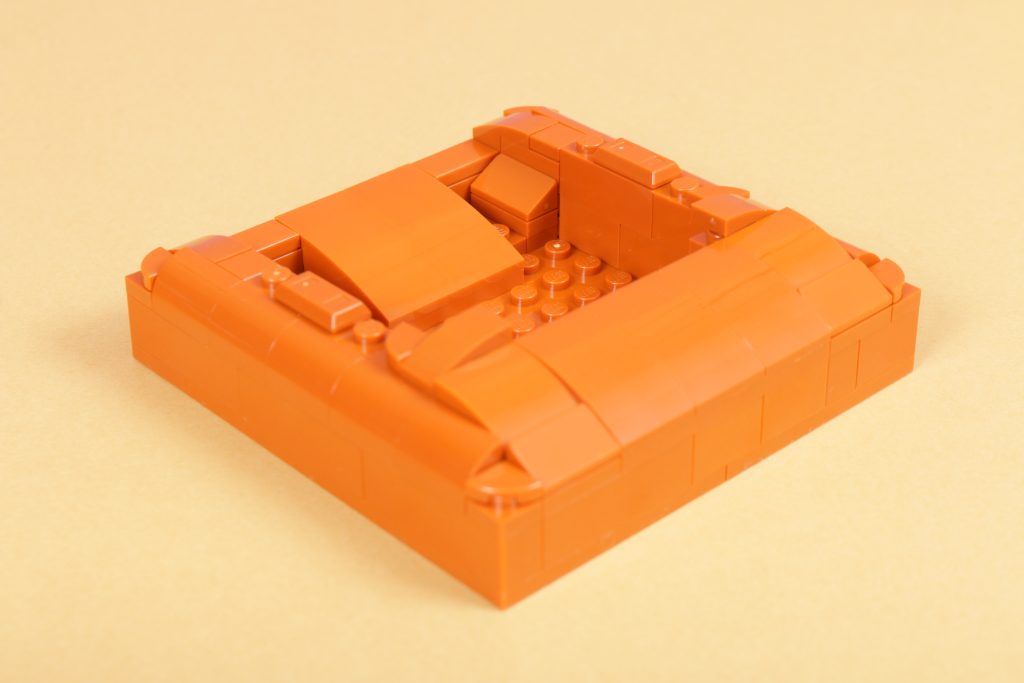
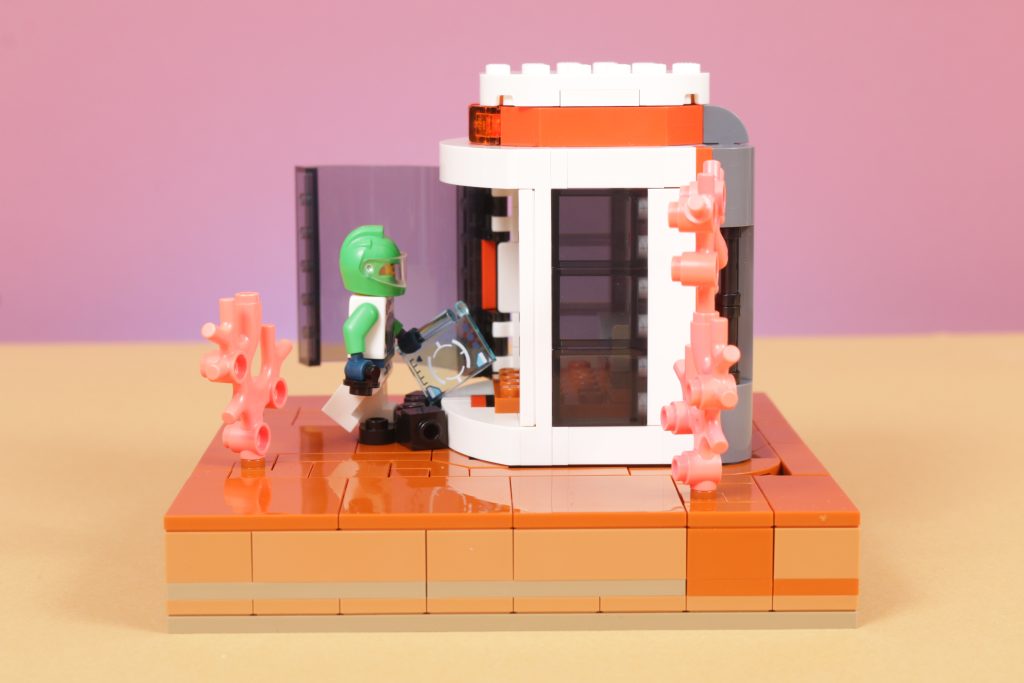
A home from home II
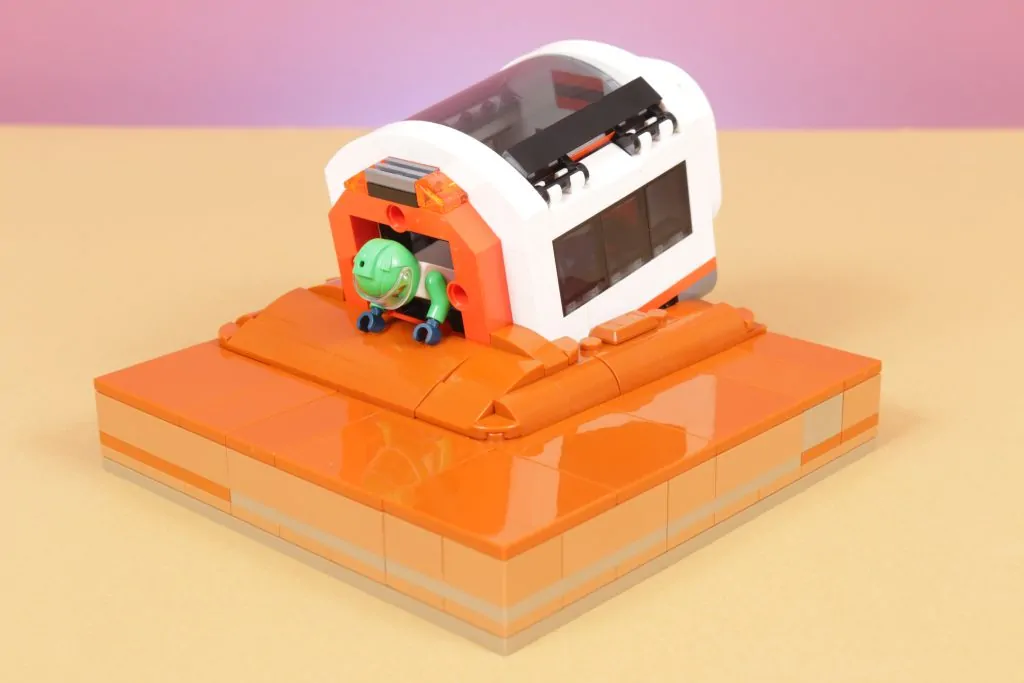
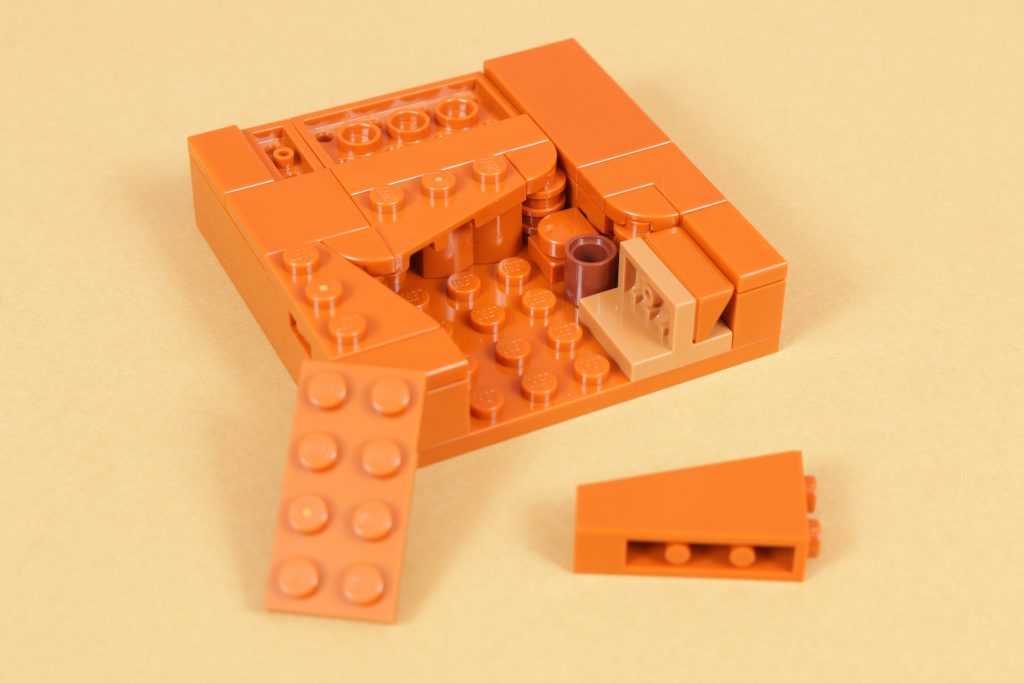
However, what if in transporting these pods one falls off a rover, or is dropped from a height into the sand, or perhaps has been set down on unsteady land? It could sink into the ground at an angle and end up being stranded or abandoned, perhaps with an unfortunate astronaut inside too.
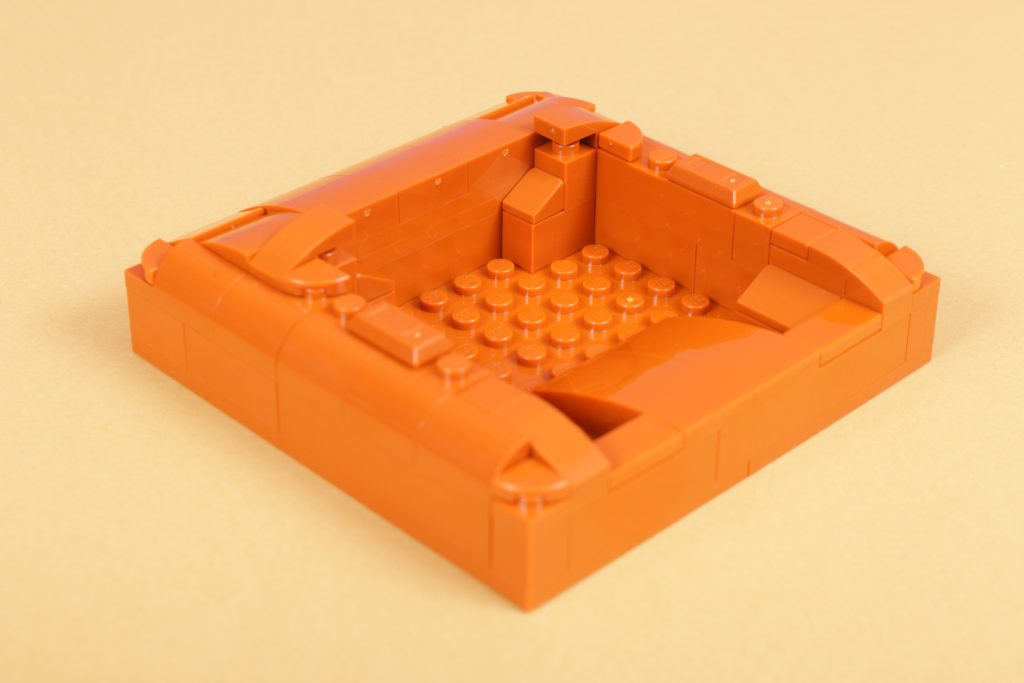
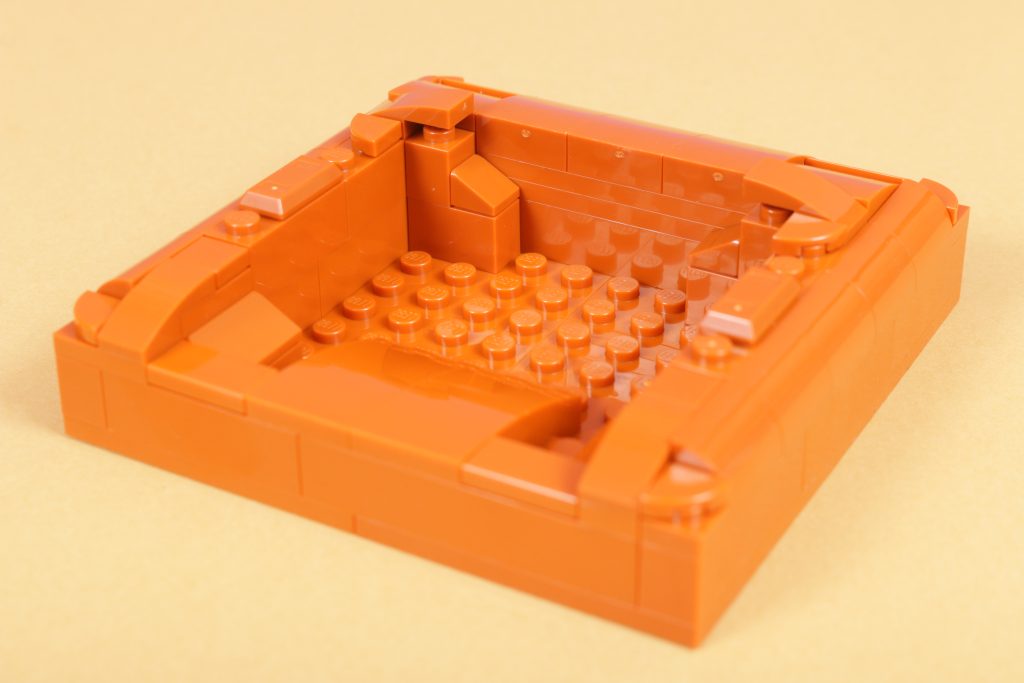
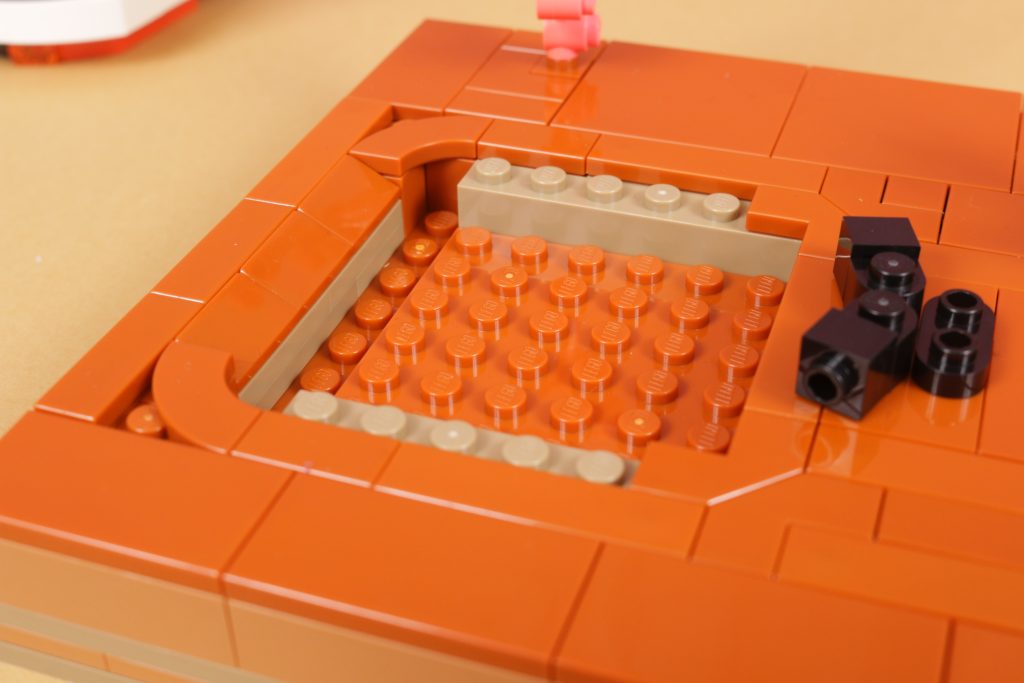
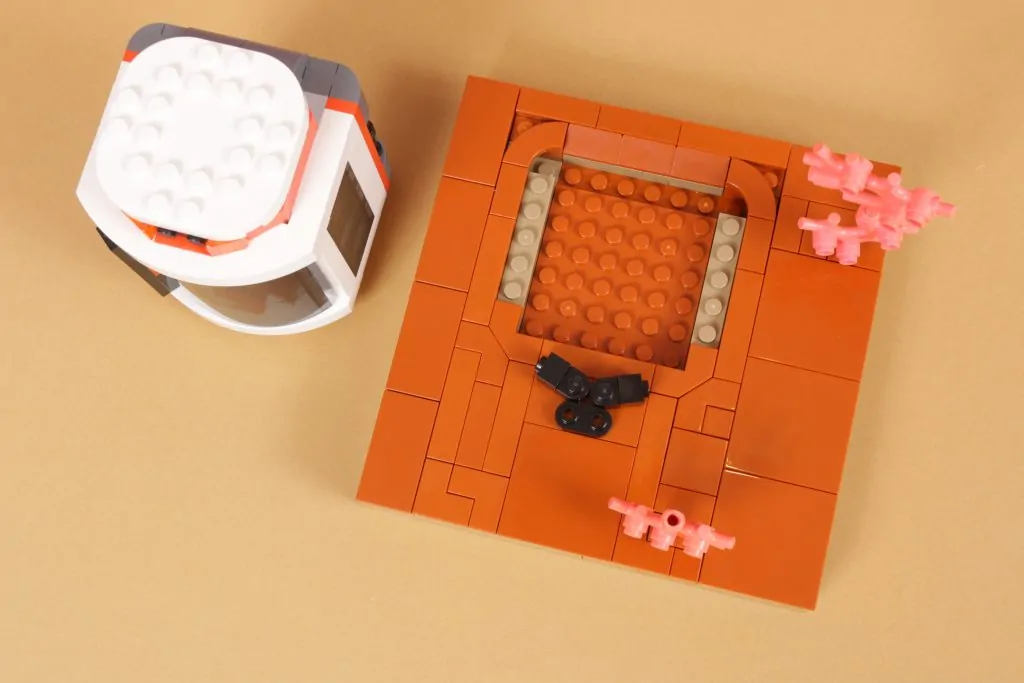
Using the depth of the modular base approach that we have been using through this project we can make such an effect possible, starting simply by cutting down into the base and removing a chunk of bricks. The pod can then sit in this space, rather than attach to it. Then, the angle of lean that we want to create is achieved by supporting the one side of the pod’s underside with some large slope pieces.
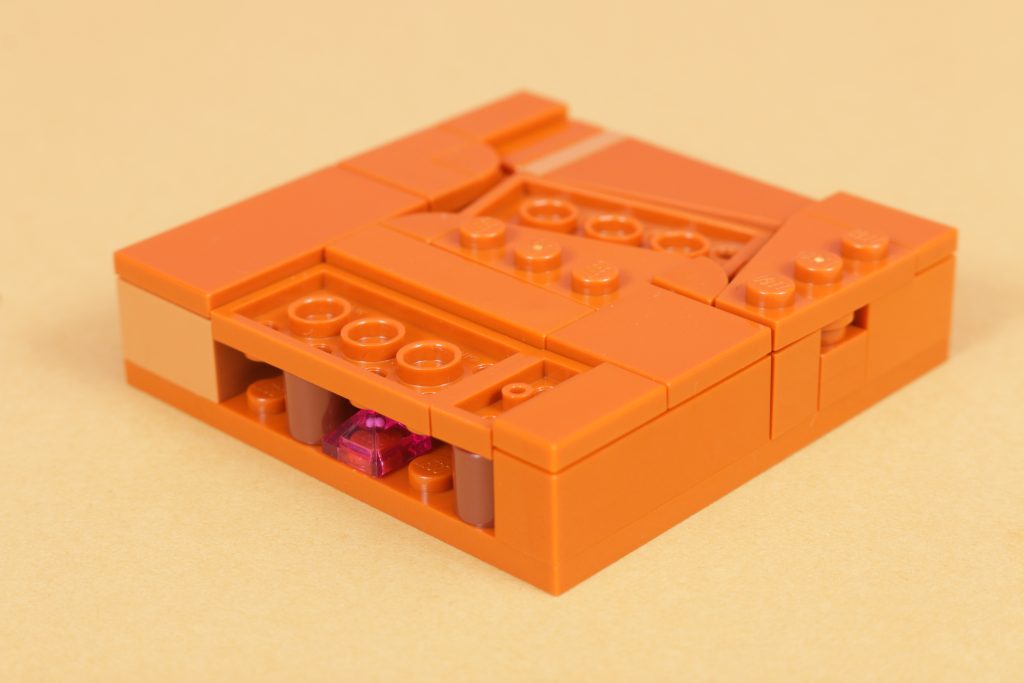
Once you are happy with the lean, build around the rest of the pod to hold it in place (the pods are eight studs wide so it will perfectly sit within an eight-stud-wide space), in effect creating the sand that it visually appears to have sunk into, before finishing this with wedges and slopes that angle downwards from the pod towards the same height as the rest of the modular base. Swap it into a scene and you now have that stranded, abandoned pod, completed with an unfortunate astronaut inside too.

Key parts
| Image | Element name | Element number | Link |
|---|---|---|---|
 | PLATE W. BOW 2X2X2/3 | 6104344/15068 | Add to cart |
 | BRICK 1X2, OUTSIDE HALF BOW | 6404661/37352 | Add to cart |
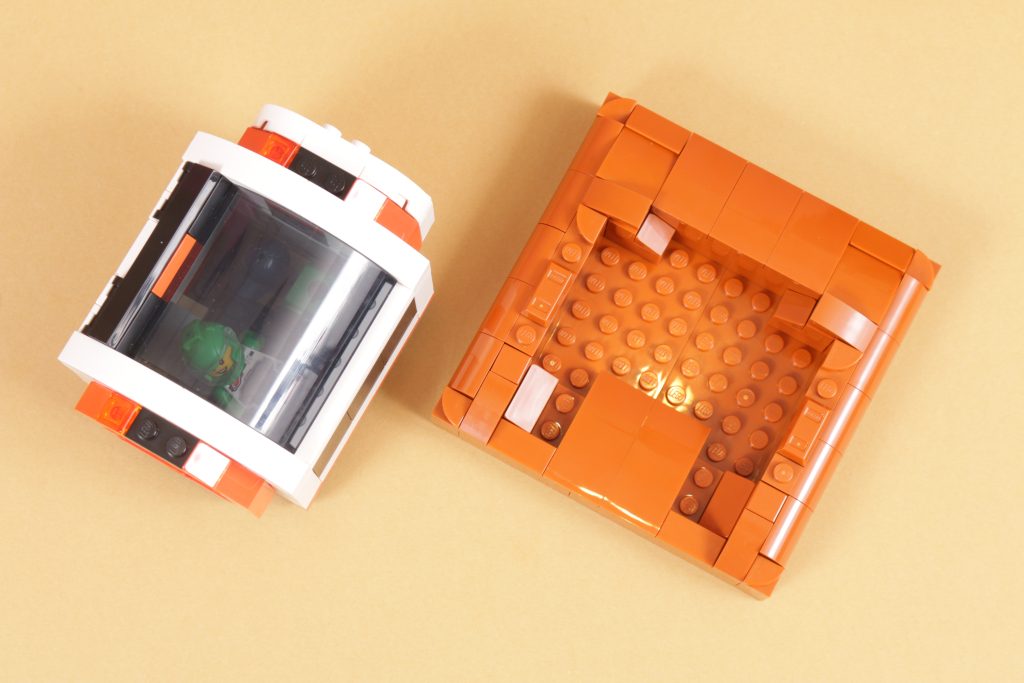
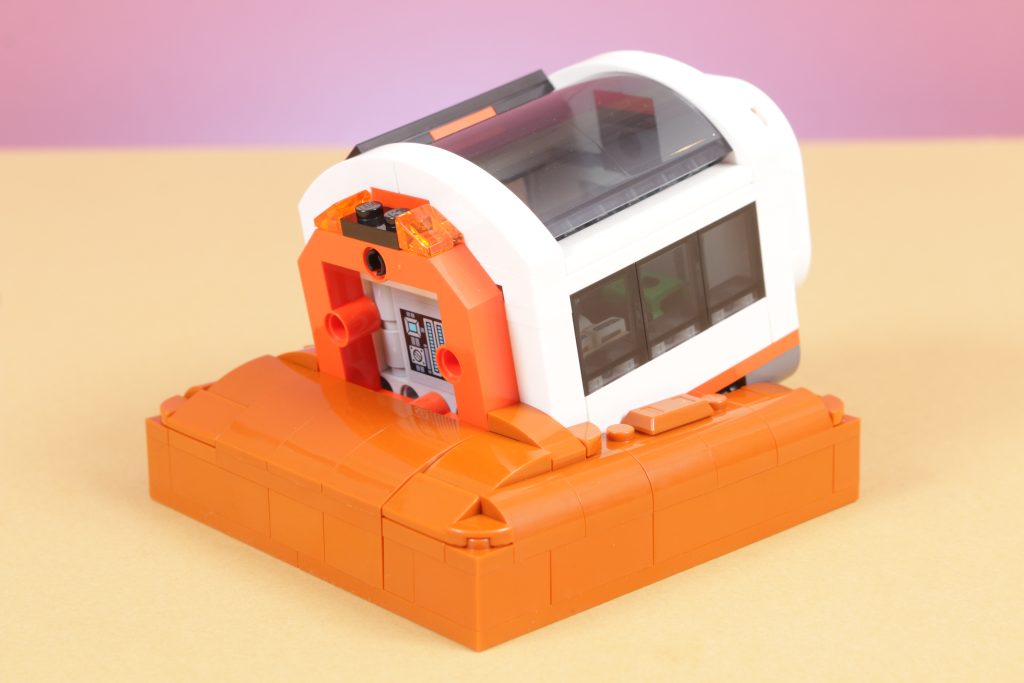
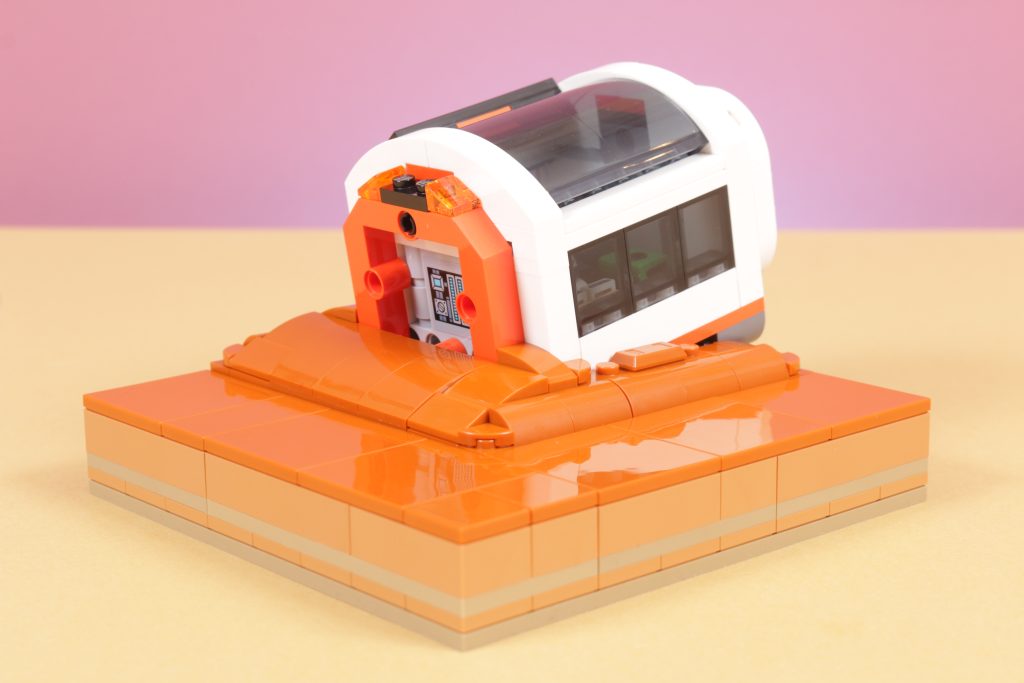
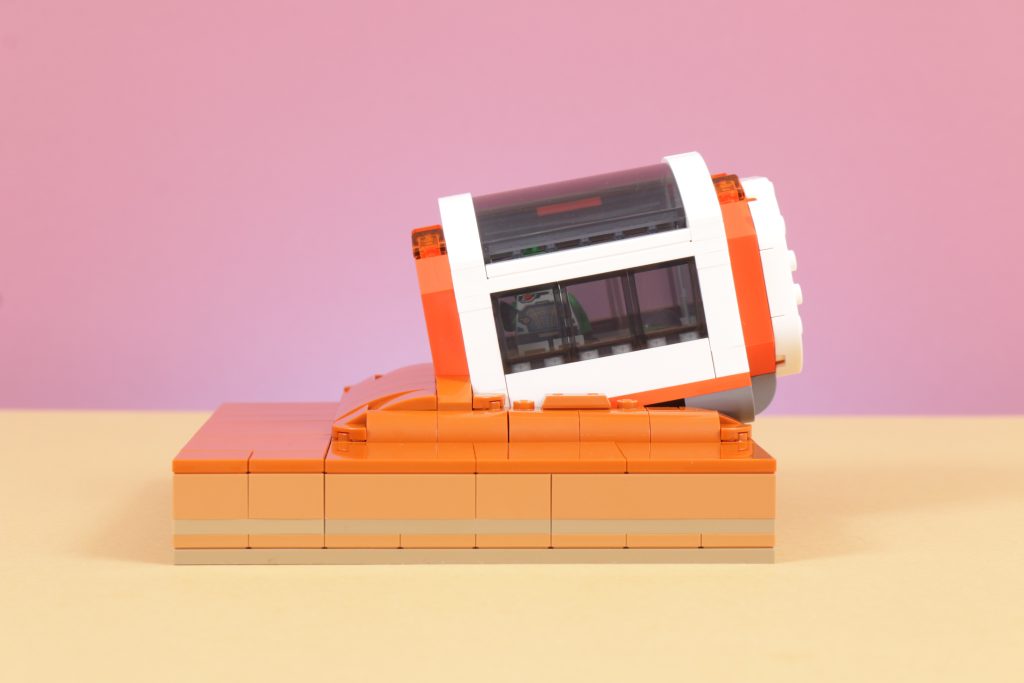
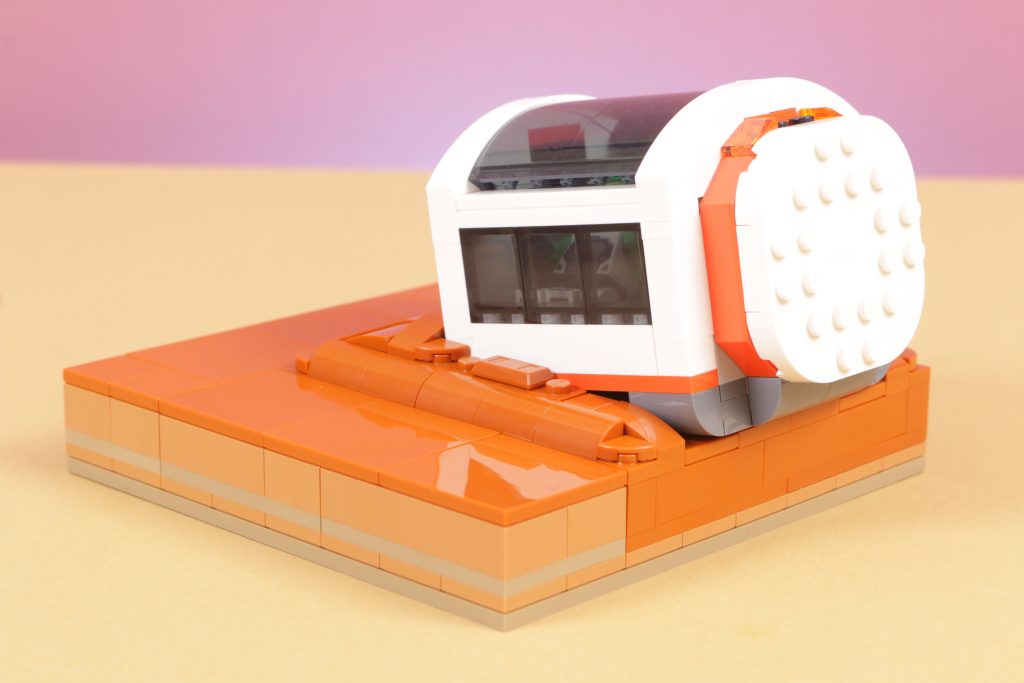
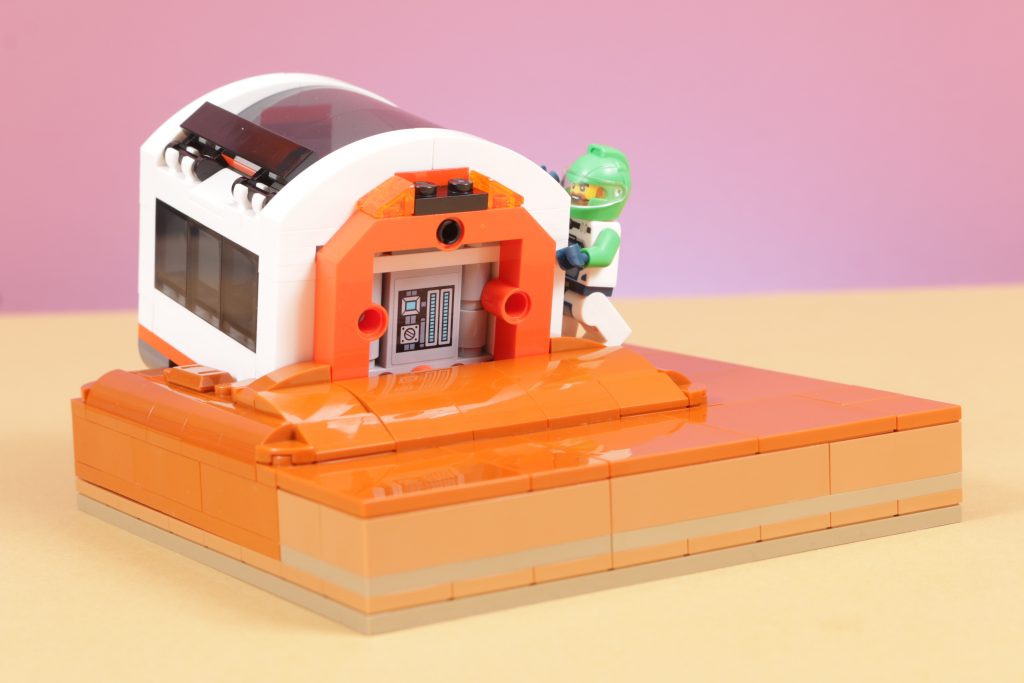
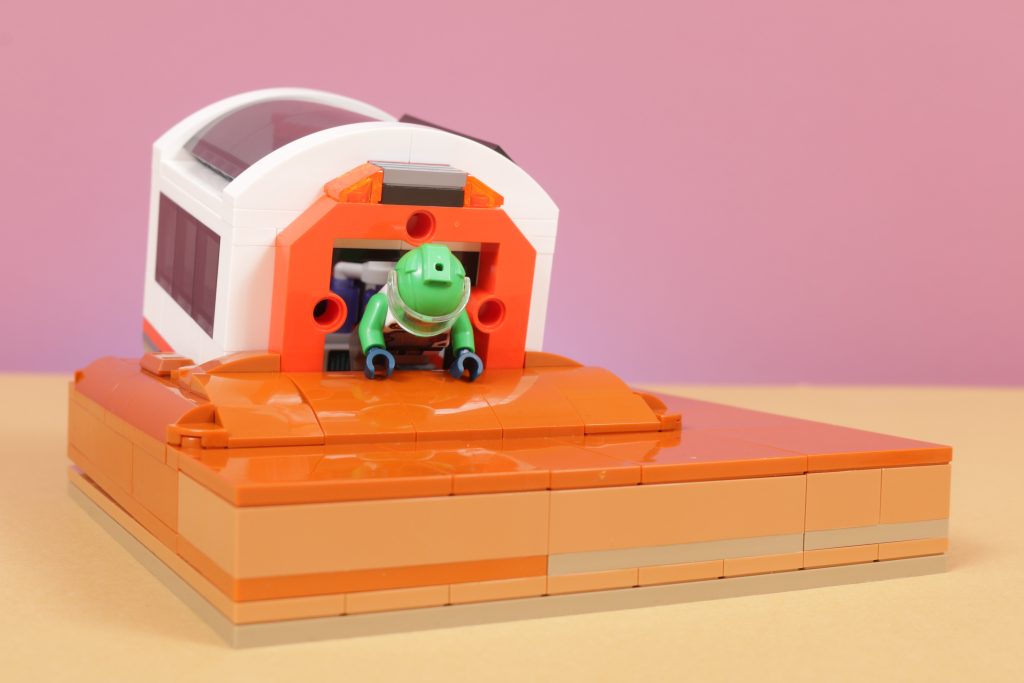
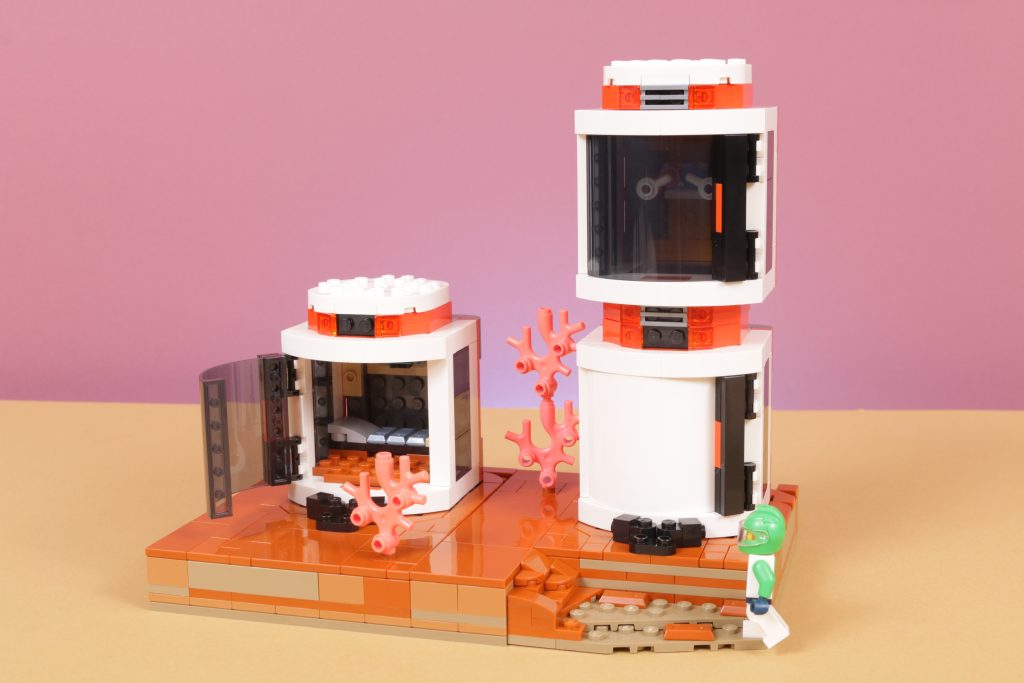
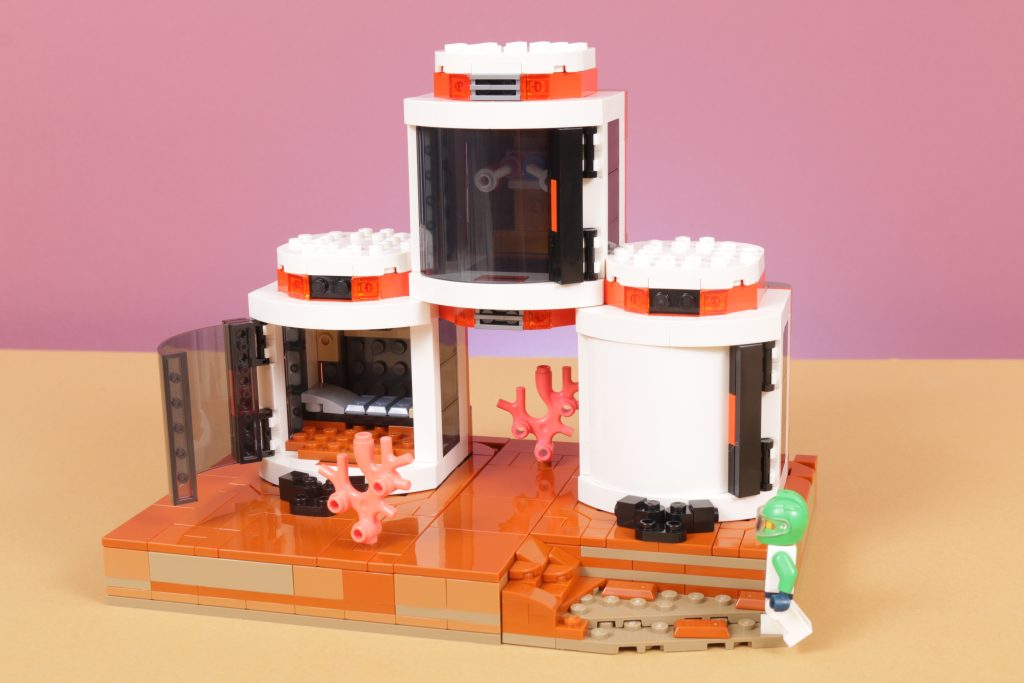
A home from home III
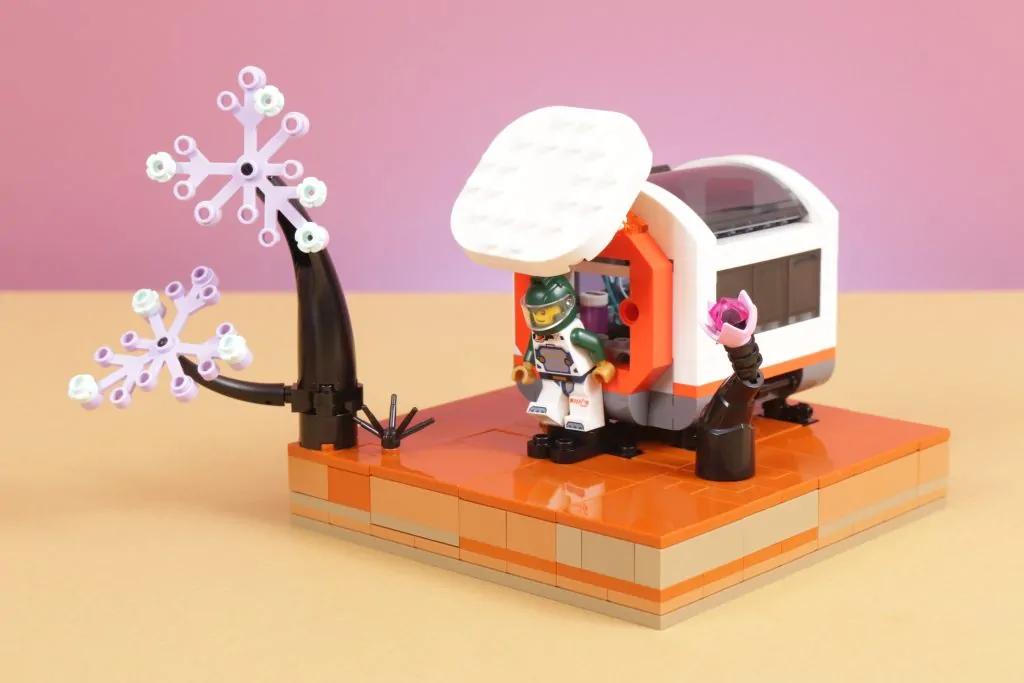
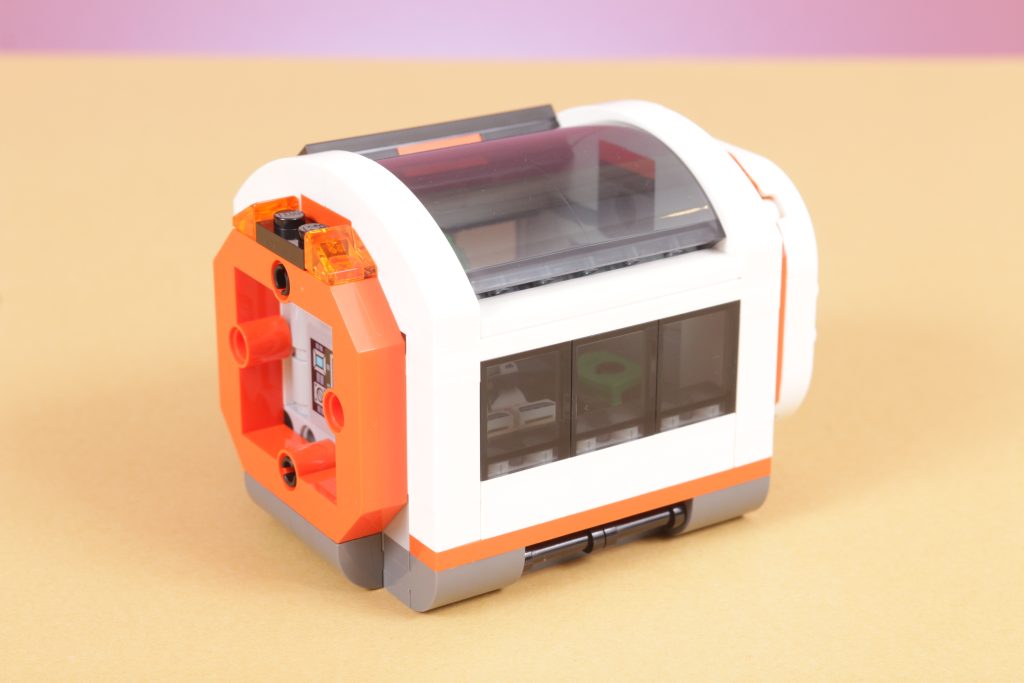
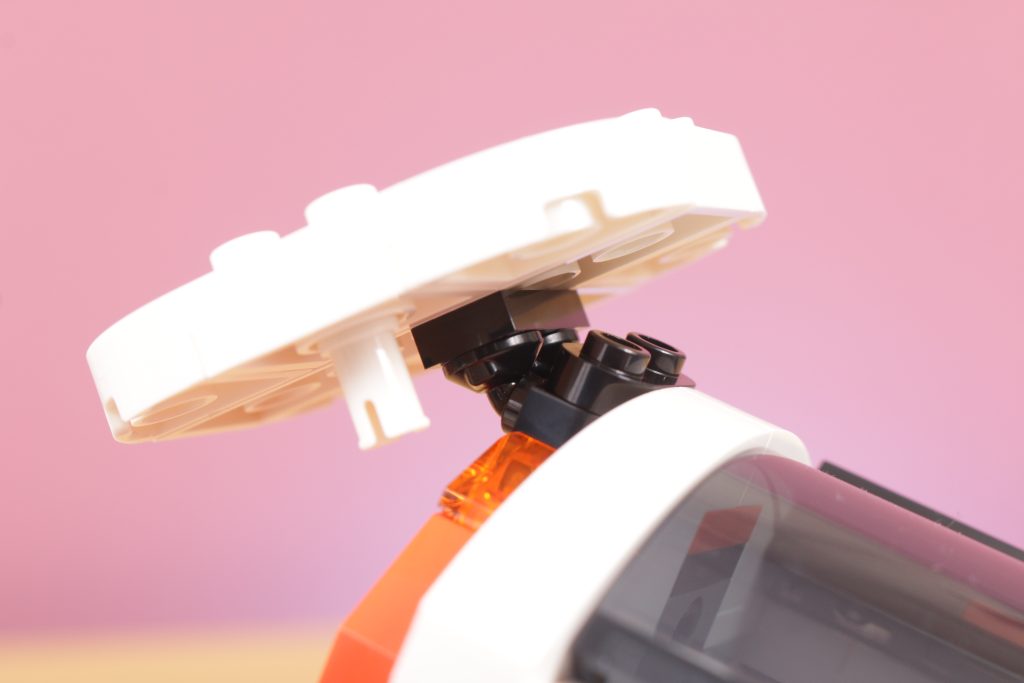
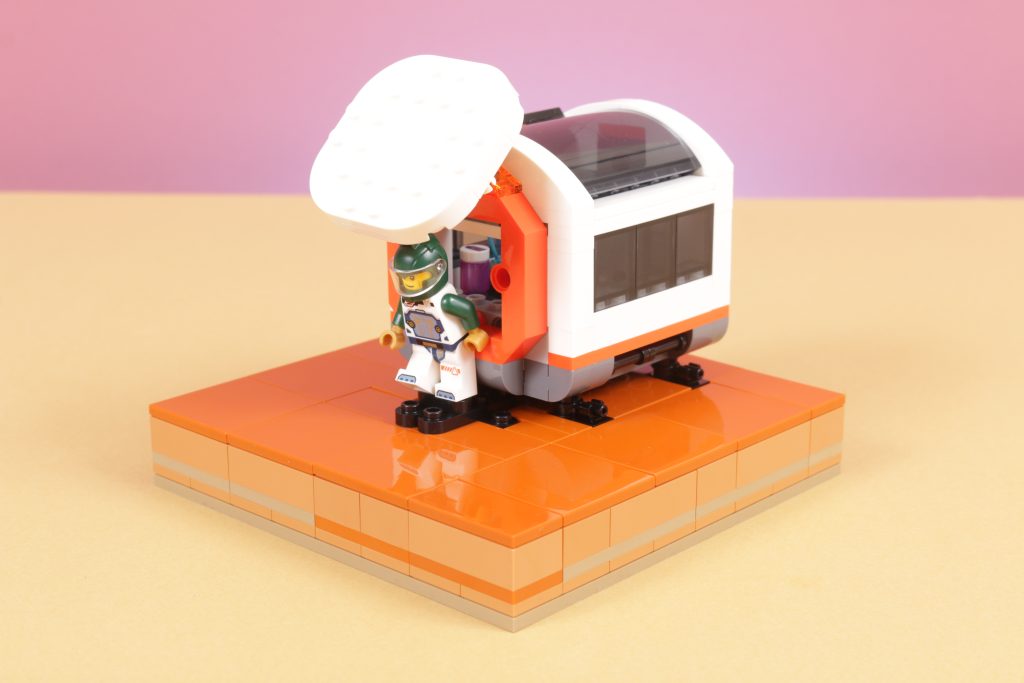
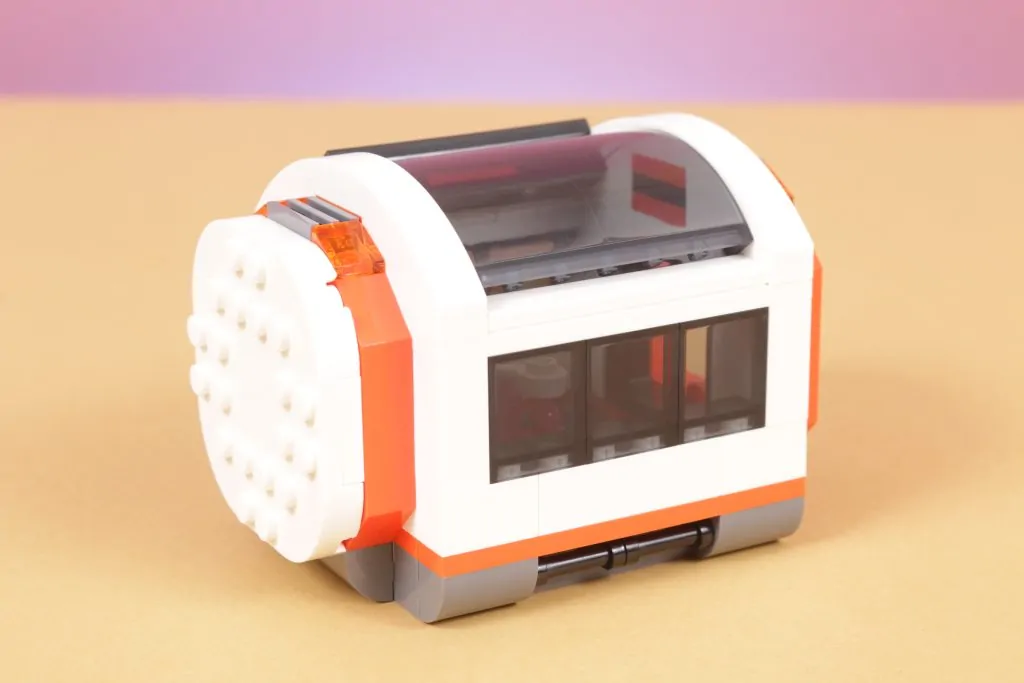
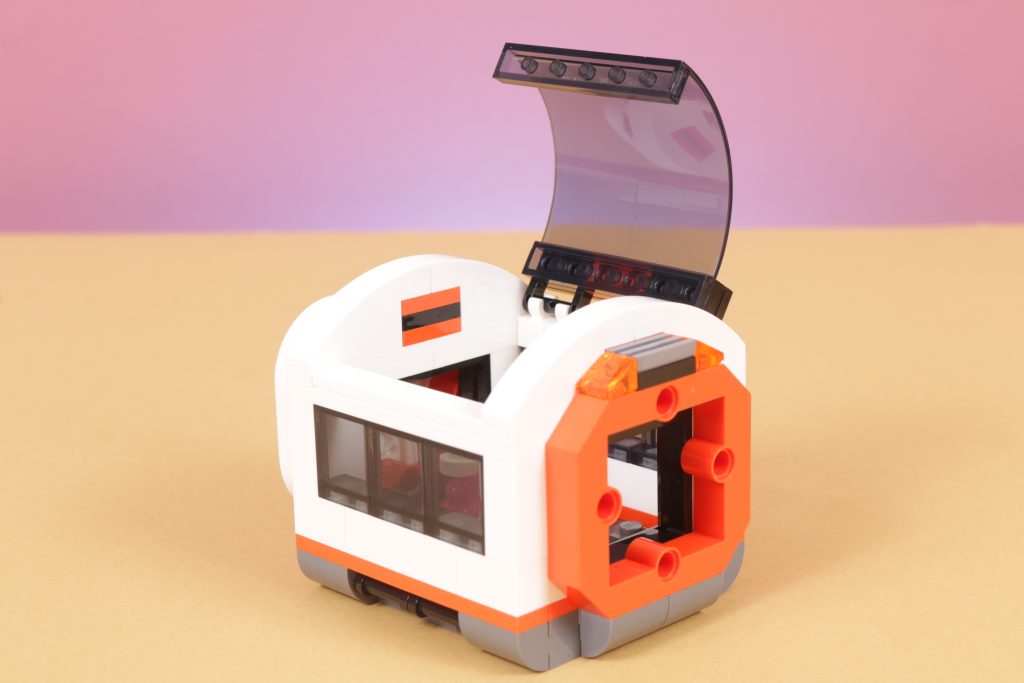
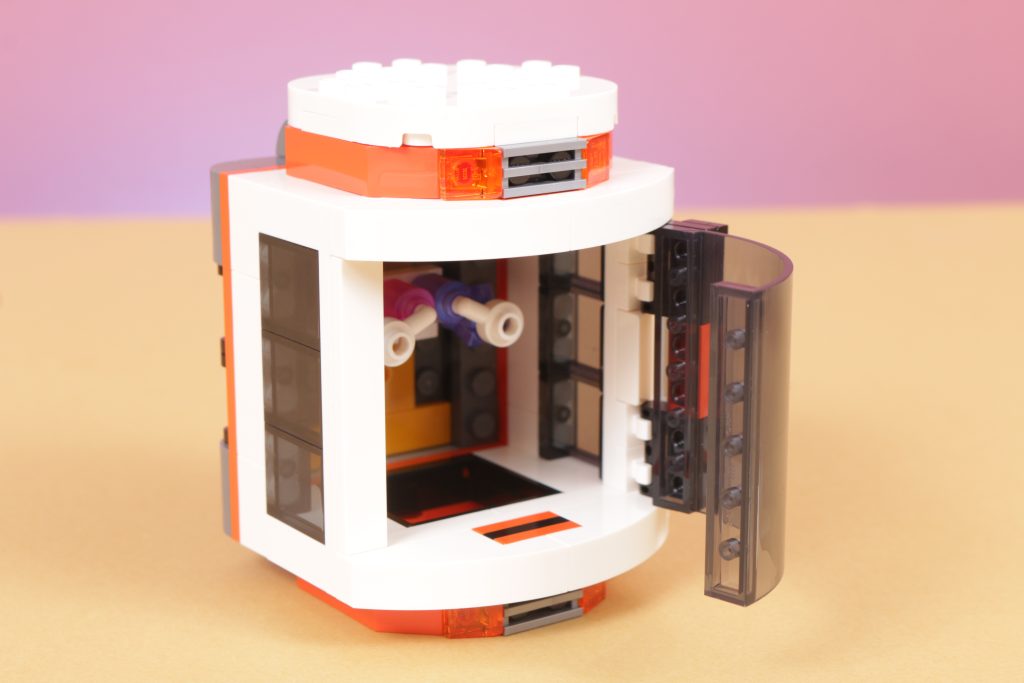
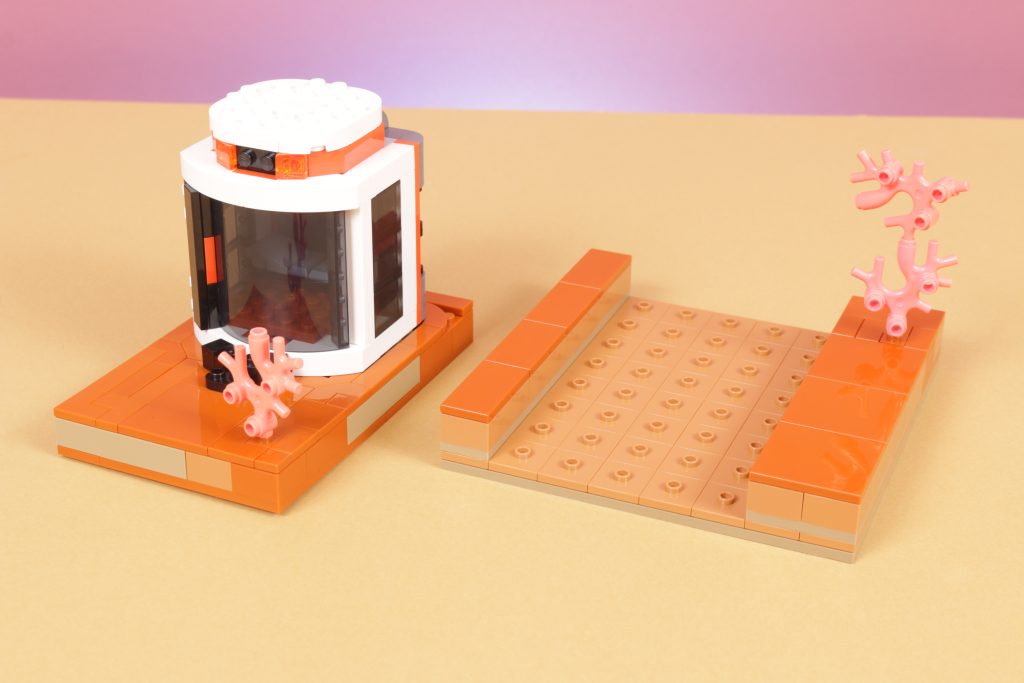
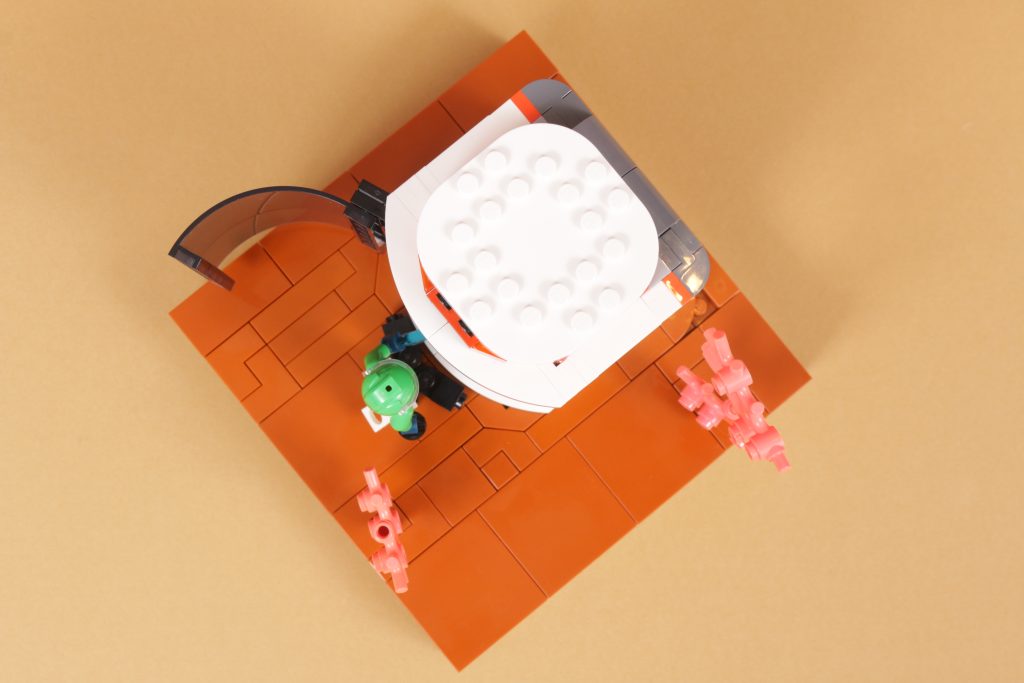
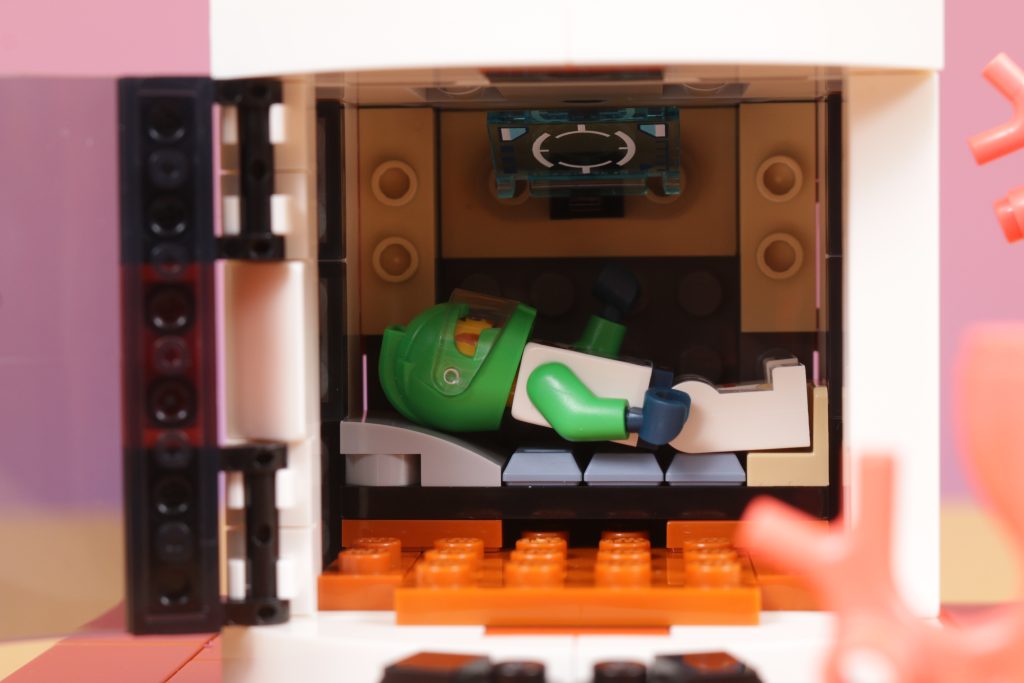
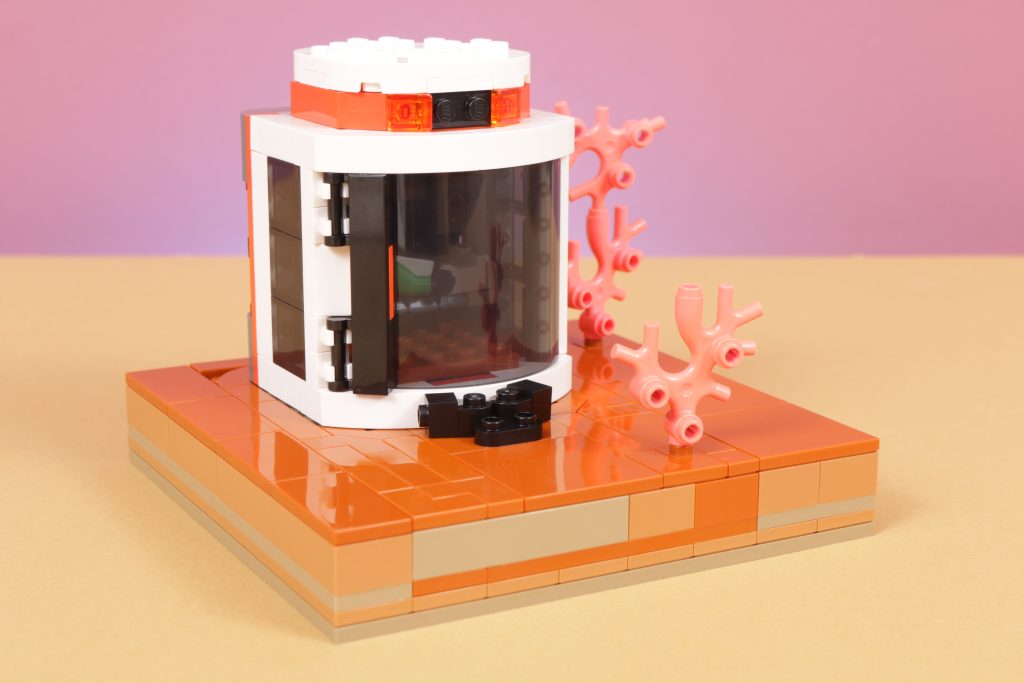
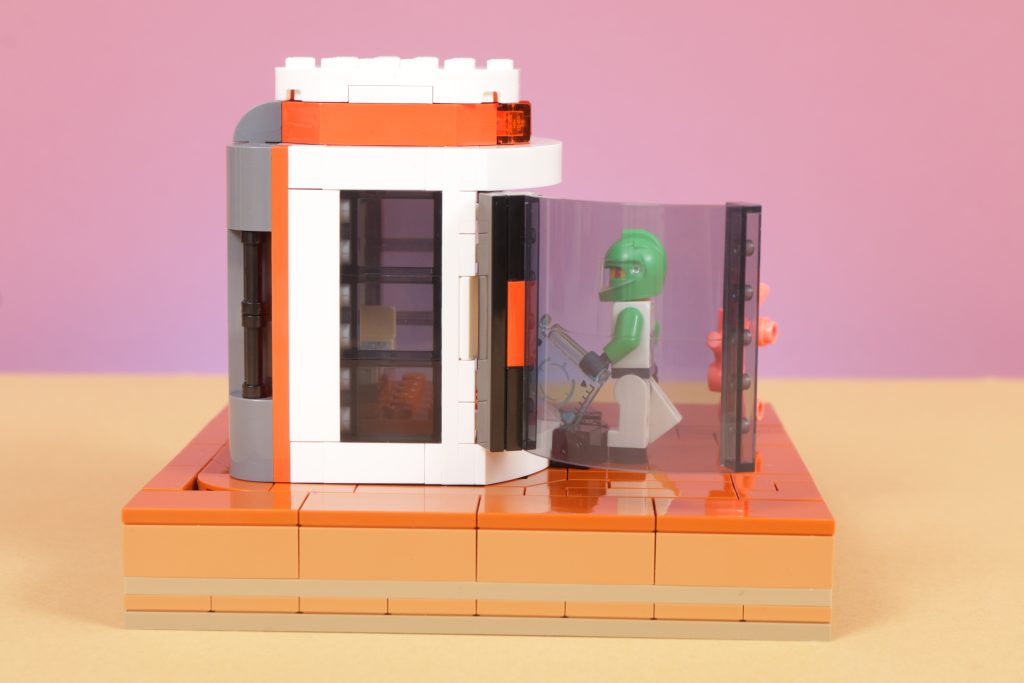
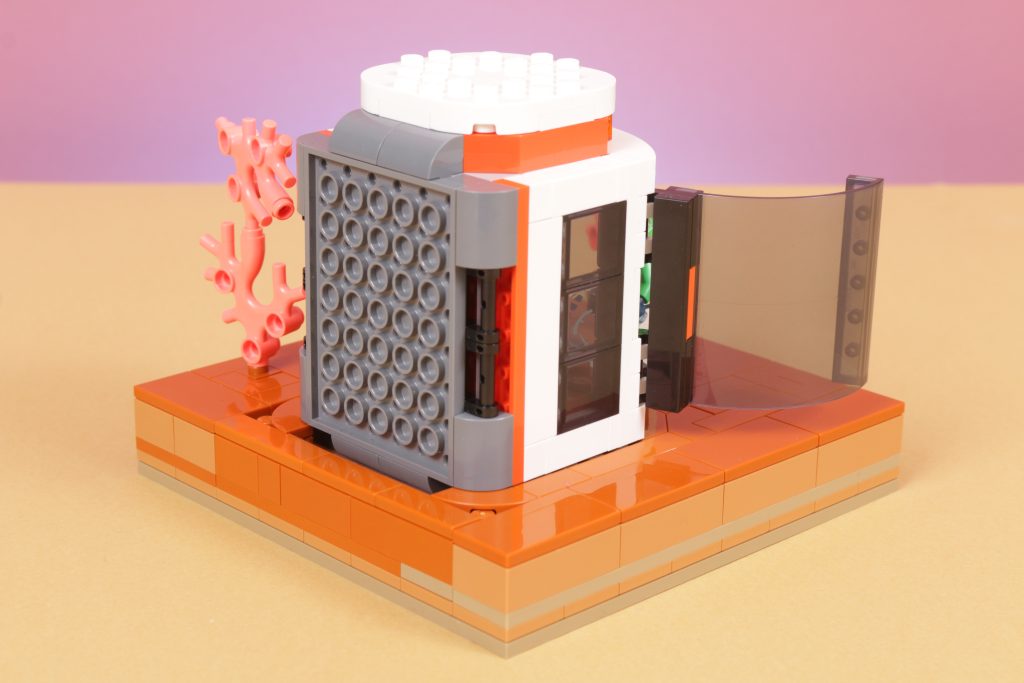
These pods, however, don’t have to stay as they are. They don’t have to sit lengthways and we would pitch one third build idea to give them new life and offer a bit of relief for those of you with larger hands and fingers. The pods are initially put together in a way that official access for the astronauts is through the orange doorways at either end. However, the largest access point into each pod is via a hinged window at the top, to allow us humans to place the minifigures in. Access is officially through the end, but almost always via the top.
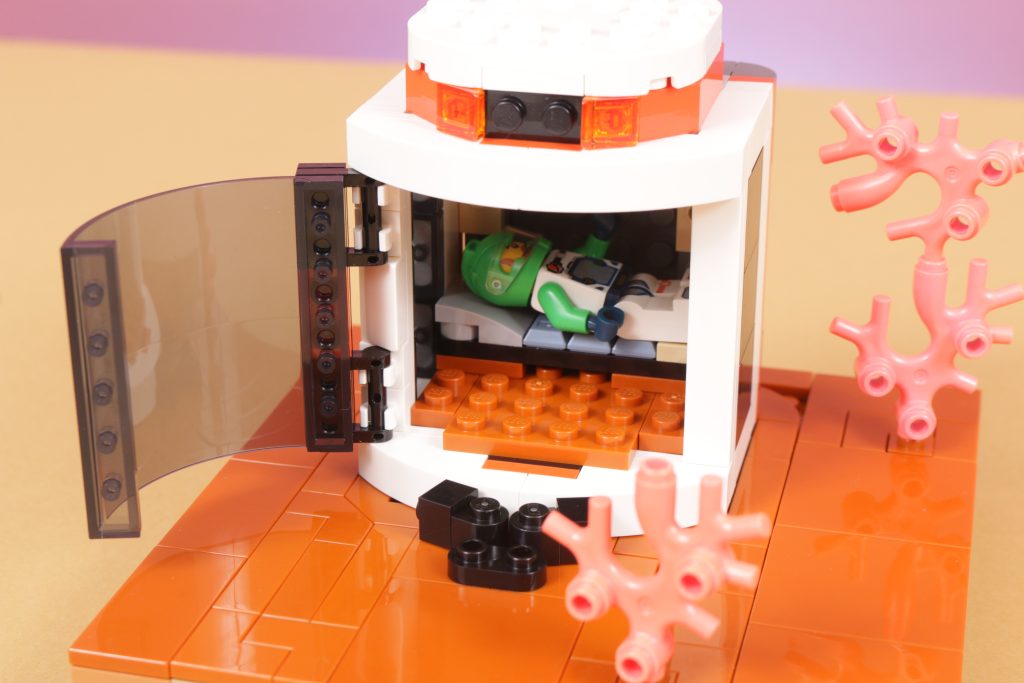
Placing the pods on their side and rejigging the inside a tiny bit can transform the pods and combine both human and minifigure access to the large hinged window. What was a large, unofficial opening at the top of each pod is now a large, official doorway into each pod.
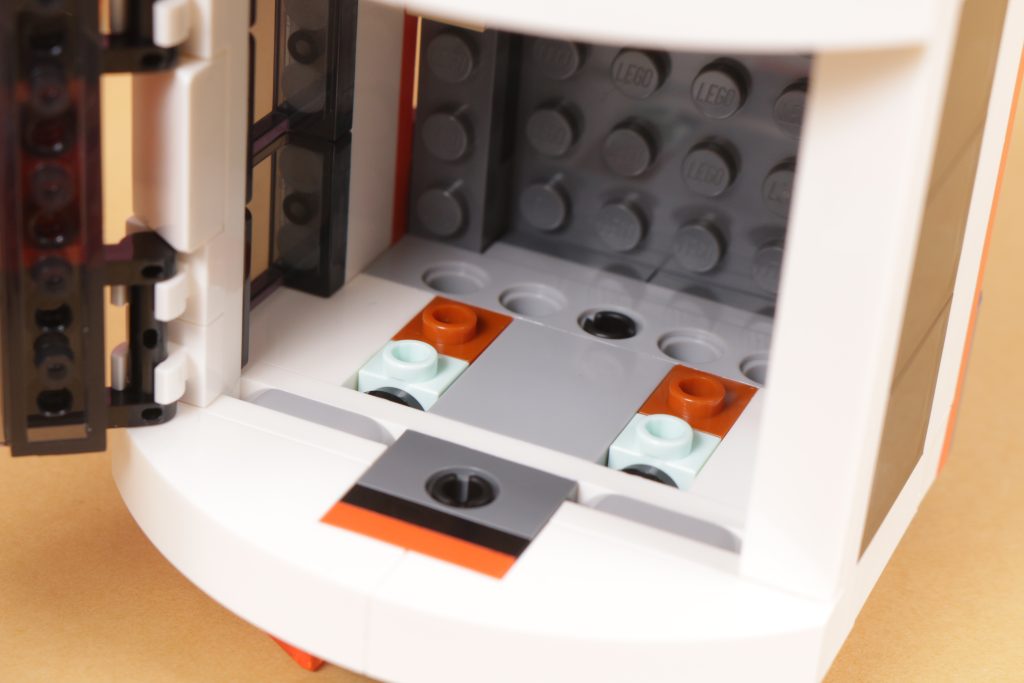
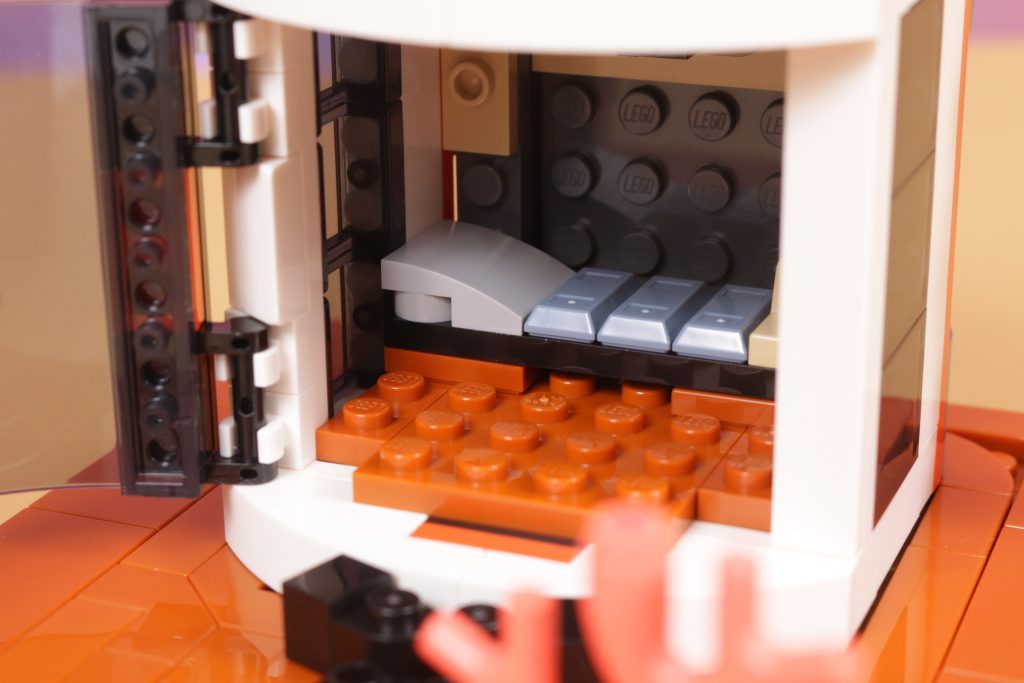
Popping out a few bricks at one end of a pod and replacing them with bricks with studs on one side, with those side studs pointing up and into the pod is the secret here, as you can then attach a baseplate to the inside (a 4×6 fits nicely – we chose dark orange to reflect the sand being traipsed into the pod from outside) and then you can rearrange the rest of what’s inside the pod to better reflect the new, vertical layout.
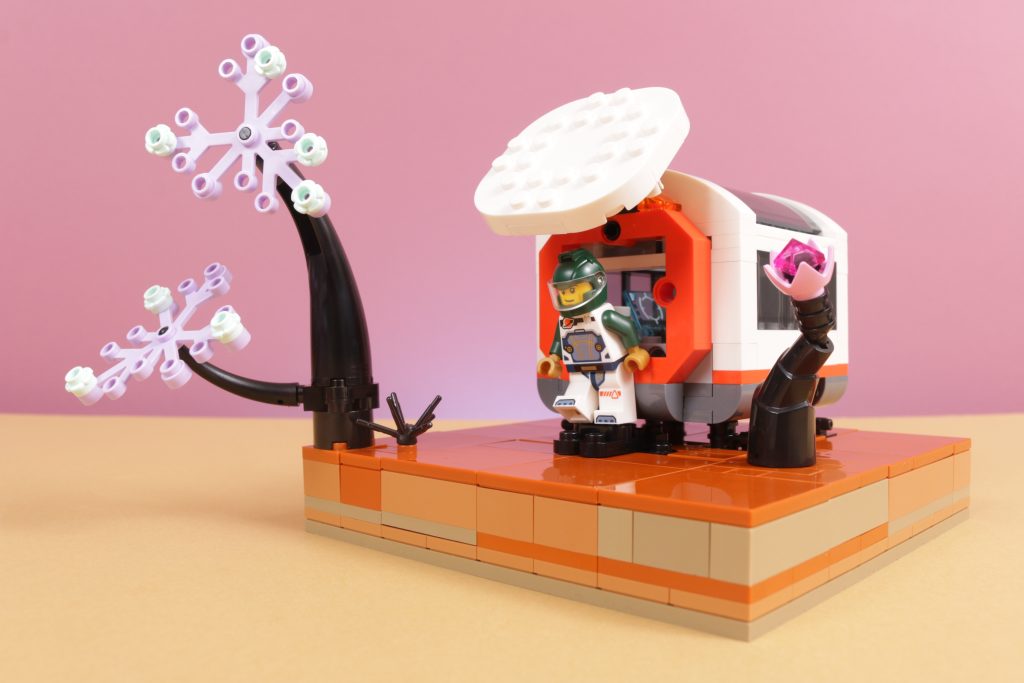
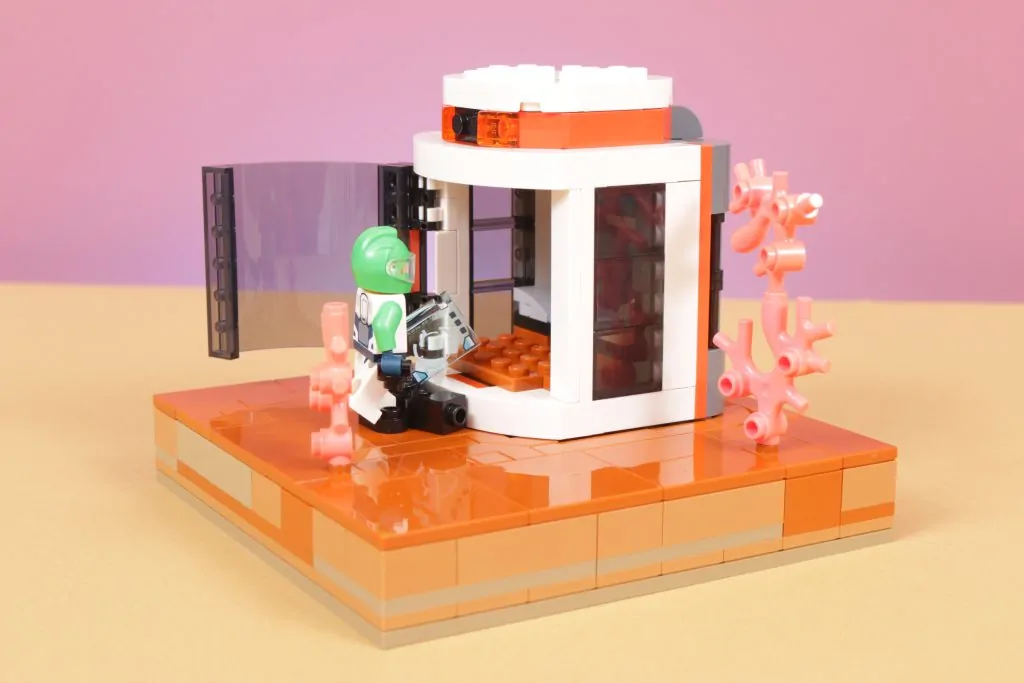
Again, dig down into the modular base to slot the vertically-aligned pod into the ground as pictured (again the pods will fit perfectly within the stud-based system here) and simply place your reorganised pod into its new spot as a one-minifigure living quarter, research lab or whatever you want it to be. And yes, it kinda does resemble a LEGO brick in this orientation, doesn’t it?
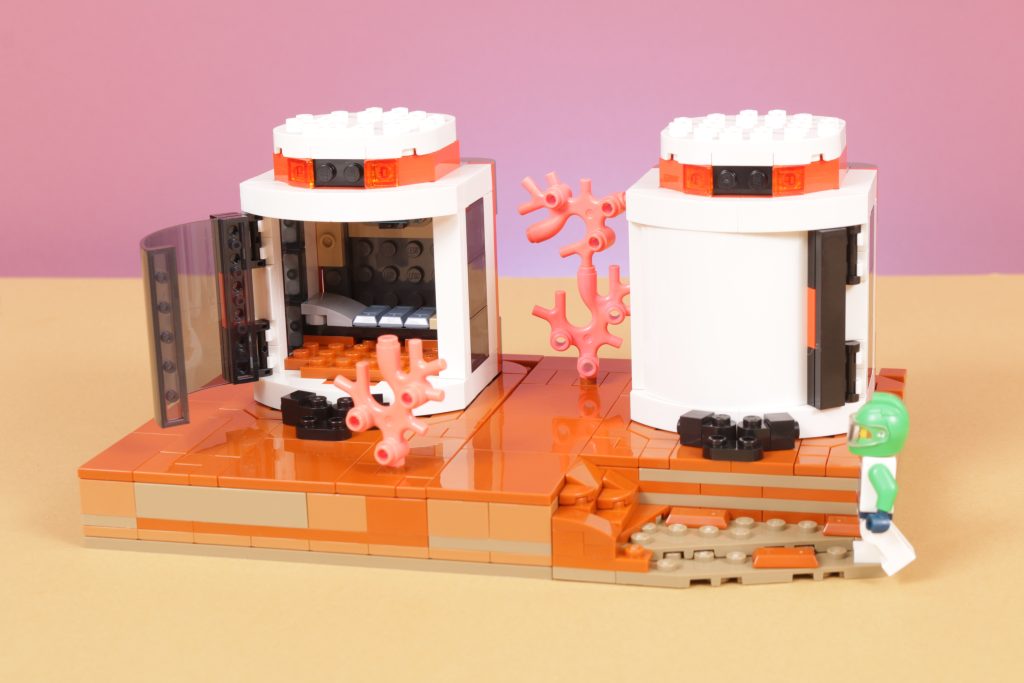
This approach can be replicated to create a little neighbourhood of pods for the astronauts, or the pods could be connected on top of each other for taller little stations, or maybe some of the pods could form a bridge across the top of those sat in the ground – in any case, it’s a fun, flexible system and, importantly, it takes a common, cross-set-compatible feature from the official sets and gives it new life on the alien planet all these sets are imagined to be exploring.

Key parts
| Image | Element name | Element number | Link |
|---|---|---|---|
| PLATE 1X1X2/3, W/ 1 KNOB, ROUNDED | 6469825/3386 | Add to cart | |
| BRICK 1X1 W. 1 KNOB | 4666322/87087 | Add to cart |
Next steps
There are any number of ways that story and the ideas that you have relating to story can impact what you choose to build and how you build it. On from introducing the modular base system in part I of this build project, part II has hopefully demonstrated a number of different approaches and considerations you can make when planning out a LEGO build. When you think about story, what does it inspire you to want to build?


Check out part I of this build guide here, where we introduce the modular base concept that we have explored in more detail in this feature.
The LEGO City and Friends Space sets have inspired all of these builds and are currently available at LEGO.com and various third-party retailers.
Thank you to the LEGO Group for providing the pieces for this build project exclusively from their online Pick a Brick service. Whilst colour availability may vary, every piece featured in this project is available via that service, except for what has been taken from the official City and Friends sets for illustration purposes (though you’ll find that most of those pieces are on PAB too!).
Support the work that Brick Fanatics does by purchasing your LEGO using our affiliate links.
Author Profile
- As one half of Tiro Media Ltd, I mix a passion for print and digital media production with a deep love of LEGO and can often be found on these pages eulogising about LEGO Batman, digging deeper into the LEGO Group’s inner workings, or just complaining about the price of the latest LEGO Star Wars set. Make a great impression when you meet me in person by praising EXO-FORCE as the greatest LEGO theme of all time. Follow me on Twitter @RobPaton or drop me an email at [email protected].
Latest entries
 News28/08/2024LEGO Harry Potter 40695 Borgin and Burkes: Floo Network GWP review
- Harry Potter22/08/2024LEGO Harry Potter 76437 The Burrow Collectors’ Edition review
- June 2024 sets03/08/2024LEGO Harry Potter 76440 Triwizard Tournament: The Arrival review
- News01/08/2024LEGO 40712 Micro Rocket Launchpad gift-with-purchase review


I really enjoyed both parts of this excellent guide! Thank you for the inspirations and technique demos! I’m going to work on something along these lines and definitely will be passing this on!